Editing Corners
In VectorStyler, any shape containing cusp corners has corner attribute. Corners of shapes can be changed using the Corner tool, the Node tool (if enabled), or from the Corner panel. Corners can be applied to geometric primitives or free form paths.
Typically corners are round, but it is possible to select other shapes from a set of predefined corner shape presets, or to define custom corner shapes from user drawn shapes.
The Corner Tool
The  Corner tool is used to edit corner sizes interactively. There is no restriction on applying corners on shapes, but the corners will be visible only at cusp nodes. To interactively modify corners of a shape use the following steps:
- Select the object (or objects) whose shape corners are to be modified.
- Select the Corner tool from the application toolbox.
- At each cusp corner of the selected shapes two handles are shown on the shape, and a handle is shown at the middle of the cusp corner.
- Drag the middle handle to adjust the corner size uniformly. All cusp corners of the shape will be assigned a (round by default) corner shape.
- To modify a single corner only (when multiple cusp corners are in a shape), start dragging the middle handle and then hold the Shift (Mac) or Alt (Windows) key while dragging.
- Release the mouse first and then the Option (Mac) or Alt (Windows) key to adjust a single corner only.
- To set non-uniform corner sizes use the on shape corner handles to drag the entering / exiting corner size at a node. Non-uniform corner sizes are useful for example in rectangles.
- Use the Single Corner check box in the control panel to set whether to adjust all corners (unchecked) or only the selected one (checked).
While using the Corner editor, the context menu provides a number of corner attributes. To open the context menu hold the Control key and click with the mouse.
- Corner Type - Open the Corner view used to select all corner attributes in a modal view.
- Invert Corners - Flip the corner shape between inside and outside modes.
- Reverse Corners - Flip the corner shape direction.
- Alternating Corners - Use the corner sizes in alternating mode, when non-uniform are selected. This option is especially useful to set non-uniform rectangle corners.
- Clear Corner - Remove all corners from the edited shape.
- Clear Local Corners - Remove all local corners from the edited shape.
The shape corner sizes can also be edited using the Node tool, by enabling corner editing while the Node tool is active using the Corner Editing command of the view menu.
The Corner tool can be used to select other objects, to edit their shape corners. The selection mode when using the Corner tool is additive by default. This means that by clicking on another object, that object is added to the selection. To start with a new selection, click into an empty area of the canvas.
When multiple objects are selected, the Corner tool can be used to set equal corner sizes to all these objects, by adjusting a single corner on one of the selected objects.
The corner rounding
tool can be used to increase or decrease corner sizes at specific corners, by painting over these corners with a brush. Normally, corner sizes are increased. To decrease the corner sizes hold the Option (Mac) or Alt (Windows) key while painting over the corners.
The Corner Panel
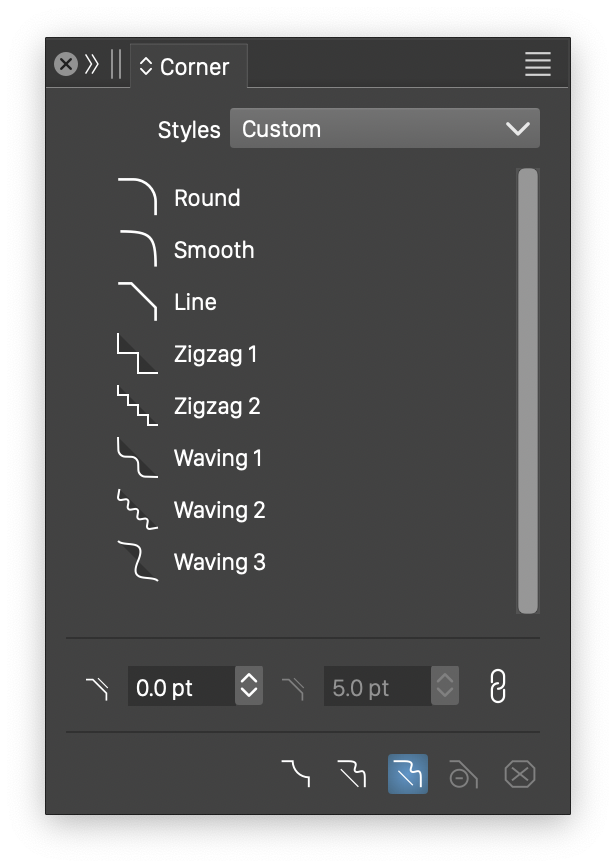
The Corner panel.
The Corner panel - accessible from the Window menu - can be used to select various corner attributes of the selected objects, including corner shape, size and corner directions. The Corner panel is also used with the Corner tool to apply corner shape at selected corners.
The Corner panel contains the following options:
- Styles - Create or select corner presets and styles. When clicked, a corner style menu is opened, containing commands to create a style or a preset, or to select an existing preset or style. If the document contains objects with roles for corner shape or style, those object names will also show in this menu. To create a corner style from the selected object corner, select the Create Style command. Styles are stored with the document. Changing a style will update all uses of that style. To create a corner preset, select the Create Preset command. Presets may be stored at application level or in a preset group, or in the document.
- The Corner panel contains a list with available corner shapes and their names. In VectorStyler, a corner can be round or any other shape. New corner shapes can be created using object roles, corner shape styles or presets. To select a corner shape, click on one of the shapes available in the corner panel.
- The size of the corners can be edited in the numeric fields below the corner shape list. By default, the corner sizes are equal on the left / right side of a node. To edit non-uniform sizes, click the lock button to unlock the second size editor.
The Corner panel contains a number of buttons to flip various corner options, or to clear corner attributes:
 - Flip the corner shape side between inner and outer modes.
 - Reverse the corner shape direction (useful for asymmetric corner shapes).
 - Flip the alternating corner sizes option. When enabled, the alternating corner sizes mode swaps the left / right corner sizes for non-uniform corners.
 - Clear all local corner sizes and options from the selected shape.
 - Remove all corners from the selected shape.
The Corner panel also provides a number of panel menu commands (accessible from the top right corner of the panel):
- Save Corner Shape Preset - Create a new corner shape preset. When applying only the corner shape, the other corner attributes are not changed, allowing the use of the same corner shapes at different sizes.
- Save Corner Shape Style - Create a new corner shape style. Corner shape styles are used to define a common attribute of the corner shapes across multiple objects. If the style is changed, all instances of the style are updated automatically.
- Save Corner Preset - Create a new corner preset. All corner attributes are saved and applied when using corner presets.
- Save Corner Style - Create a new corner style. When using corner styles, it is possible to apply the same corner attributes across multiple objects and automatically update those attributes by editing a single style only.
The Corner View
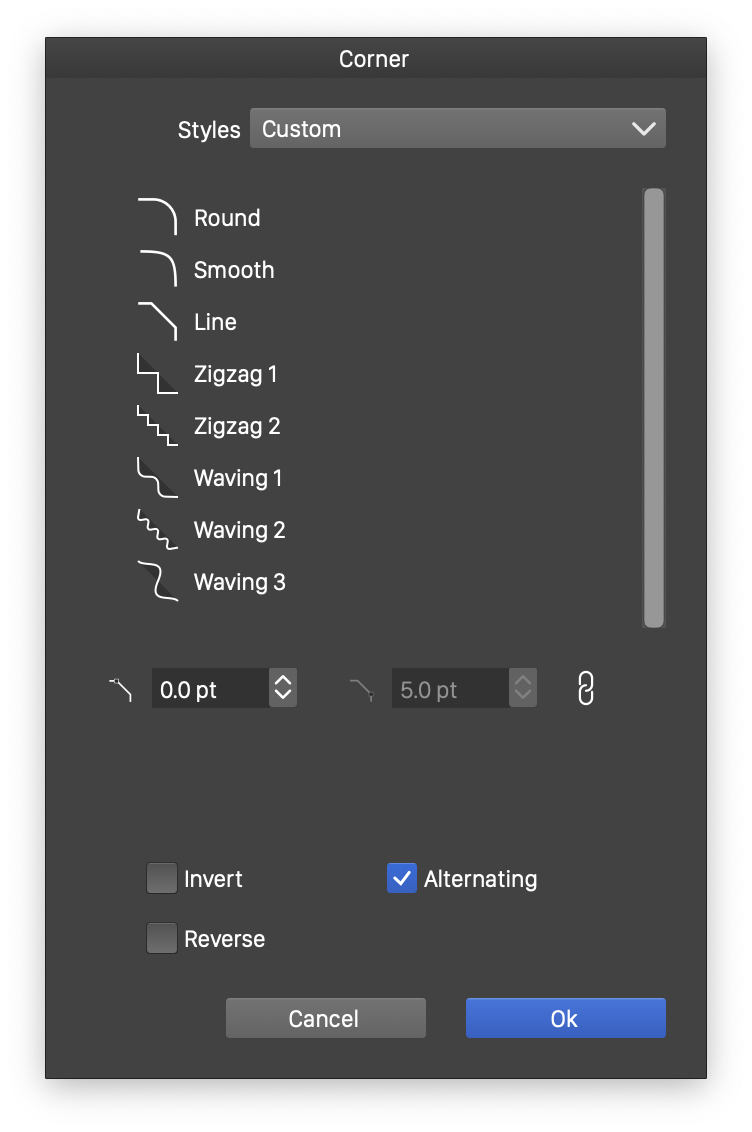
The Corner view.
The Corner view can be accessed from the Shape panel corner editor button, or from the context menu while editing corners. The Corner view contains all corner options in a modal view, and it is also used when editing a corner style with the Document Styles command, or from the Styles or Overrides panels.
The Corner view provides access to the same options as the Corner panel:
- Styles - Select from a list of available corner styles.
- Corner - Select from a list of available corner shapes that can be selected for the corner style.
- The numeric fields are used to edit the corner size, that can be non-uniform if the lock button is unlocked.
- Invert - Select the corner shape outer or inner modes.
- Reverse - Flip the corner shape direction.
- Alternating - Enable or disable the alternating corner sizes mode (for example: non-uniform corner sizes in rectangles).
- Preview - Preview the current options on the selected objects.
Create Corner Shapes
In VectorStyler, corners can have arbitrary shapes, and it is possible to create new user defined corners. New corner shapes can be defined as presets or styles, or object roles can be used to dynamically link corner shapes to an object shape (see the next sub-section).
To create a new corner shape:
- First create an object that contains an open path. The object may contain a number of closed paths also (using the Combine command from the Objects / Combine menu).
- Select the Create Styles - Create Corner Shape Styles command from the Styles menu to create a corner shape style, or
- Select the Create Styles - Create Corner Shape Preset command from the Styles menu to create a corner shape preset.
- Set the name of the style or preset (and the group in case of a preset) and save the corner shape style by pressing Ok.
- The new corner shape preset or style is shown in the list of shapes in the corner panel.
Corner shape styles and presets can also be created using the Corner panel menu commands.
Corner Shape References
Another way of creating a new corner shape is to use the Corner Shape role on a named object. This allows the dynamic linking of a corner shape style to the shape of an objects, as a corner shape reference. To create a new corner shape using object roles:
- Select the object with the shape that will be used as a corner shape. The shape may contain closed sub-paths, but it is recommended that there is one open sub-path (see the special case of closed only shapes).
- Select the Object Options command from the Object menu to edit the object attributes.
- Set a name for the object (this will be the corner shape name in the corner panel or other style lists).
- Enable the Corner Shape role from the object roles menu using the Role button.
- Apply the object options to the selected object by pressing Ok.
- The Corner panel, and other corner style lists should contain a new corner shape mirroring the object shape and name.
- Use the new shape on other objects as a corner shape.
- When modifying the original (reference) object shape, all corner shape uses are automatically updated.
When the corner shape has no open sub-paths, the alignment of the shape to a path corner is made by cutting the closed shape along the angles defined by the path corner. This has the same effect as the round corner (when using circles), but it makes possible to use other closed shapes for corners, not just circles.


