Introduction
What is VectorStyler
VectorStyler is a vector graphics and illustration software created for design professionals. In vector graphics a design document consists of a hierarchy of layers and objects each with a shape and a set of styling attributes. The shape of objects can be modified at any time using the various shape types, and it can be converted to curves and edited directly. An object can have multiple style attributes (fill and outline), stacked on top of each other. These attributes can be freely modified on selected objects.
Illustrators and graphics artists can use VectorStyler to create screen or print designs, icons or user interface mockups, or complex vector illustrations and artworks.
This is a reference manual of VectorStyler. The various features of the application are described in a structured form. These features can be combined in many ways to create beautiful designs and illustrations, and these combinations will be addressed by separate tutorials.
Highlighted Features
VectorStyler provides all of the drawing and illustration features typical designers are familiar with. It also provides a large set of features and capabilities that are new for this type of application. A high level feature list is available for a quick overview of some of these new features. This documentation provides a detailed description of all these features and how to use them to improve your design workflow. A few key features of VectorStyler are described next:
Snapping to geometries
VectorStyler provides multiple smart guide and snapping options. The usual grid and guidelines are available, where both the grid and the guideline supporting arbitrary angles. It is possible to setup multiple grid systems on the same canvas, and assign unique colors to these. Guidelines can be organized into groups, and assigned a color to differentiate between them.
Object key points (boundaries and center) are used as snapping locations when moving or scaling the selection. Rotation angle is snapped to guideline or grid angles.
It is possible to rotate grids and guidelines to any angle. Setup multiple grids on a canvas, and assign custom colors to guideline groups.
One important feature of VectorStyler is the use of collision and formation snapping modes. When collision snapping is enabled, moving objects will collide with other objects, and their position is set automatically so that their shapes are touching at a point. Colliding with arbitrarily shaped objects fixes the location of the moved objects. Collision snapping also works in combination with guidelines (and rotated guidelines as well).
In formation snapping VectorStyler detects if a moved object is in a geometric relation with two other (fixed) objects, and positions the moved objects to a location that makes a regular geometric formation with the two other objects. The geometric formation can be for example a simple line, where the object is positioned along the line formed by the two other objects, with special magnets at the center (between the two objects) or the extensions (distance between the two objects). It is also possible to arrange objects in triangular or rectangular formations, or at some arbitrary angle (set by the user) to the line formed by the two reference objects.
Collision snapping can be combined with rotated guideline snapping, to restrict object positions using complex geometric constraints.
For both collision and formation snapping, the reference objects can be restricted to a few desired objects to avoid snapping to all objects of the canvas. The collision or formation snapping modes can be activated from the View / Guides menu, or the Snapping Options panel (accessed from Window - Editing - Snapping Options).
Multiple Canvases, Unlimited Artboards
The VectorStyler document format contains multiple canvases in a single document. A canvas can contain virtually unlimited artboards (there is an upper limit of 65536 when creating new artboards in one command). Multiple canvases can be used to organize a design into components. For example, symbols or style references (see in the Symbols and Styles chapter) can be placed on reference canvases and then automatically used throughout regular design canvases. Template canvases can also be used (a replacement to the traditional master page concept), to create a basic layout or design.
Artboards can be created using the Artboard Tool or the Canvas / Create Artboard menu command). Artboards can be arranged in a grid, or positioned freely using the Artboard Tool. The Artboard Tool can also be used to rotate artboards to any angle.
Organize a large number of icons, UI elements, symbols, or other design components in a single document, using a hierarchy of canvases. Place symbols or other reusable design components on reference canvases and reuse these in multiple other canvases.
The Canvas & Artboard panel can be used to manage a hierarchy of canvases and the artboards of a canvas. The Artboards and Canvases chapter gives a detailed reference on how to manage canvases and artboards of a VectorStyler document.
Repeaters
In VectorStyler repeaters can be used to create non-destructive copies of objects using various geometry types. Repeaters are objects that generate object copies using a selected geometry. Attributes of repeaters can be adjusted at any time, and the original object (or objects) edited to change the repeater content.

A repeater along a path.
The repeater geometry can also be adjusted interactively, on canvas, using the repeater tool. Repeaters can be expanded, or create actual object copies.
Repeaters can be used as a tool to fill objects with symbols, or to create various vector effects through repetitions.
Vector Halftones
VectorStyler provides support for vector halftone effects as a method to simulate color or tone of objects or images.
Vector halftones use varying sizes of shapes arranged in a user selected geometry to simulate the effect of varying color tone intensities. Vector halftones will consist of pure vector objects, that can be further resized or distorted using shape effects.

A stippling halftone example.
Vector halftones can be created and managed using the Halftones panel, or adjusted using the interactive halftone tool.
Vector Shape Effects
Shapes of objects can be distorted (including objects in groups) using various shape effects available in VectorStyler. Shape effects can be stacked on an object or a group of objects, and their parameters edited freely using the Shape Effects panel. Shape effects can also be edited interactively using the shape effect editor tool available from the Shape Effects panel.
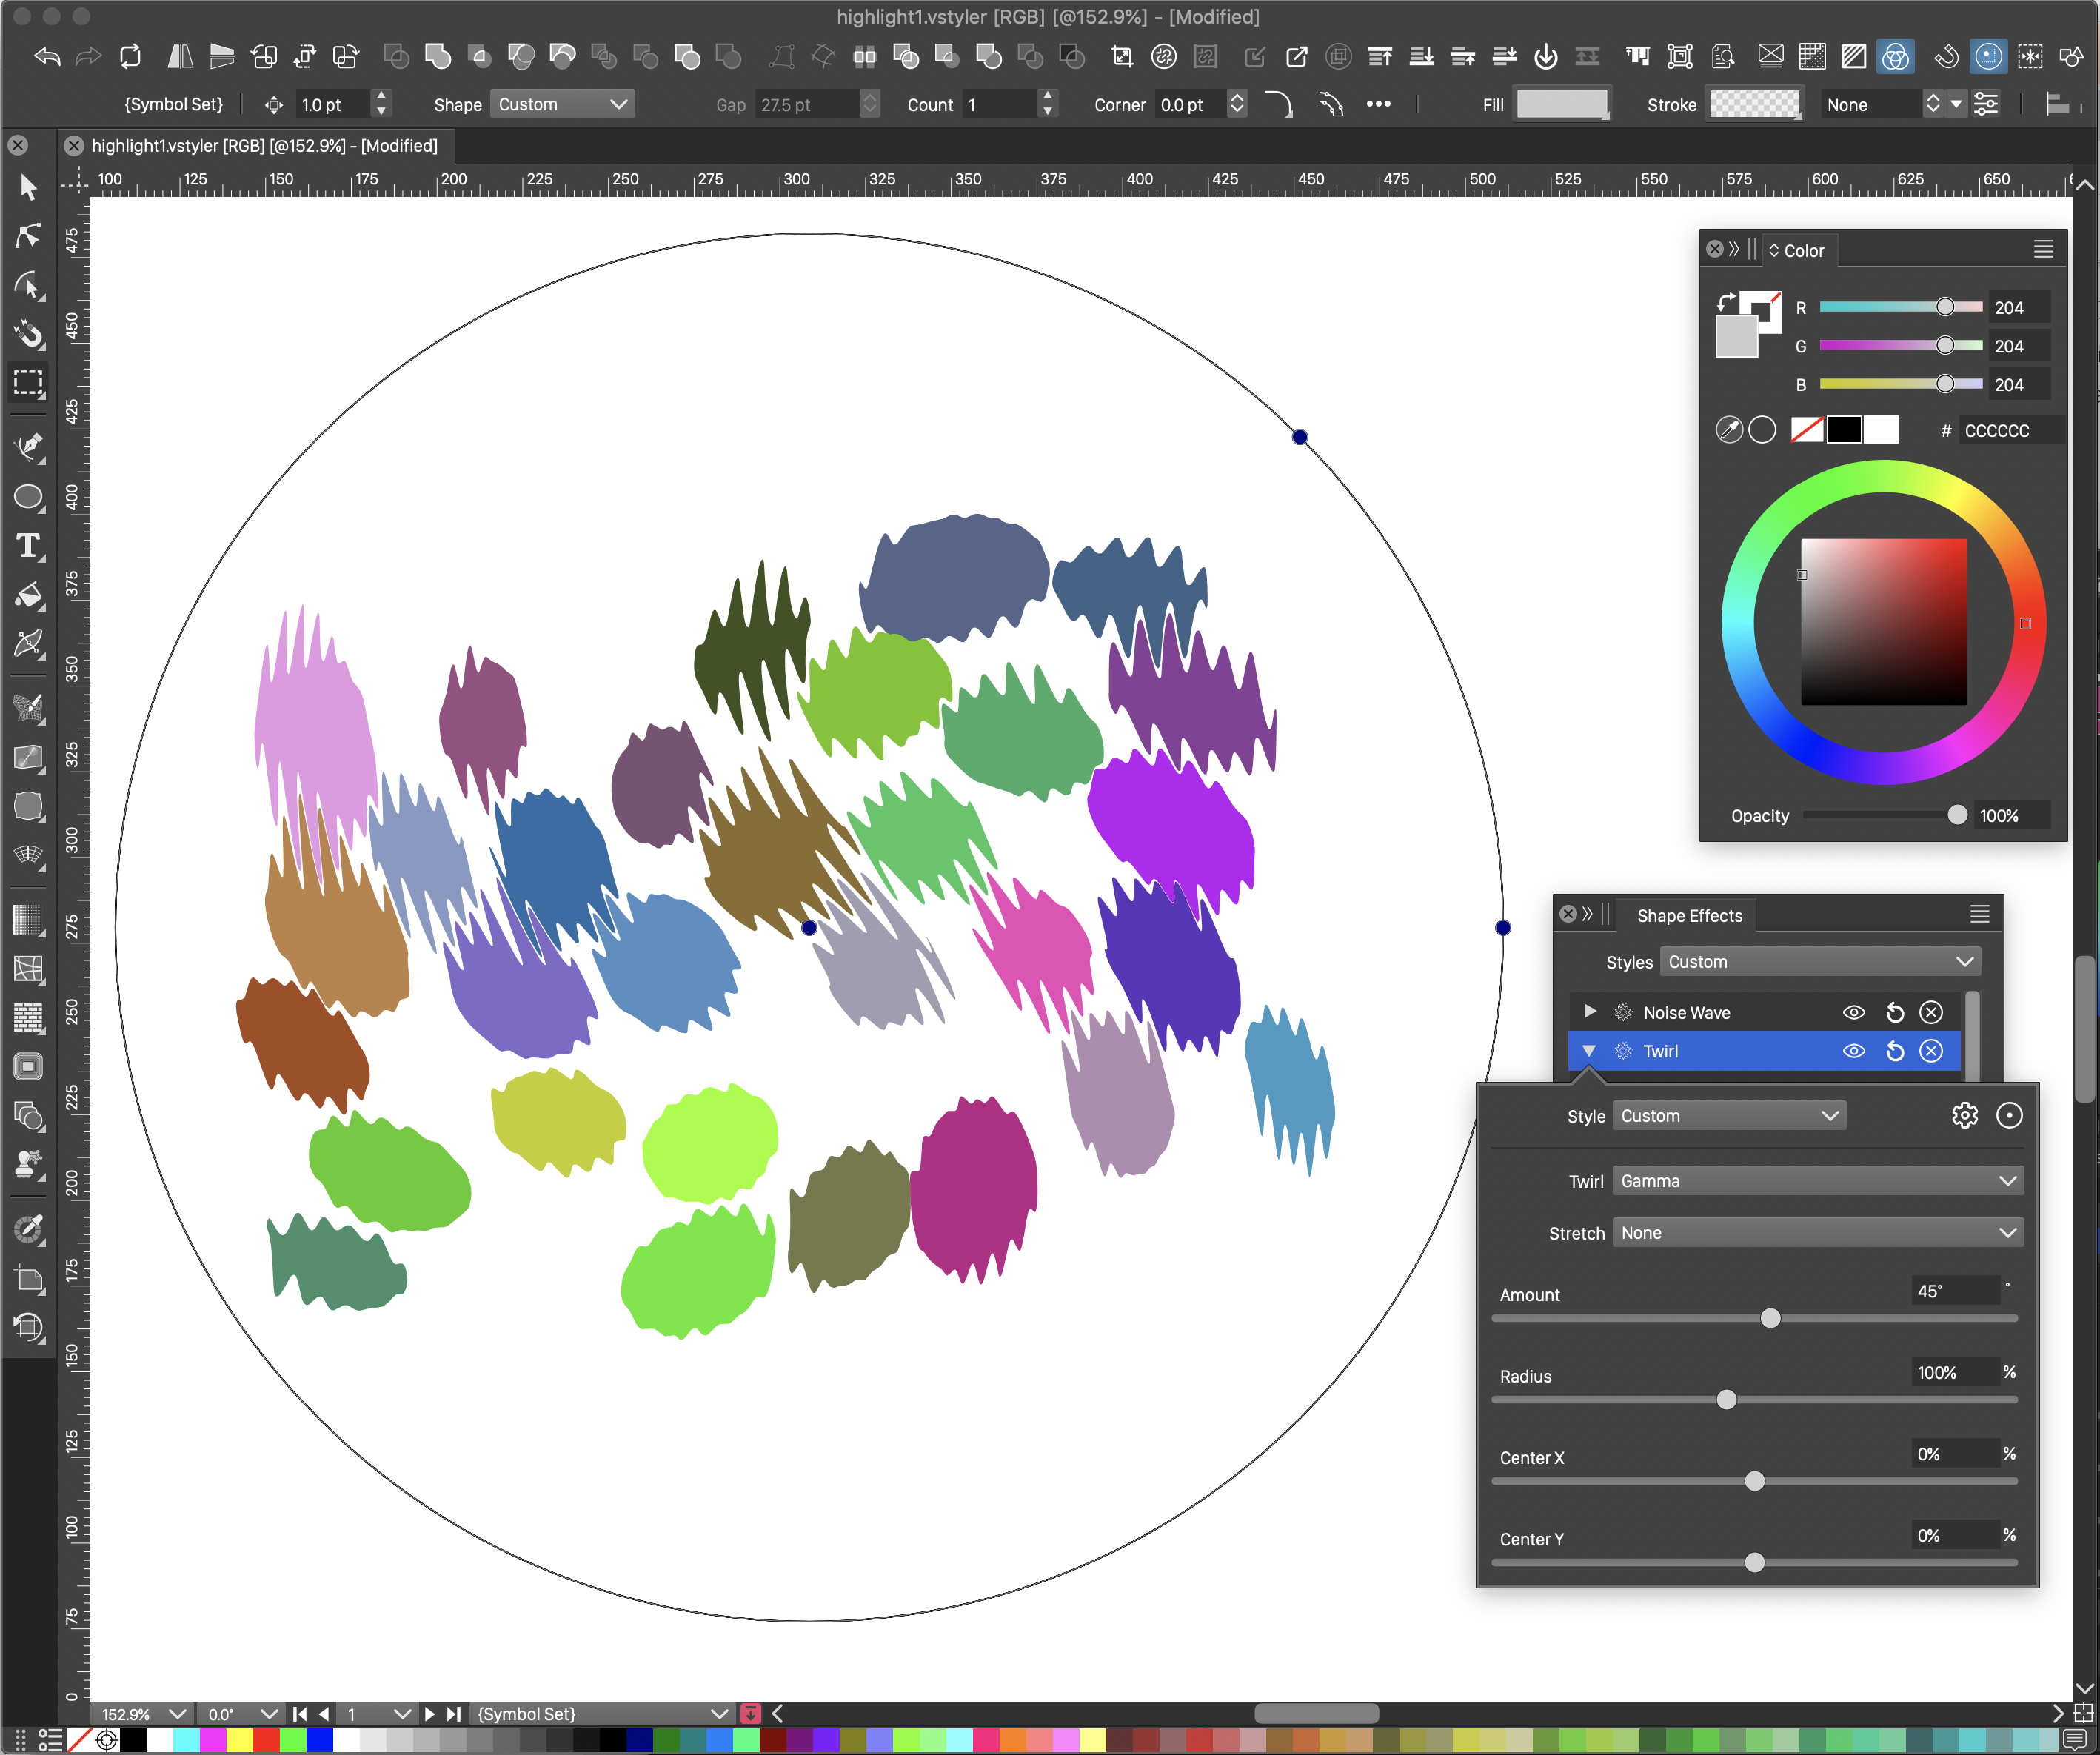
Two shape effects (Noise Wave and Twirl) applied to a group of circles.
The original object and shape properties remain editable after applying shape effects, and it is possible to modify/remove shape effects stacked on an object. The interactive editor specific to each shape effect can be used to visually fine-tune the parameter of the effect.
Apply non-destructive shape effects on groups of objects, to change their shapes. Shape effects remain editable, and shape effect styles may be changed by style overrides.
VectorStyler allows the creation of shape effect styles, reusable groups of shape effects that can be applied to selected object. Changing the shape effects in a style will automatically update all instances of that shape effect. Shape effects can also be applied as a reference to another object, reusing its stack of shape effects. In this case changes on the reference object shape effects are automatically mirrored on all uses.
Elastic Warp
One of the shape effects provided by VectorStyler is the Elastic Warp effect. Elastic Warp can be applied as either a shape or an image effect. When applied as an image effect, the selected objects are treated as an image - distorting all content not just shapes - without flattening the object to an image.
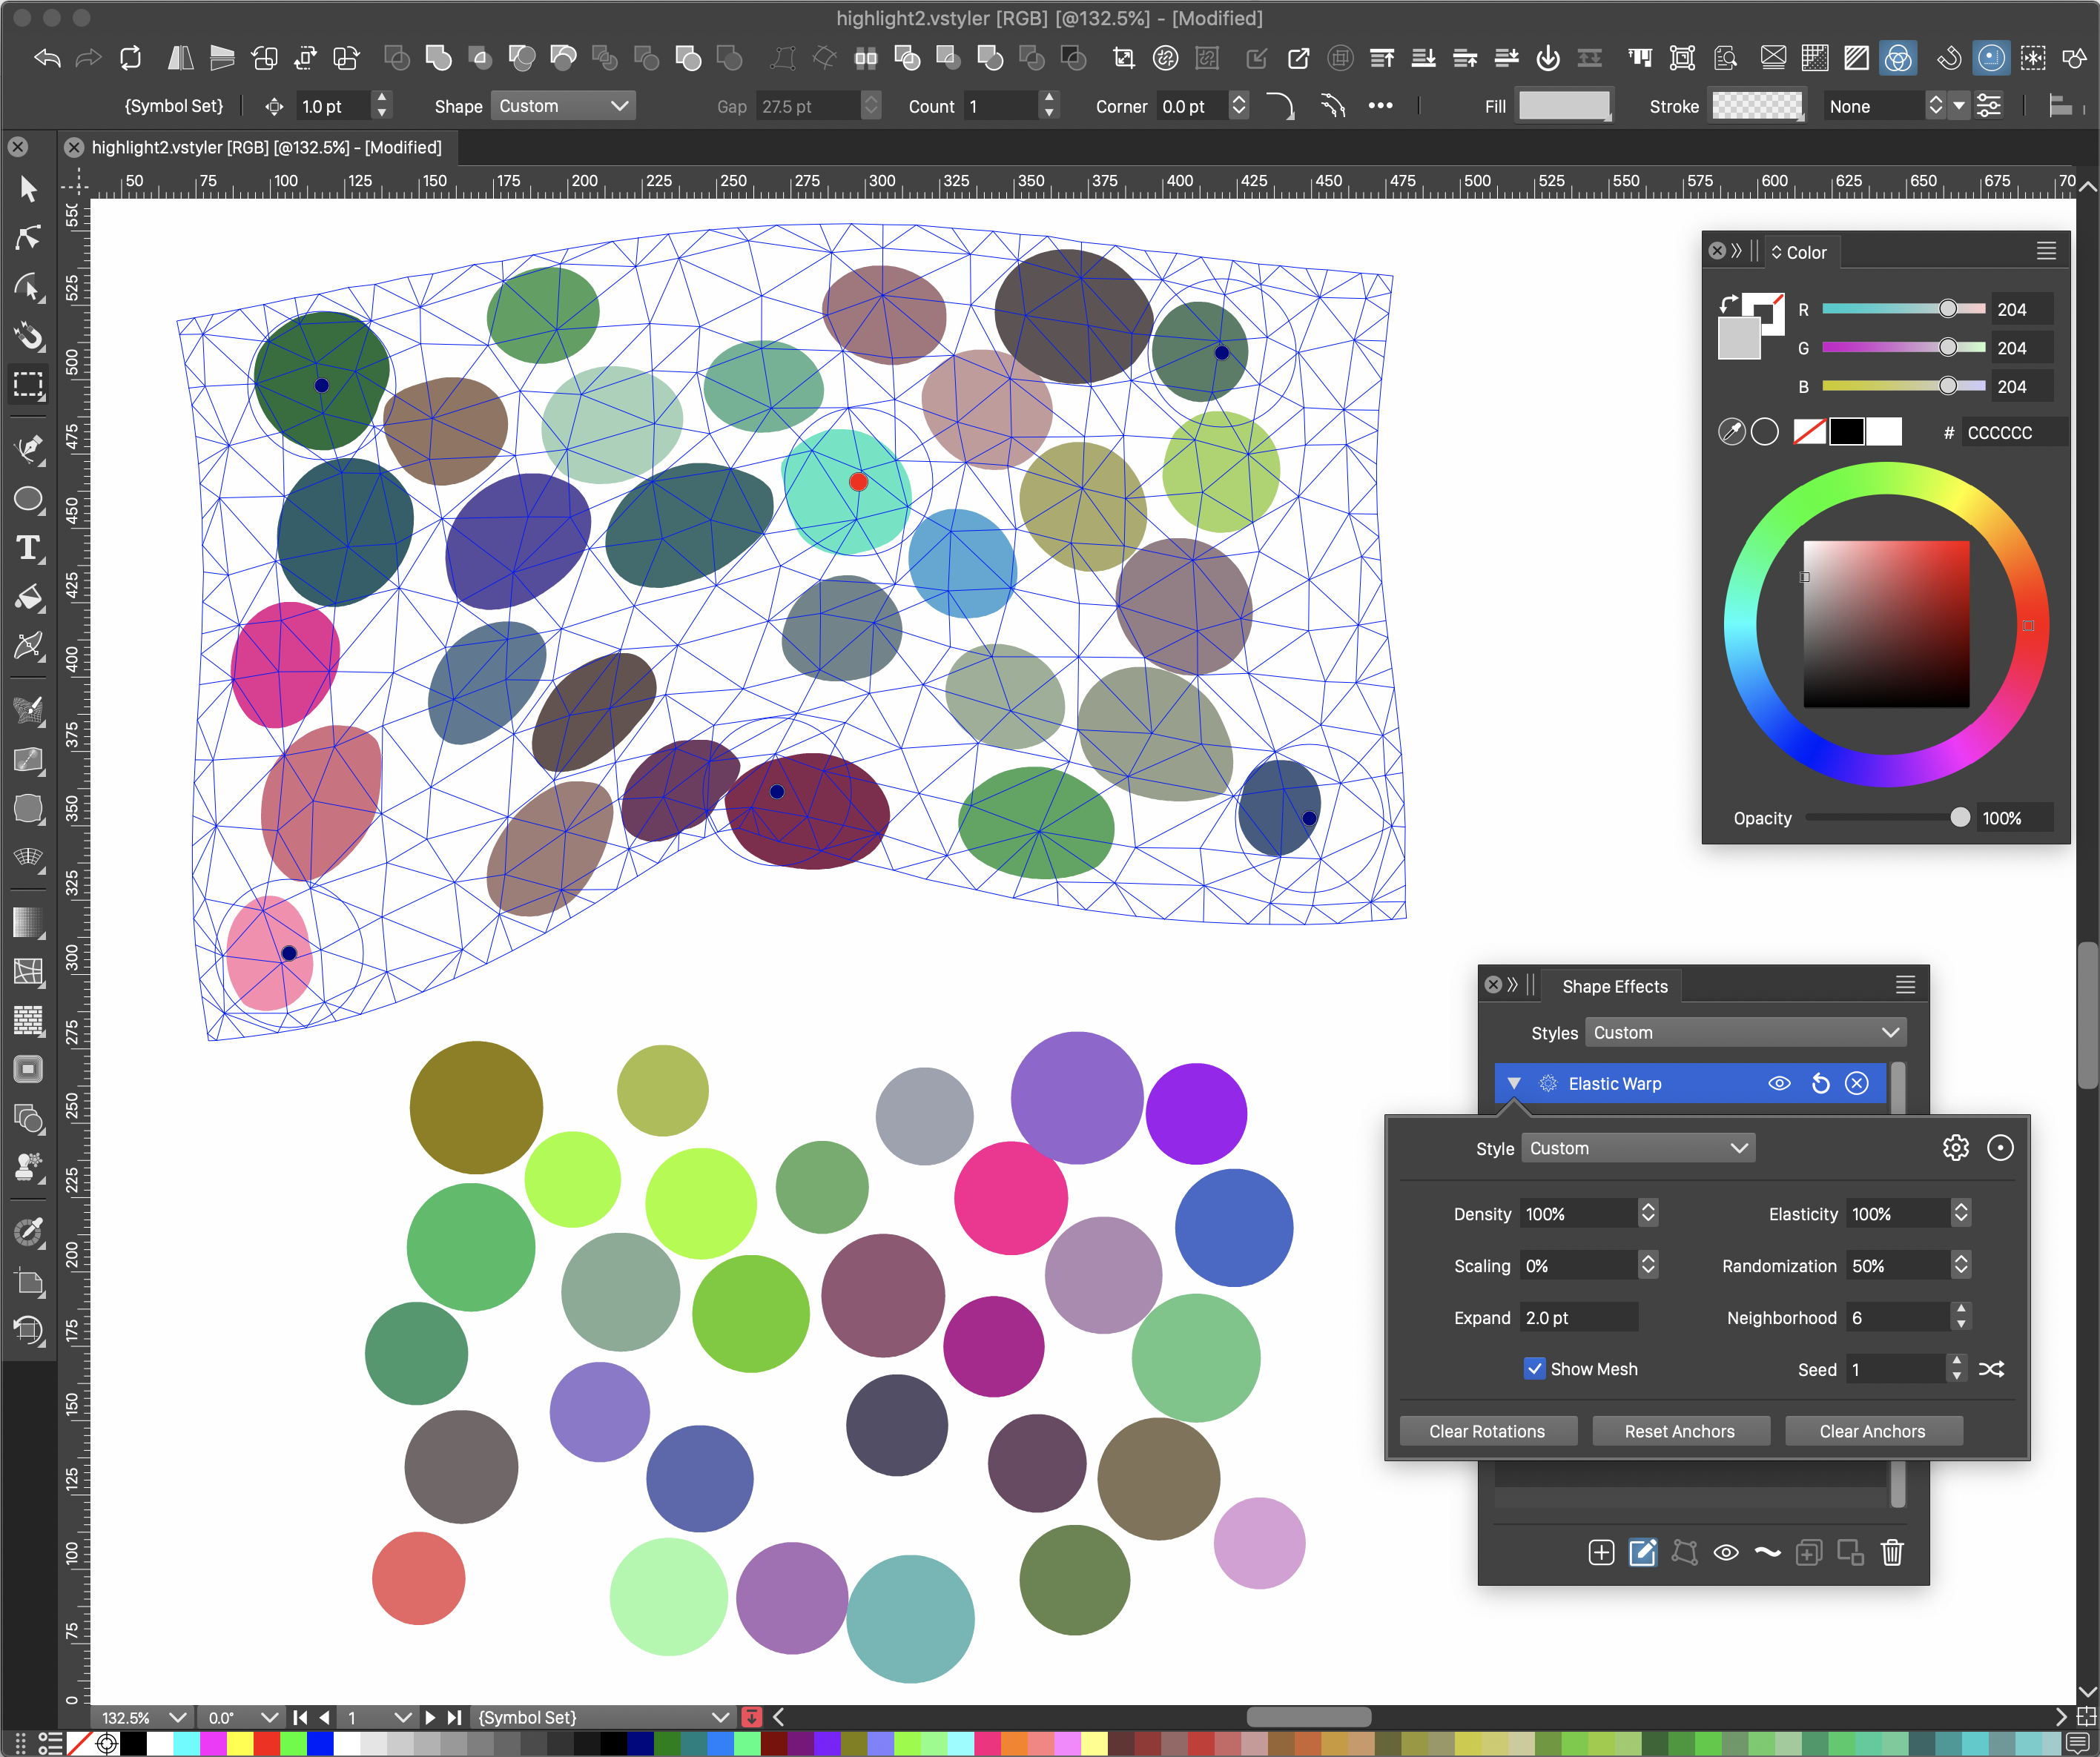
The Elastic Warp effect applied to a group of circles.
In Elastic Warp a number of control points are created at arbitrary locations on the selected group of objects. These control points can be freely moved, while the rest of the object stretches according to these movements. Control points can also be rotated, adding an extra rotation effect to the stretching.
Balance between uniform and nonuniform stretching of distorted geometries in the elastic warp effect. Elastic anchor points can be created outside of covered regions of a group of objects.
When applied to a group of objects, the Elastic Warp effect will distort the whole group as a single “shape” instead of distorting individual objects separately. This allows for a more realistic and useful filtering of object shapes.
Mesh Gradient and Distortion
VectorStyler provides both mesh gradients and mesh distortions. In mesh gradients, colors of a mesh grid can be selected and intermediary (gradient) colors are automatically generated. The shape of a mesh is arbitrary, and can be easily edited using the mesh gradient tool. The curves in a mesh gradient can be sequences of multiple segments (not just a single segment as it is commonly implemented).
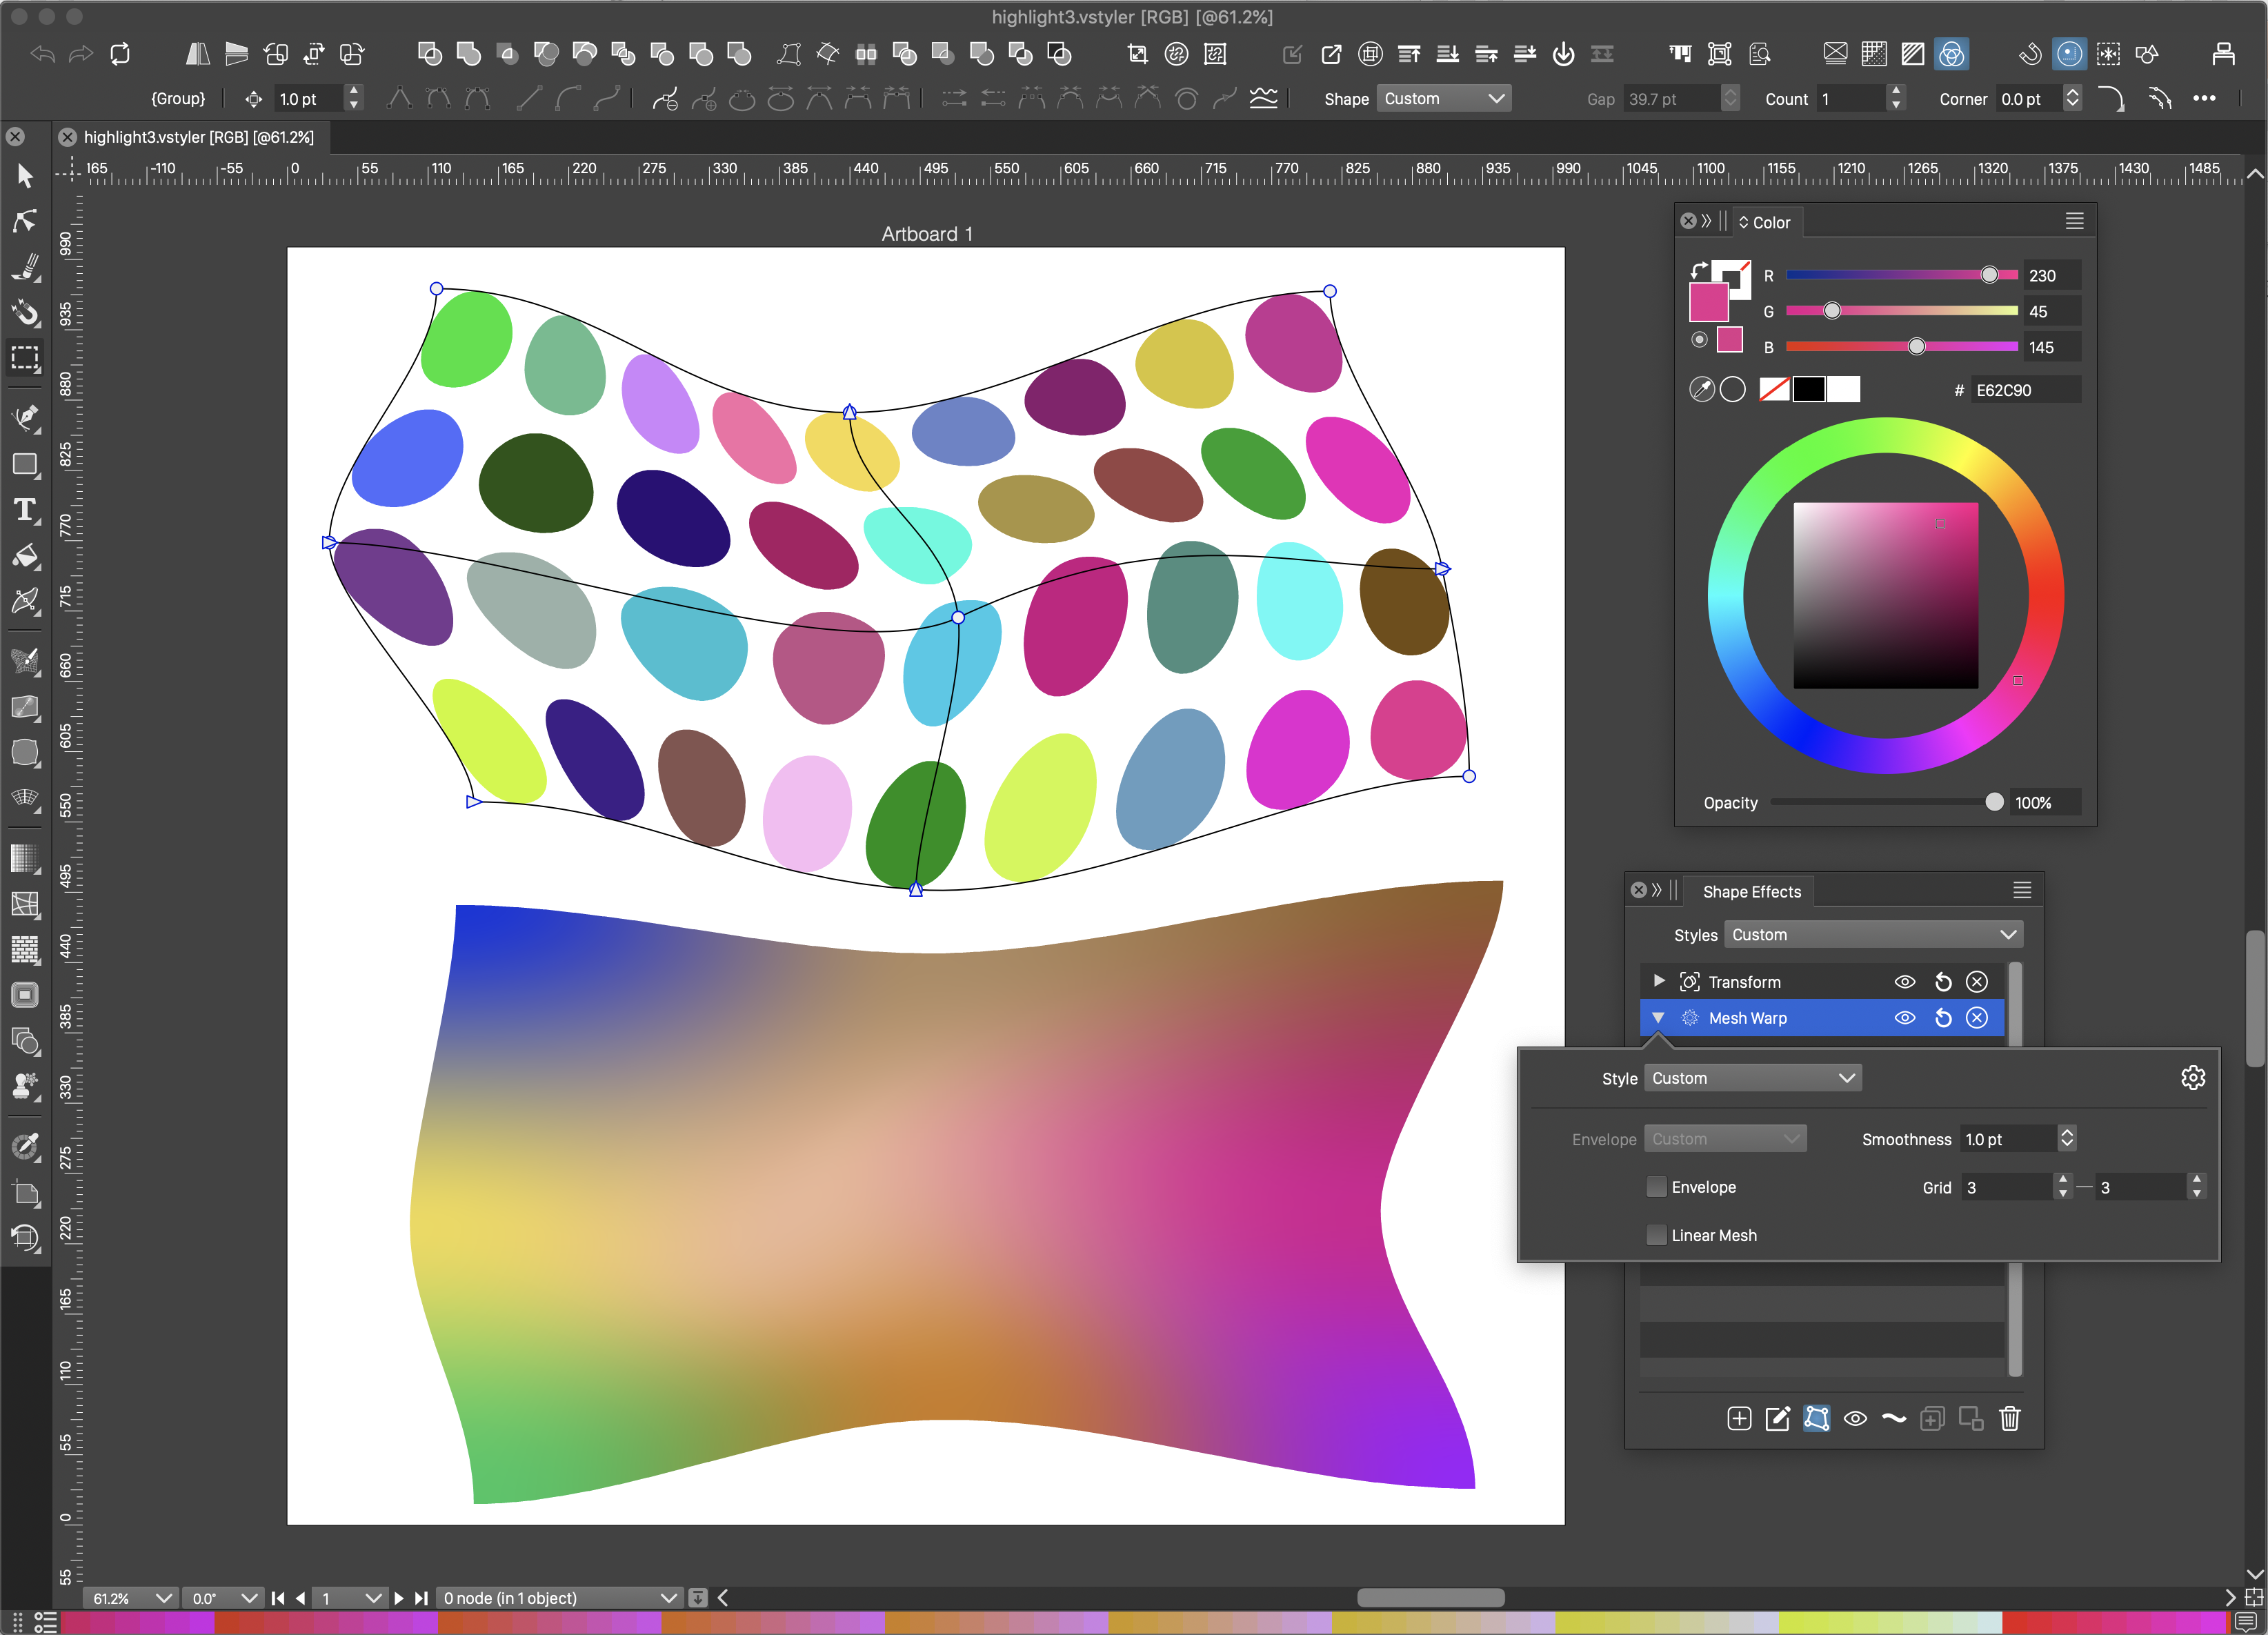
Example of a Mesh Distortion and a Mesh Gradient.
Mesh distortions can be applied on shapes (or as image effects) of a group of objects. The mesh distortion grid can be freely edited using the Mesh Distortion tool and its properties can be fine-tuned from the Shape Effects panel. The inner and outer edges of a mesh can be formed from a sequence of curve segments, not just a single segment.
Link to any object shape in the envelope distortion effect, to create shared envelope geometries.
A variant of mesh distortion supported by VectorStyler is the Envelope distortion. In the Envelope, only the outer shape of a mesh is defined, and the distorted objects are stretched to this envelope shape. Since there is a single shape, the Envelope distortion can be defined using a closed shape style or reference to any closed shaped object.
Bending
Another VectorStyler specific shape (and image) effect is the Bending distortion. In Bending, an object (or a group of objects) is distorted along an arbitrarily shaped curve. The curve can be edited using the standard Node Tool. The bent object is stretched along the curve similar to a brush paint.
Use variable width profiles to control the extent of the bent object along the curve. The variable width profile can be edited on the canvas, or using the profile editor view.
The width of the object can vary as it is stretched along a curve. The width profile can be edited interactively, or selected from the Shape Effects panel “Profile:” field.
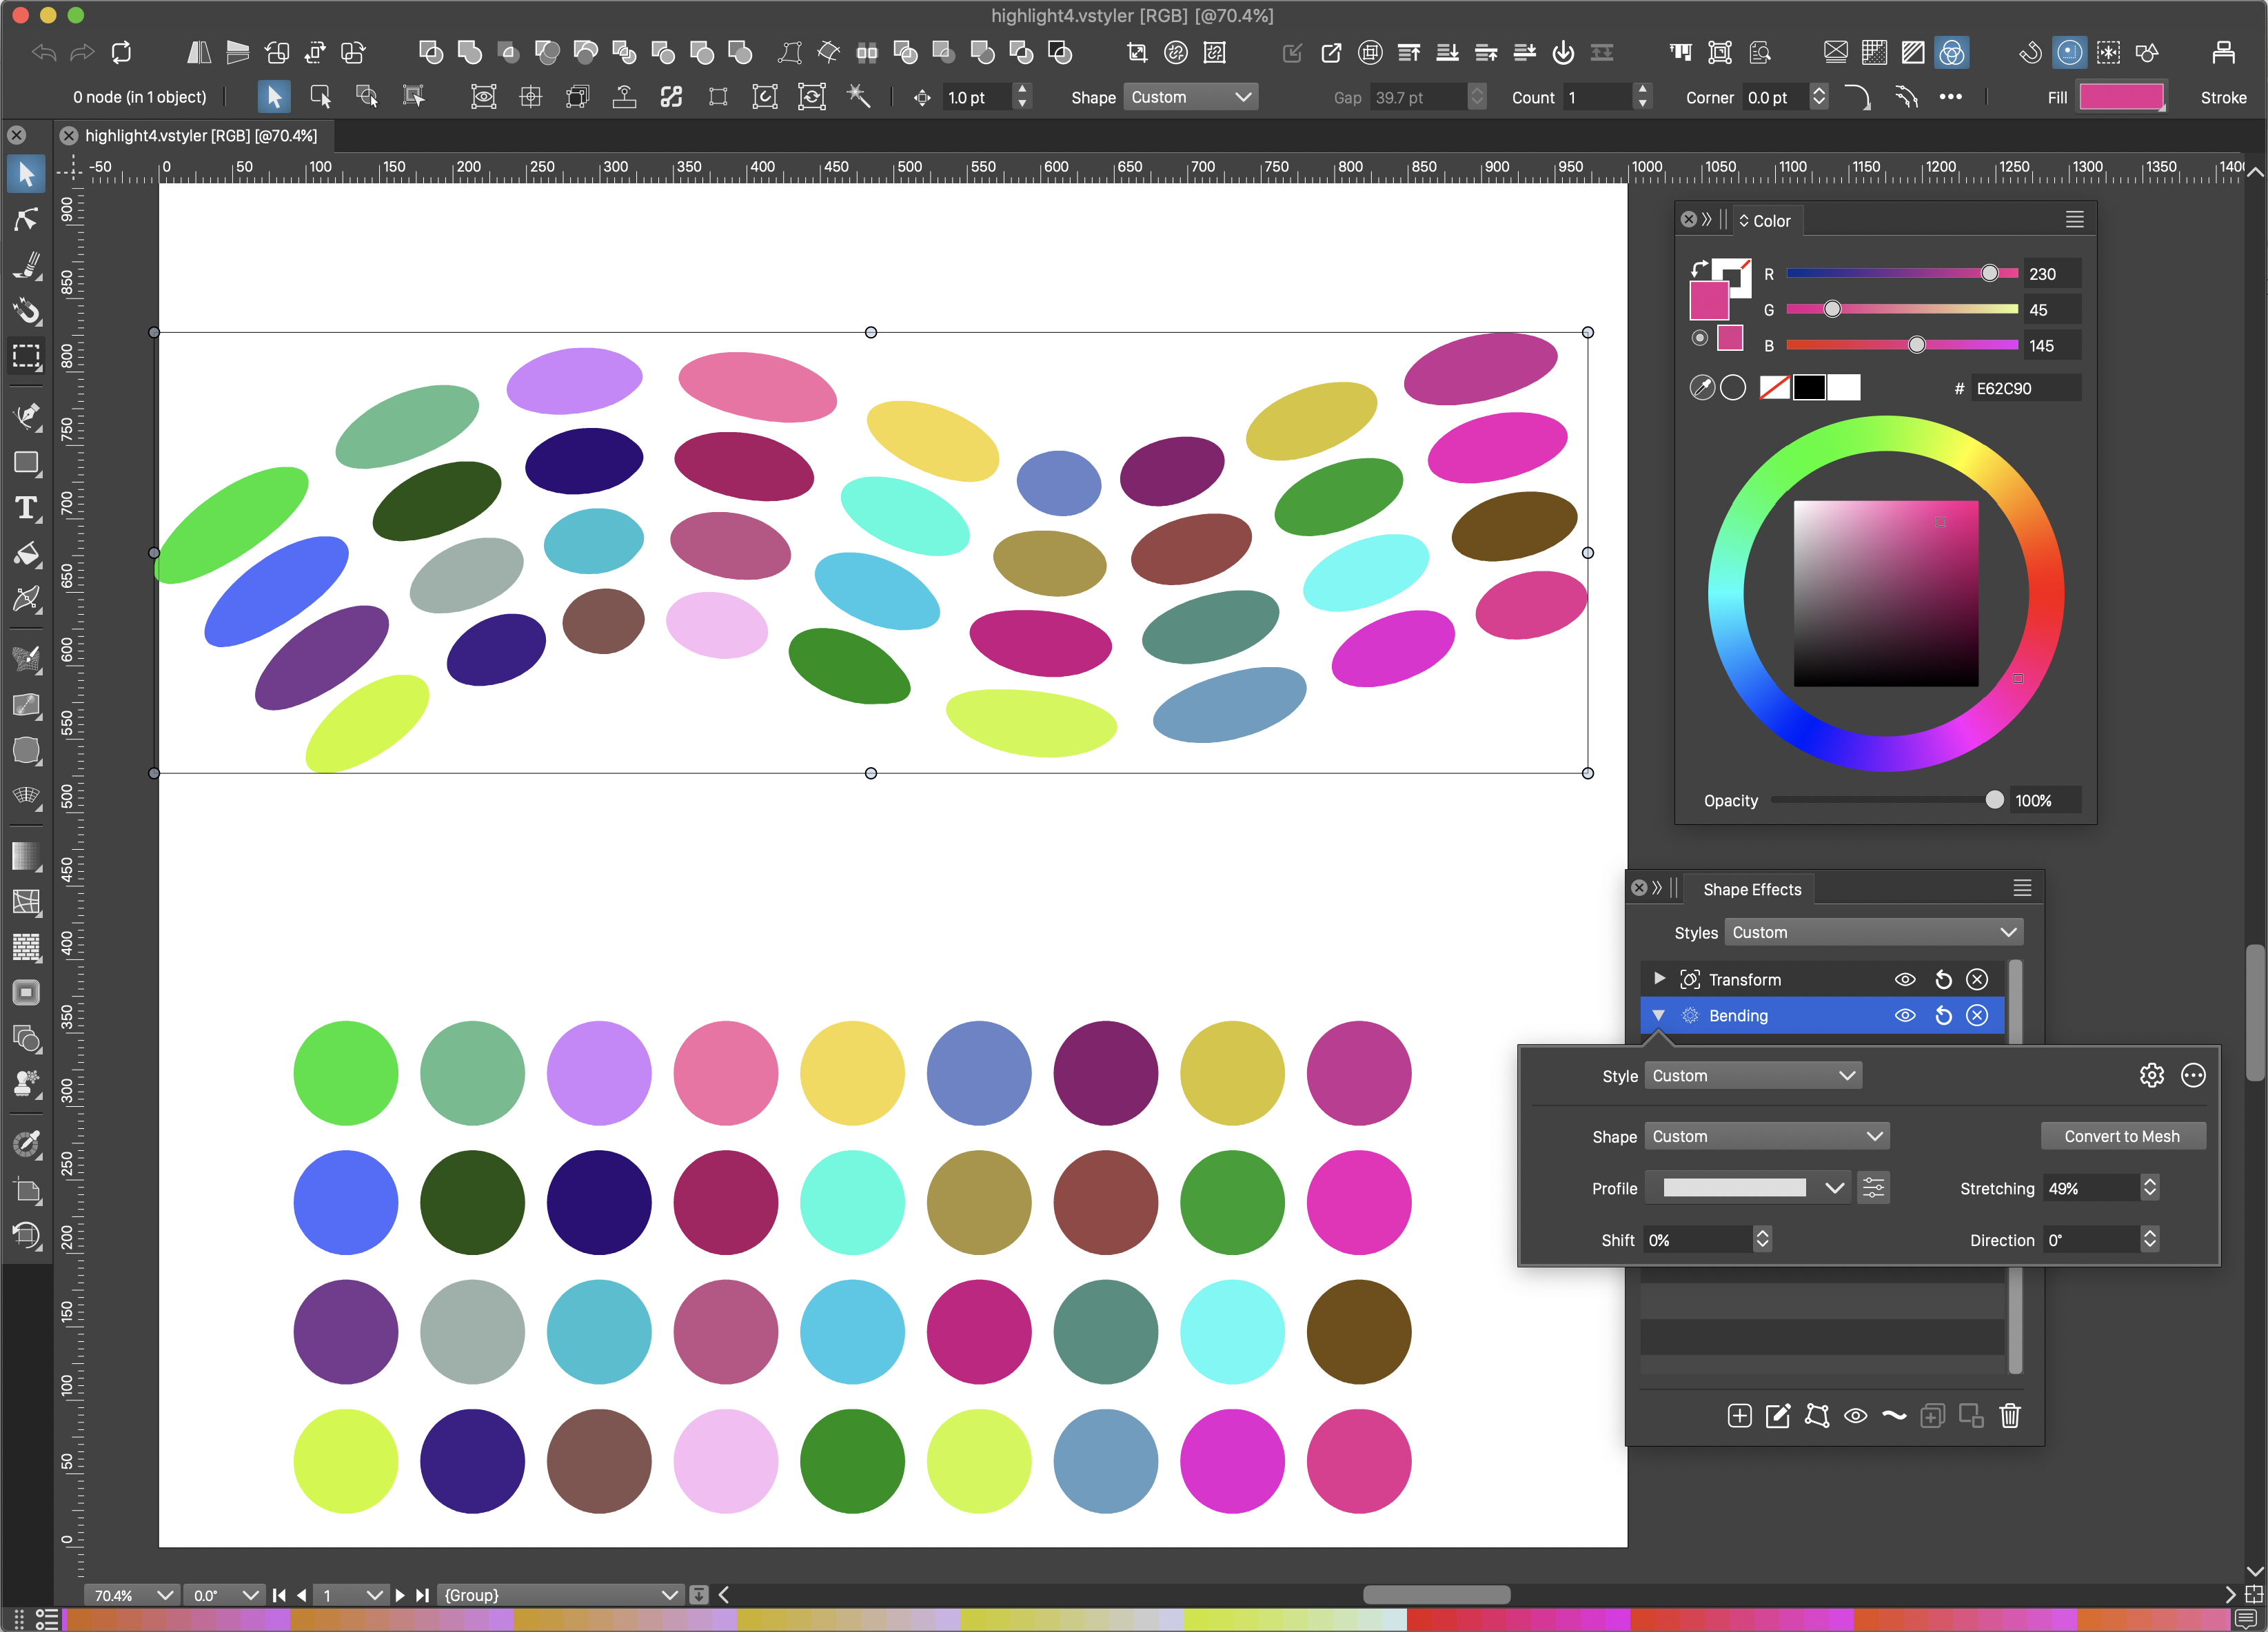
A group of object bent along a curve using variable width profile.
Since the Bending effect uses an arbitrary shape, this shape can also be referenced from another object, or it can be a previously saved shape style. In these cases the shape of the bending effect is automatically updated as the referenced shape (style or object) changes.
Outline Options
VectorStyler provides an extensive set of outline parameters. These include inner/outer offset by an arbitrary amount, customizable cap shapes, arrows, dashes, stripes and variable width profiles. The outline style of the selected objects can be set from the Stroke panel. An object may contain multiple outlines with different settings.
The cap shapes (used in dashed and open outlines) can be set to any open shape. This includes shape styles and reference object shapes. If the shape style or the referenced object shape is modified, the linked cap shapes are automatically updated. The same capabilities apply to arrows as well.
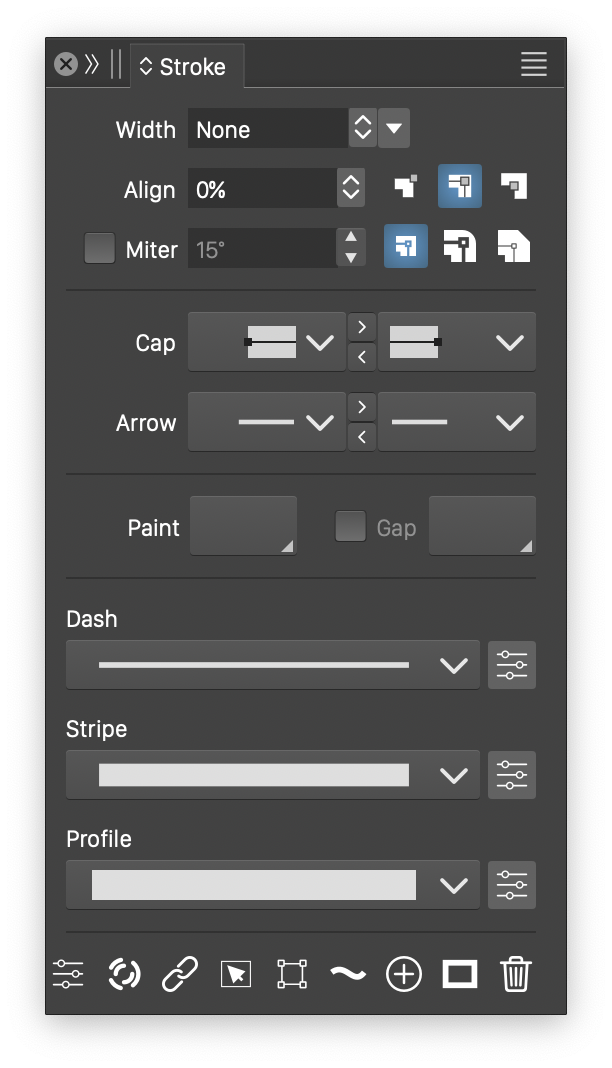
Outline options are set from the Stroke panel.
The outline can be of variable width. The width profile can be selected from previously saved profile styles in the Stroke panel, edited in a modal view, or edited interactively in the document. Variable width profiles can also be adjusted using Variable Width Brush, Variable Width Smooth and Variable Width Erase interactive tools.
Combine dashes, stripes and variable width profiles into a single stroke attribute. Variable width profiles can be interactively edited using the Width
tool
When shape effects are applied to an object with outline, the outline can be expanded to a filled shape (nondestructively, without losing the actual object/outline relationship), and the resulting shape is distorted with the effect (instead of the object shape). This allows the application of shape effects on the variable width profile curves, and arrow shapes as well.
Multiple Layer Panels
The Layers panel in VectorStyler provides a hierarchical view of the current canvas (or isolated group) content. This hierarchical access to the objects make it easier to manage and rearrange objects and their stacking order. VectorStyler extends the traditional Layer panel use by allowing the opening of multiple Layers panel instances at the same time, to access different parts of a document.
A Layers panel can be locked to a specific document, canvas, layer or isolated object group. Since VectorStyler allows multiple opened documents, it is possible to have a Layers panel opened on a background document, while working on a foreground document. The extra Layers panel can be used, to drag and drop objects from the background document, into the edited document. The same applies to keeping a Layers panel locked on a canvas that is not currently visible (one of the multiple canvases of a document), while working on an active canvas of the document. This allows the reuse (by drag&drop) of the objects from an inactive canvas.
Use multiple opened Layers panels, to copy or arrange objects between different canvases of the document, or different layers of the same canvas.
Using multiple Layers panels locked to documents or canvases improves a design workflow of creating complex documents with reused symbols. For example, it is possible to use a Layers panel as a way to access a collection of symbols stored on a Reference Canvas, while working on a design.
Symbols and Styling
In VectorStyler, Symbols and Styles are used to reference objects or attributes by their name, instead of creating a local copy. Symbols can be used to create multiple instances (virtual copies) of an object, with local variations if needed (style overrides). Styles (similar to symbols in VectorStyler) can be used to set object attributes (fill, outline, effect, character or paragraph formatting) by referencing to the style. Whenever the attributes in a style definition change, all uses of that style are updated as well. Most attributes used in VectorStyler can be styled, this allows the creation of complex designs, artworks and illustrations that can be easily repurposed or modified by using and changing these styles.
Setup reference objects using the Object Role options, to define virtual styles or symbols attached to the object. Changing the reference object updates all other objects using the style.
One of the workflow improvements introduced by VectorStyler is Object Roles and object references, that can be used to simplify working with symbols and styles. Object roles are used to assign a role to an object, and then use the content or styles associated with that object as a symbol or a style. Whenever the object changes, the symbol or style references are updated automatically. Object roles can be used to keep symbols and styles easily accessible and editable in a multi-canvas document. Object roles are extended by Canvas Roles, where the content of a whole canvas is treated as a collection of symbols or styles.
Symbols
In VectorStyler there are three mechanisms to reuse objects (or groups of objects). Objects can be saved as presets, and reused in any document without keeping a link to the original. This enables an easy workflow to create copies of premade objects.
Objects can be saved as Symbols inside a document. The Symbols panel can be used to manage and insert symbols of a document. When symbols are inserted into the canvas, a reference is created to the symbol object. Styling and other attributes (including shapes) of a symbol instance can be modified using Styles and Style Overrides.
If a symbol is defined in another document, it is possible to link to it by creating a document link with the Styles / Document Links command. It is important to understand that such links to external documents (reusing content from other documents) require that the other document is copied/archived with the document using the symbol.
Use style overrides to customize symbols on different canvases, when exporting or printing.
The third option to create a Symbol (and possibly the easiest) is to assign an object a name and a Symbol Role using the Object / Object Role / Symbol command, or selecting the Symbol role in the Layers panel menu. In this case the object remains in its place, and can be edited freely. It is recommended that the object (with the symbol role) is assigned a name in the Layers panel. The Symbols panel will list the object as a symbol (along with other symbols), and the user can insert this symbol into the current canvas (or text flow), by double clicking or drag&drop.
It is recommended that objects with a symbol role are placed on a separate canvas (the Reference Canvas group is created for this purpose) to provide a better organization of reusable symbols in a document. This scheme of symbol creation and use is the easiest, as it allows for an easy location and editing of the original object. Any changes to the original object are immediately mirrored in all symbol instances.
Styles
Styles are created and used in a similar workflow as Symbols. Just like in the case of symbols, there are three mechanisms to create styles. Object attributes (colors, gradients, patterns, noise styles, effects, shapes, and much more) can be saved as presets in separate preset files (or as a preset stored with the document). These separate preset files can be shared and reused by other designers as collections of swatches, brushes, effects or shapes. When reusing a preset, the whole style is copied, and there will be no link kept to the stored preset. This allows an easy reuse of premade style or shape components.
The second mechanism to reuse object attributes are Styles. Here the attribute is saved in the document as a reusable style, that can then be applied on the selected objects or text. Whenever the style is modified (by editing its attributes in a modal view, updating from an external style file, or style override), all uses of the changed style are instantly updated. It is possible to reference to styles stored in other documents by creating a link to that document using the Styles / Document Links command.
It is possible to use style overrides to customize the content of a canvas, or object, when printing or exporting.
The third mechanism to create and use Styles are the Object Role feature. The object role can be set from the Object / Object Role menu (that opens a list of possible roles), or from the Layers panel, containing a similar list. It is recommended that objects with roles have a name assigned in the Layers panel. Once a role is assigned to an object (for example Gradient Style) the object name (and preview) will show up in all style lists through the UI (as a gradient style in our example). This referenced style then can be applied as a style on other objects. If the style of the original referenced) object changes, all uses of that style are updated.
Linking (by references) to other (named) objects for style, provides for the easiest workflow in creating documents with reusable styles. Almost all aspects of an object (or text) can be styled by using references. This includes the object fill and outline attributes, but also the object shape or the effects applied on an object.
The Symbols and Styles chapter provides a detailed description on how to use Presets, Symbols, Styles and Object Roles to create a more reusable design, by combining these features with multiple canvases and Reference Canvases.
Typography
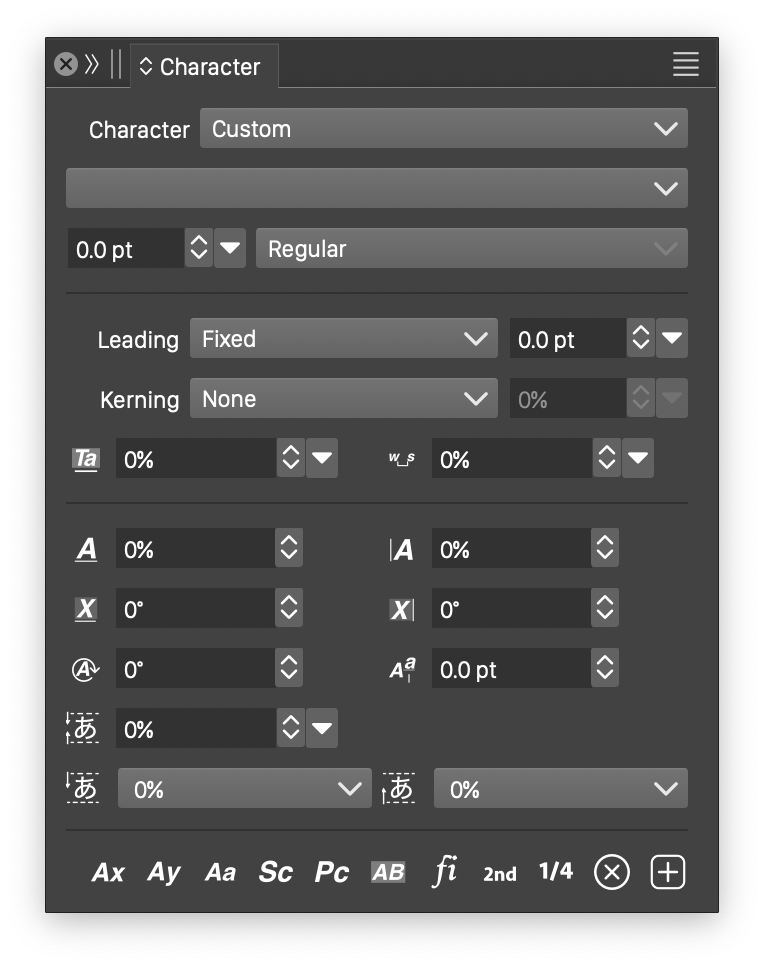
The Character panel contains basic character styling options.
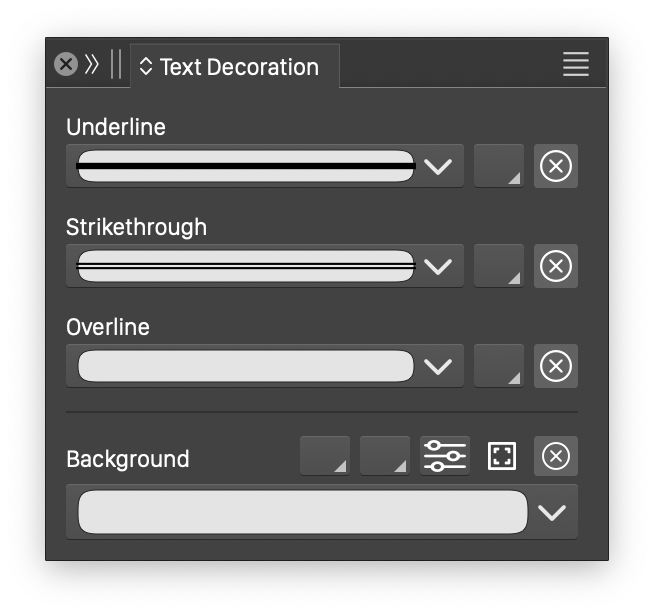
The Text Decorations panel.
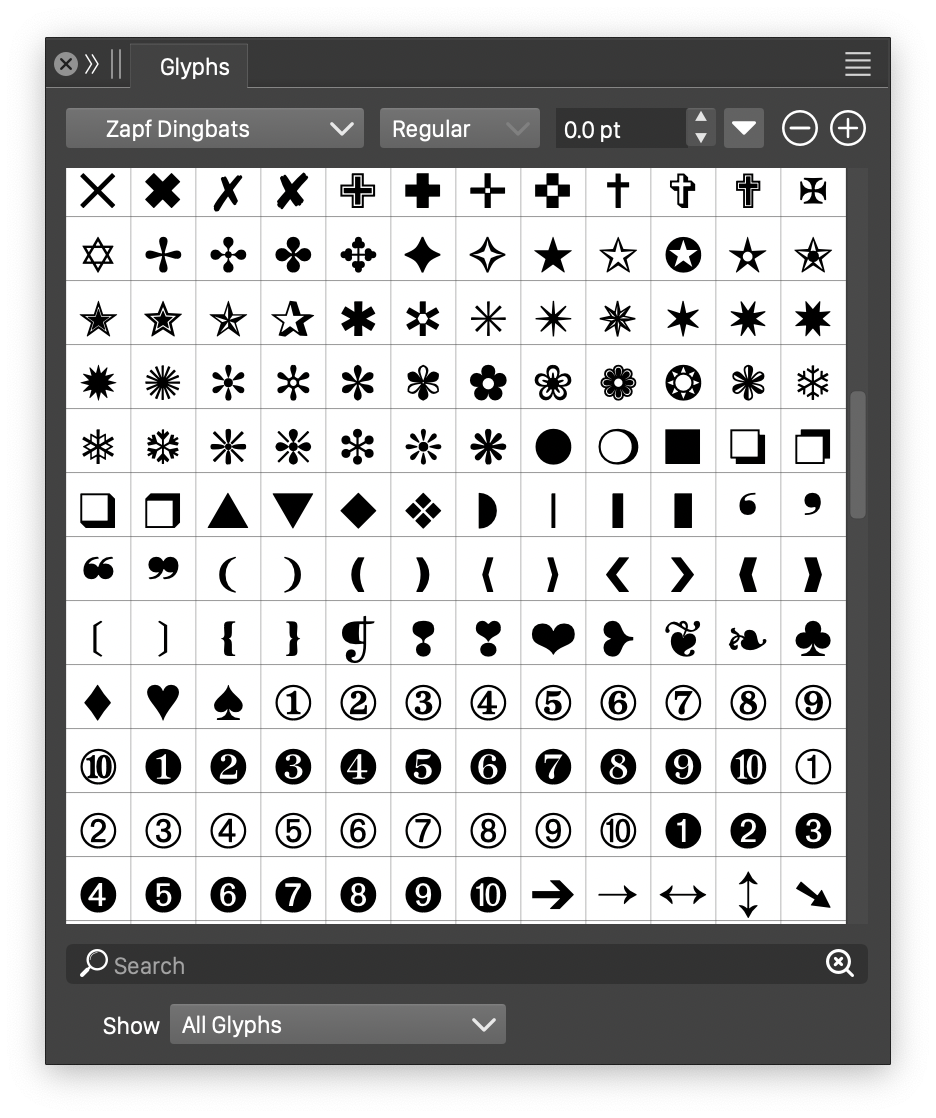
The Glyph panel provides access to the glyphs of a font.
VectorStyler implements a complete set of typographic features, including text flowing over multicolumn frames on multiple artboards and multiple canvases. There are two types of text objects in VectorStyler. The Vector Text Shape is basically an object shape formed from text. It can be broken into multiple text lines, but it has no margin. Vector text can be fit along any shape using the Text on Path command. Vector text shapes can be styled with any number of fill and outline styles, just like any other object.
The other text object type is the Text Frame object containing a text flow. Any shape style (preset, style or reference) can be assigned as a shape of a text frame. Text can flow over multiple frames positioned on different artboards or canvases. The Text Frame Options command of the Text menu can be used to set the properties of a text frame, including the number of columns and vertical balancing. Text formatting options are set through the Typography, Character and Paragraph panels, including OpenType styling options.
VectorStyler implements both single and multiline paragraph composers. In the multiline paragraph composer, line breaks of a whole paragraph content are balanced to minimize stretching and extra space. Paragraph formatting options also include Drop Capitals and automatic Labeling (bullets or numbers).
VectorStyler provides various text decoration schemes. The Text Decorations panel can be used to set underline, strikethrough and overline styles of a sequence of characters in a text. The text background can be used to create a filled (and outlined) background for a sequence of characters. Both vector and frame text allow decoration options.
The Character  tool can be used to move, scale or rotate individual characters of a text (both vector and frame text). The Link Text Frames tool can be used to interactively rearrange links between text frames, or to continue the text flow into any object.
VectorStyler also supports East-Asian typography features, when enabled in the Settings - Application.
The Glyph panel can be used to access individual glyphs of fonts, including various OpenType stylistic alternates. Glyphs can be inserted into vector of frame text as the text is edited (by double clicking or drag& drop). The glyph panel is also useful in accessing and browsing icon fonts. Glyphs can be added to the current canvas as an object shape, and can be used to define shape presets, style or references. The Glyph Panel can be used to show the available Inline Shape and Inline Object definitions in a document. Inline shapes and objects can be inserted into text at any locations (both vector and frame texts), and will automatically flow with the text as a regular glyph. Inline shapes are styled as text characters while inline objects have their own styling.
Color Filters
VectorStyler provides a set of Color Filters that can be used to adjust colors of the selected artwork. Unlike image or shape filters, color filters applied on artwork are destructive, in that instead of layering an effect over the object, the color in those the objects are changed. These color filters can be accessed from the Effects menu (the first section of the effects menu) or from the Layers panel menu (when they are applied to the objects selected in the layers panel).
Color filters are used to adjust or replace colors of vector artwork, without converting these to images.
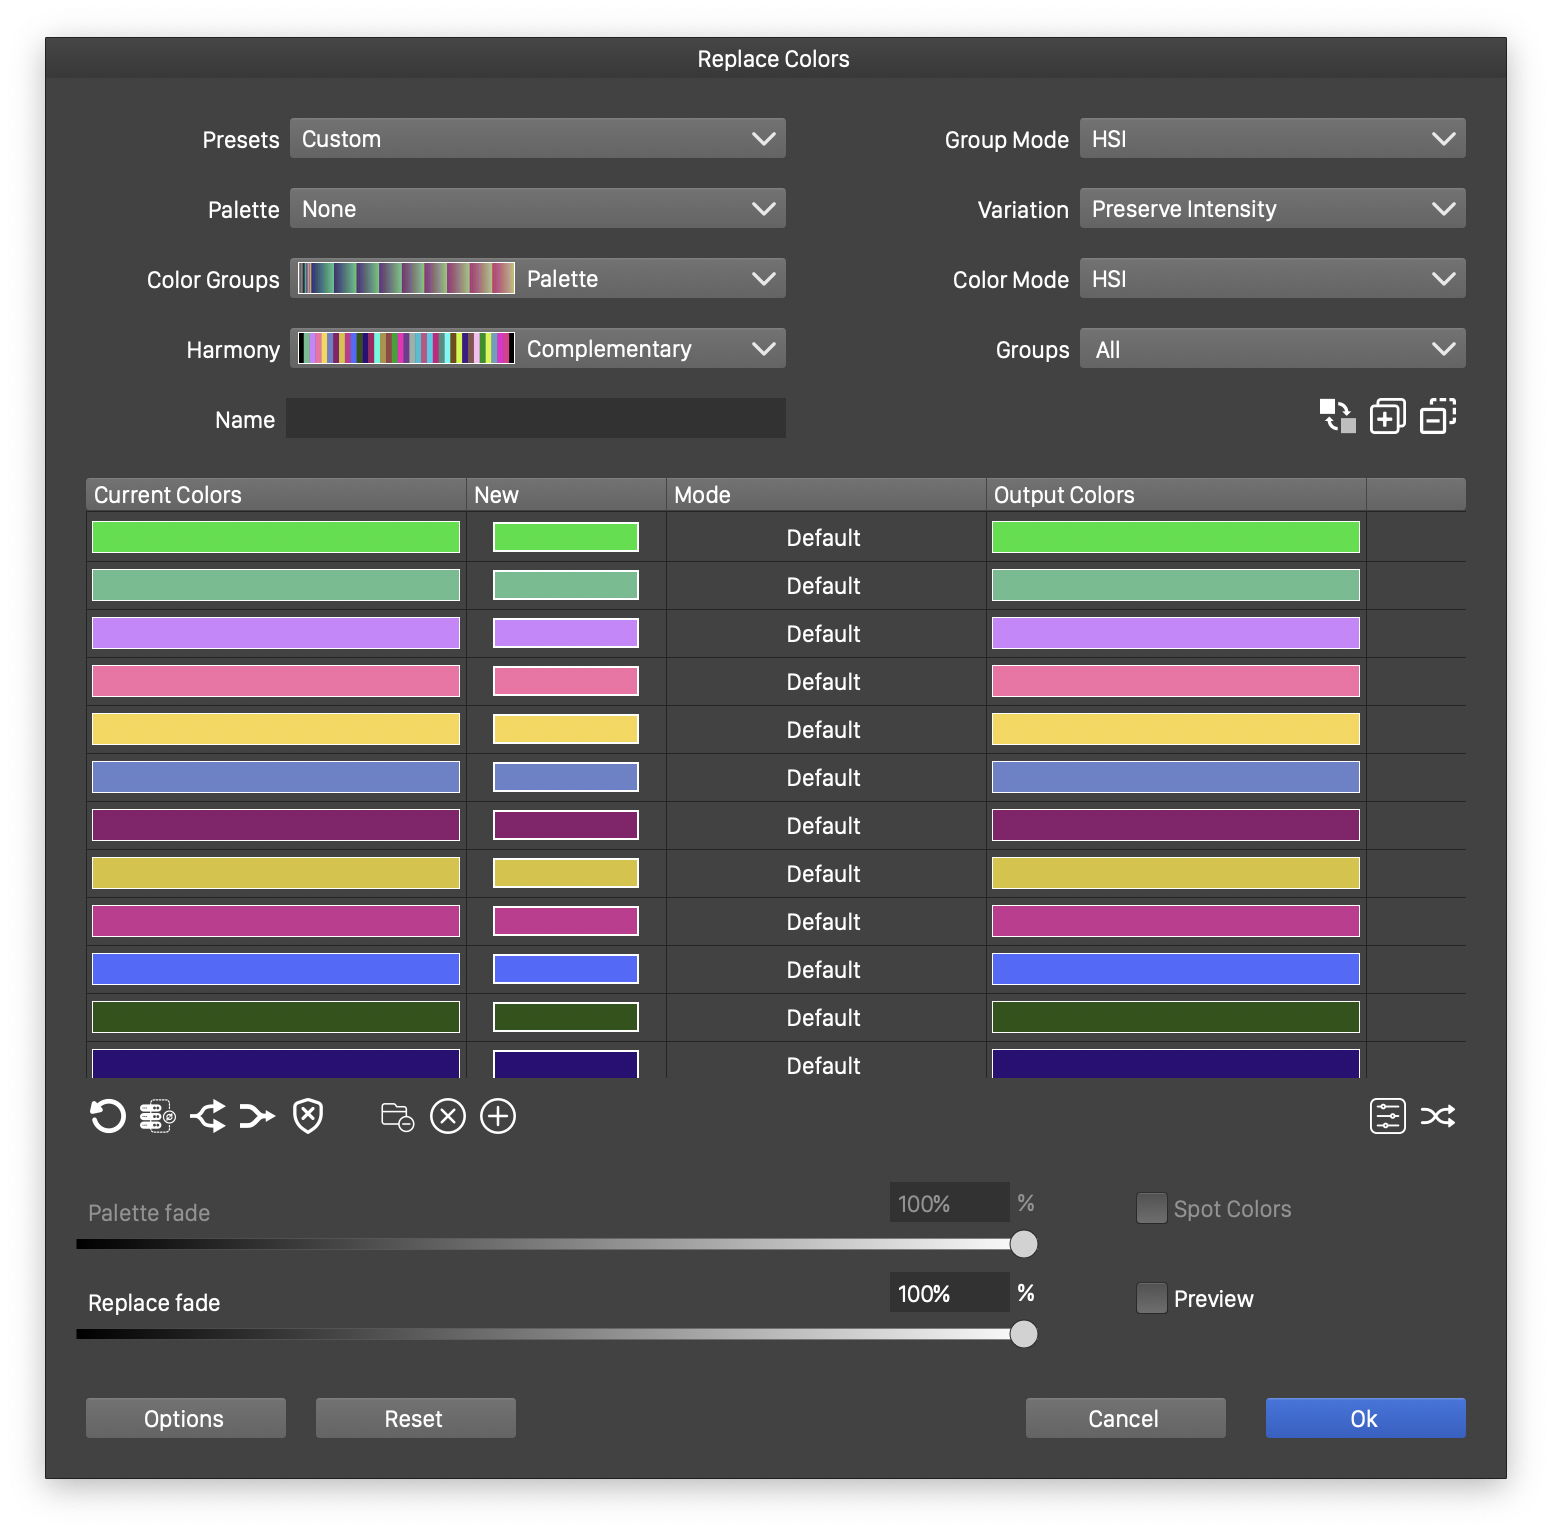
The Replace Colors filter used to recolor artwork.
The following color filters can be used to adjust colors in the selected artwork:
- Color Mode - Change the color mode of the selected object (RGB, CMYK, Gray, HSI, …).
- Curves - Use curves to adjust the color tones.
- Levels - Adjust the color tone levels.
- Brightness and Contrast - Adjust the brightness and contrast of colors.
- Invert Colors - Invert colors of the selected objects.
- Auto Adjust - Various automatic color adjustment options/
- Black and White - Convert colors to grayscale using various color channel weights.
- Channel Mixer - Mix color channel amounts.
- Color Balance - Adjust color balance.
- Hue Adjustments - Shift hue values.
- Color Map - Map colors to a gradient.
- Selective Color - Selectively adjust color tones based on color channel amounts.
- Match Color - Match colors to another document.
- Match Histogram - Match color histograms to another document.
- Saturation - Adjust color saturation.
- Vibrance - Adjust color vibrance.
- Photo Filter - Apply a photo filter to the colors.
- Posterize - Posterize colors in selected objects.
- Solarize - Solarize colors in selected objects.
- Replace Color - Recolor the selected artwork using color replacement mapping.
- Nearest Color - Change colors to the nearest color from another document.
- Nearest Palette Color - Change colors to the nearest color from a color palette.
- Min/Max Color - Convert colors to grayscale using the minimum/maximum color channel amounts.
- Adjust Color - Adjust color channel amounts using a color mode.
- Disturb Colors - Randomly modify color channel amounts using a color mode.
- Colorize - Colorize selected artwork by selecting colors randomly, from a noise or a color palette.
Adjustment Filters
In VectorStyler any object or layer can be an adjustment layer using any of the image effects. The Object / Create Adjustment Layer menu can be used to create new adjustment layers using a selected subset of image effects suitable as adjustment layers. The adjustment layer property can also be set with the Object or Layer Options command, or from the Layers panel.
Any of the image effects can be applied as an adjustment filter of a layer or object. Adjustment filters can use the shape of an object as the image effect mask. The content of a layer or object may be used as the adjustment filter mask.
Any object containing image effects can be turned into an adjustment layer. When image effects are applied to an object, the content of an object is filtered as an isolated image, and then it is composited with the backdrop. To create an adjustment layer from the object (with a shape) use the Object Options command and check the Adjustment Layer and Content is Mask options. Once the object has the Adjustment Layer option turned on, the image effect is applied to the canvas (or layers) below the object and the object shape is used as a clipping mask for the image effect.
Batch Exporting
VectorStyler provides an extensive set of exporting options. Artwork can be exported to other image or vector formats (including SVG, PDF and EPS). To export the current document, canvas or selected objects use the File / Export command, select the file format and adjust the exporting options.

The Object Export panel.
Batch exporting options include exporting artboards, objects or slices. Each artboard can also set its own exporting options used in batch export. Objects can be selected for batch export using the Object Export panel.
Slices are regions of a canvas marked for exporting into one or more file formats. Slices can be created and modified using the Slice Tool. The Slices panel is used to manage the slices created on the current canvas. Each slice can have one or more associated file format. When exporting, the content of the slice is exported into separate files using the selected file formats. VectorStyler allows for slices to be rotated at arbitrary angle. This can be used to export artwork at various rotations, as the content of a rotated slice will be rotated in the opposite direction.
Batch exporting from a document can be done by exporting objects, artboards or slices.
Import Native Illustrator Files
VectorStyler imports native Adobe Illustrator files as well as the PDF stream in AI files. In some cases AI files are saved with PDF streams, and such files are accessible from any PDF reading application (as well as VectorStyler). But this increases the AI file size, therefore many designers opt to save without the PDF stream option. Such AI files cannot be opened by third party illustration software (with the exception of CorelDraw).
Native Adobe Illustrator files can be imported, with retaining all high-level editing options. Alternatively, it is also possible to import AI files as PDFs to access the resulting vector objects.
VectorStyler implements a native Adobe Illustrator file import support. All high level editing options are preserved, including many of the shape distortions, image effects, mesh gradients, and vector brushes. In case the user prefers to import an AI file using the PDF stream, uncheck the Import Adobe Illustrator option in the Settings / Storage view.
And much more…
There are many other new of relevant features of VectorStyler not listed in this introduction. These are documented in detail throughout this documentation, and many of these are listed in the features list. VectorStyler provides many features that can improve the workflow of designers and illustrators:
- Unlimited Undo/Redo with a History panel and alternate redo histories.
- An extensive set of parametric shapes.
- Interactive editing of all shapes, object attributes, image or shape effects.
- Arbitrary shapes for corners.
- Gradients along or across paths.
- Mixing cubic and quadratic curve segments in one shape.
- Real vector brush support, including variable width brushes.
- Modify object shapes using shape distortion brushes.
- Easy mesh gradient setup and editing.
- Transparency tools to create arbitrary masks. Create masks from any collection of objects.
- Tools to edit variable width strokes.
- Large collection of noise styles.
- Object alignment and distribution, including align and distribute on a shape.
- An extensive set of selection tools, including named object markers to quickly select objects.
- Edit baseline shape of a vector text using the Node Tool to quickly create a text on path effect.
- Colorize artwork with the various color filters.
- A large collection of nondestructive image effects applied on vector objects, while keeping all vectors editable.
Installation and System Requirements
VectorStyler can be installed by downloading it from https://www.vectorstyler.com.
Installing on Mac OS
When installing on Mac OS, the downloaded file will be a disk image (DMG) file named vectorstyler.dmg. The application is installed similarly to any other MacOS application, downloaded as a disk image file. The disk image file can be opened by double clicking. Drag and drop VectorStyler icon into the Applications folder. You may need to authenticate to the system when installing an application.
VectorStyler is an application by an independent software vendor, and it is not available in the Mac App Store. In some MacOS installations the system settings may allow only App Store applications. In this case you must select the “App Store and identified developers” option in the System Settings / Security & Privacy panel.
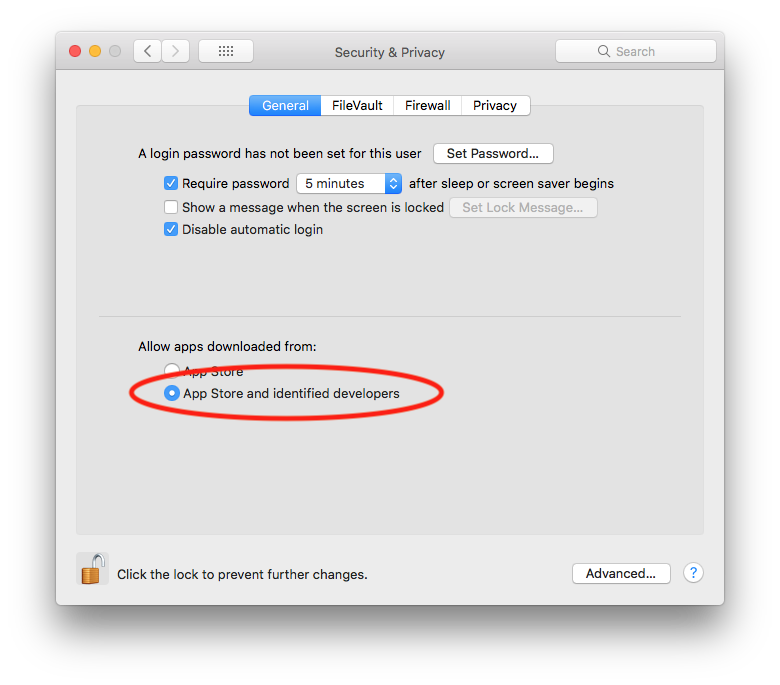
The "App Store and identified developers" option must be selected to allow VectorStyler to run.
Once copied into the Applications folder, VectorStyler can be launched just like any other MacOS application. When launched, VectorStyler opens a window with no documents. To open a document select the File / Open Document command in the application menu or press Command+O. To create a new document select the File / New Document command or press Command+N. The toolbox on the right side of the VectorStyler window contains the tools needed to create and manipulate your design.
Installing on Windows (10)
When installing for Windows, the downloaded file will be an MS Installer (MSI) file named vectorstyler.msi. Double click the file, and follow the instructions.
System Requirements on a Mac
VectorStyler is a native MacOS application and requires a Mac computer with MacOS installed to run. VectorStyler is also native on Apple Silicon, both as a separate download, or a universal binary.
The Mac computer can be a desktop, laptop or mini, preferably a model newer than 2014. The earliest supported Mac models are from 2010, using Intel Core Nehalem processors (SSE4.2 is required). A minimum of 8GB of system memory is required. More memory helps when creating complex designs or illustrations.
An Intel Core i5 or i7 processor with 4 cores and hyper-threading is recommended as VectorStyler makes extensive use of multiple threads. The Mac OS version should be 10.11 or newer. Metal support is recommended but not required. By default, VectorStyler uses Metal for rendering and image filtering operations. If Metal is not present, OpenGL and OpenCL can be selected from the VectorStyler / Settings / Performance menu command. A fast GPU and large screen is recommended to better make use of VectorStyler features. If available, a pressure-sensitive tablet can be used for pressure input to create variable width profiles for strokes and brushes, or to control the intensity of distortions applied with the shape filter brush.
System Requirements on Windows
VectorStyler is (also) a native Windows (Intel) application, and requires a PC with Windows 10 installed to run. A minimum of 8GB of system memory is recommended. More memory helps when creating complex designs or illustrations.
Only Windows 10 or newer versions are supported. An Intel Core i5 or i7 processor with 4 cores and hyper-threading is recommended as VectorStyler makes extensive use of multiple threads. GPU acceleration can be enabled in the Settings / Performance by selecting OpenCL (any GPU supported by Windows), or the NVIDIA mode for Nvidia GPUs.
It is recommended that there is a working network connection to register VectorStyler. A purchased VectorStyler must be registered using the Help / Register Product command. An unregistered product will cease to function after the trial period expires.


