Image Effects Editor
The image effect editor is a modal view used to edit the set of image effects of the selected object, or to edit an image effect preset or style from the corresponding panels. The image effect editor can be used to reorganize the list of image effects, by creating, modifying and removing effects, and apply the changes in a single step.
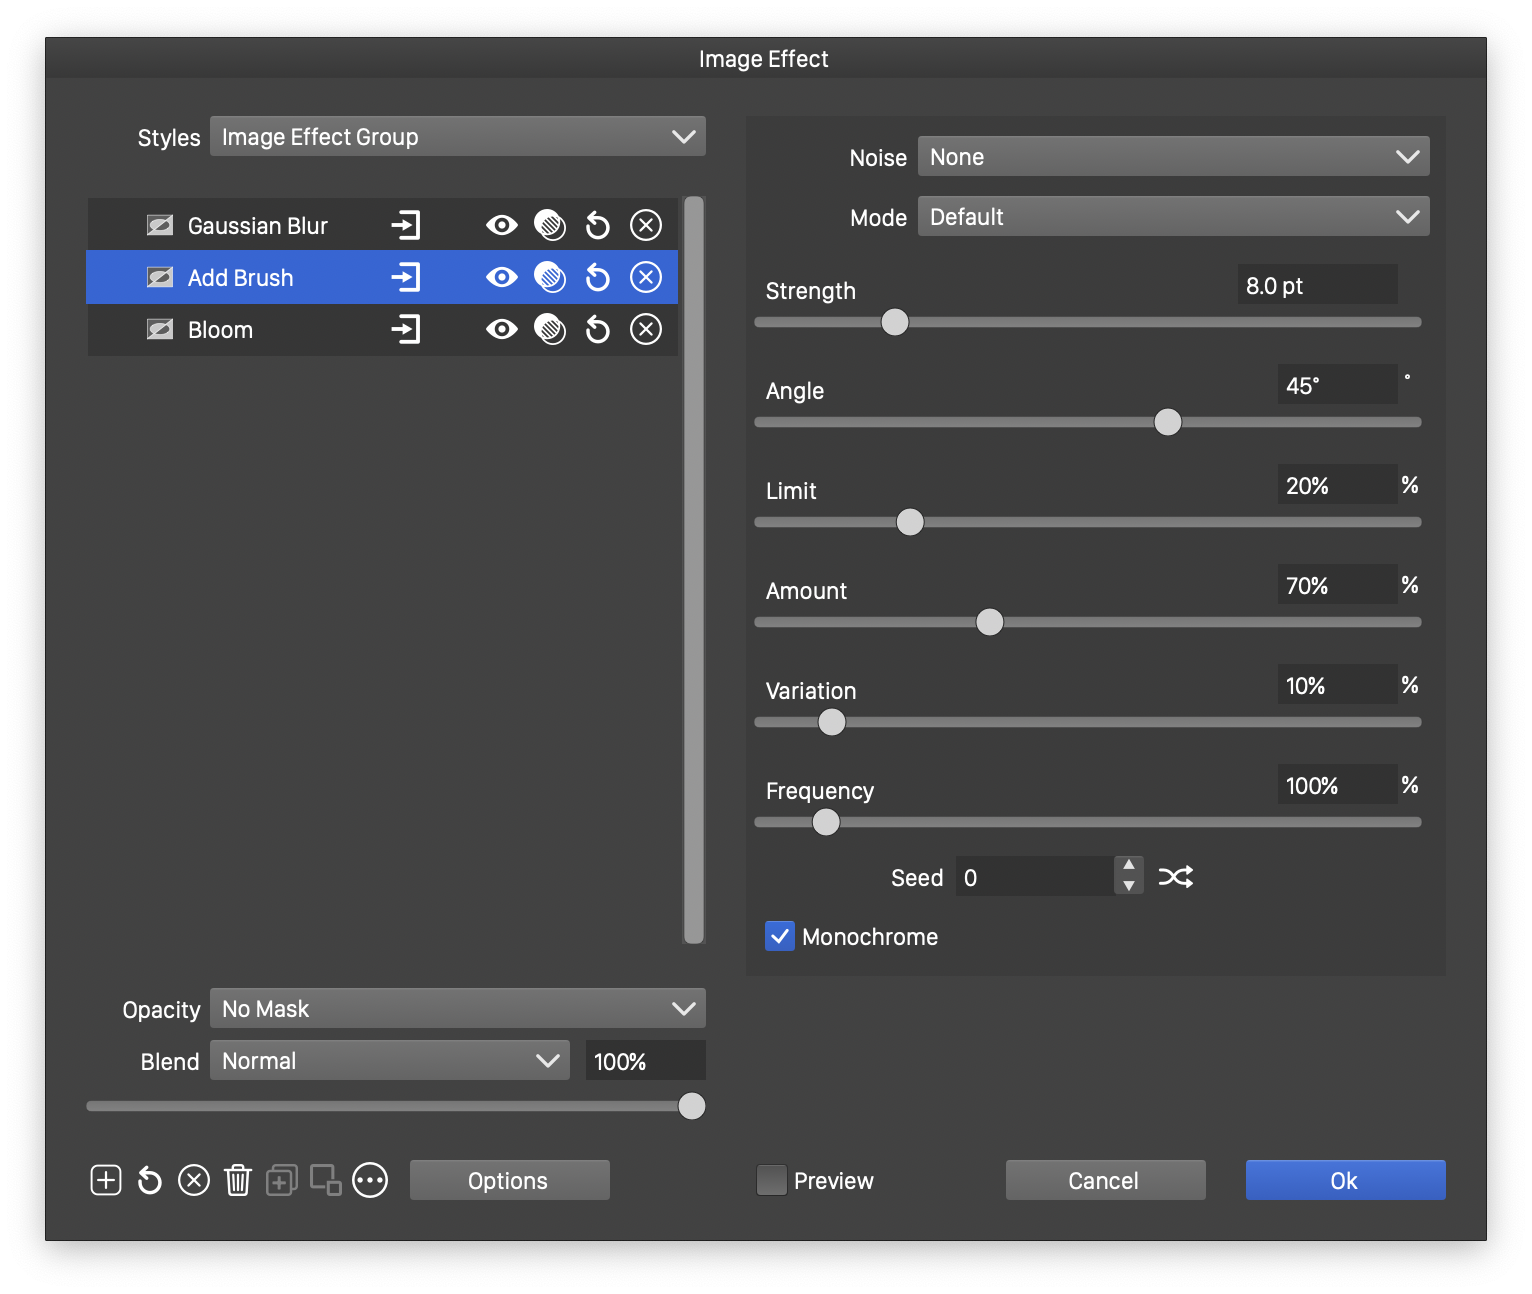
The Image Effect editor.
The modal image effect editor can be used in various places:
- To edit the image effects of the selected object, select the Edit Image Effects command from the Effects menu.
- When an image effect is added to the selected objects from the Effects menu, the Image Effect editor is used to set the effect attributes, or to create composite effects.
- When creating or editing image effects in the Layers panel and in the Appearance panel.
- When editing image effect presets and styles in the preset manager, presets panel, styles panel or the document style editors.
The left side of the image effect editor view contains the list of image effects, and various commands used to manage this list. Selecting an image effect in the list on the left side will show its attributes on the right side of the view.
The right side of the image effect editor view contains the attributes of the selected image effect. The content of the right side depends on the selected image effect type, and are described with more detail in the sections of this chapter.
There are two image effect style lists on the view. The Styles field on the left is used to save or replace the whole effect group edited in the view. The Style field on the right side is used to save or replace the selected image effect type and its attributes. This allows the selection of previously saved image effect presets or styles, to replace a single image effect in the list.
The following image effect editing options are accessible from the view:
- Opacity - Select an opacity mask from the menu, or set the uniform opacity value using the slider and the numeric editor. The masking options are the same as described in the Transparency chapter.
 - Add a new image effect to the list of image effects. Clicking this button opens a menu with the available image effect types. Select an image effect from the menu to add it to the list.
 - Reset the attributes of the selected image effects to their default state.
 - Delete the selected image effects from the list.
 - Delete all image effects from the list.
 - Create a group from the selected image effects. Image effects can be organized into a hierarchy of groups, and individual groups can be saved and reused as presets or styles.
 - Expand the selected image effect group into separate image effects.
 - Set the level of detail for the attributes of the selected image effects. By default, only the most common attributes of the selected image effects are shown on the right side. The button can be used to swap between detailed and common attributes.
- Group Objects - Enable or disable the grouping of the selected objects when the image effect editing confirmed. When multiple objects are selected, applying an image effect on the selection requires that the objects are grouped. Alternatively, disabling this option will result in applying the image effects separately on each selected object, resulting in local distortions.
- Preview - Enable or disable the previewing of the current image effect options on the selected objects.
- The masking options of an image effect can be edited by clicking on the
 button, next to the image effect names.
 - Image effects and groups of effects can be renamed for easy identification. The name of the group or effect can be used when saving it as a preset or style.
- The
 button in the image effect title row is used to enable or disable the image effect.


