Working with Panels
In VectorStyler, most of the attributes of objects, effects, shapes or styles are accessible from panels. Panels provide an easy way to organize frequently accessed features into a small view and leave sufficient screen space for the design. Multiple panels can be combined and grouped into floating windows.
In VectorStyler, most panels can be docked in both horizontal or vertical modes. The content of horizontal and vertical states of the same panel may differ substantially. By default, all panels are in vertical mode. Typically, panels that do not display lists are suitable for horizontal docking (and horizontal mode). For example: the Layers, Appearance or Presets panels do not support horizontal modes, while the Stroke, Transform or Color panels do.
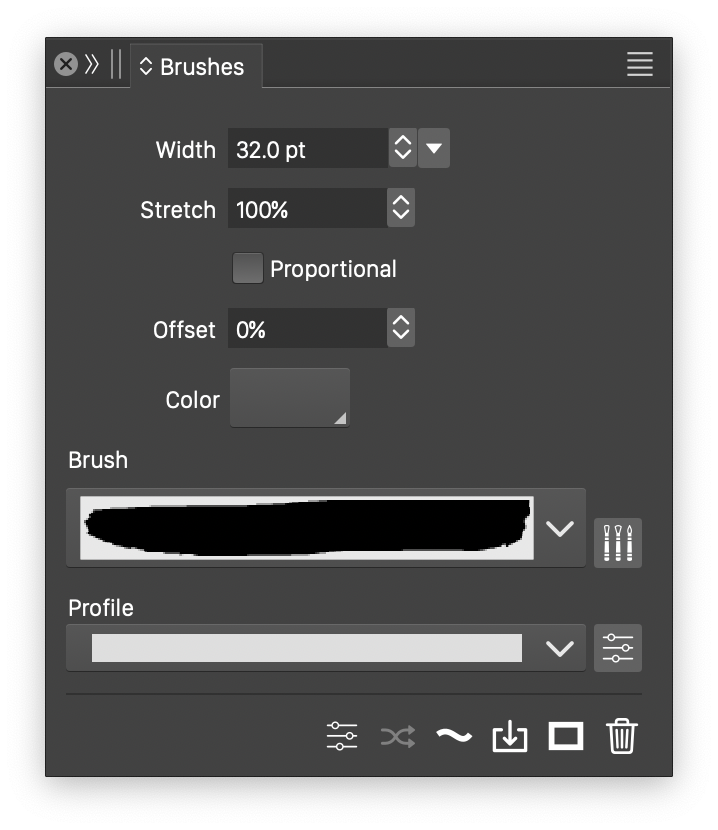
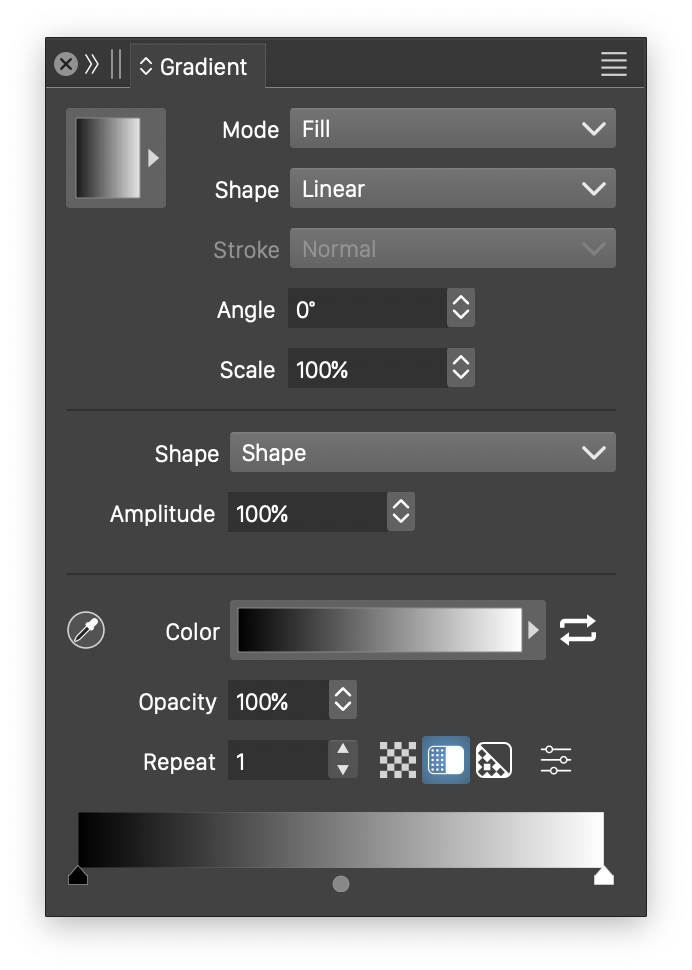
Most of the panels in VectorStyler also provide an additional menu of panel specific options. This menu can be accessed from the menu button located at the top-right corner of the panel. The following example shows three floating panels and a panel option menu: (A) the gradient panel, (B) the brush panel, (C) the alignment panel, (D) the options menu of the alignment panel.
A
B

C
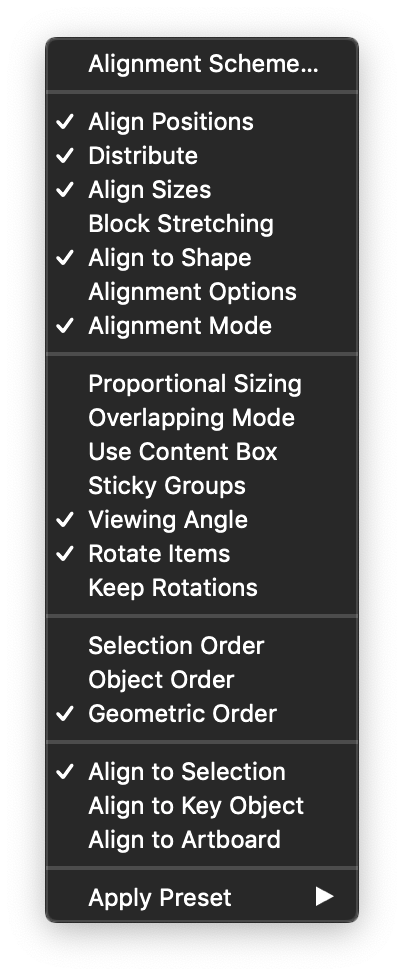
D
Panels can be closed with the close button located at the top-left corner of the panel window (left side of the title area). The panel views can be dragged and dropped into other panel views, combining into one window with a tabbed access to the individual views. The drag & drop of a panel view can be initiated from the panel title label.
Panels can also be combined into a single window by docking several panels next to each other vertically. This can be done by dragging a panel to the top or bottom margin of the window of another panel, with a transparent blue indicator showing that the panel will be docked. Docking into a vertical arrangement, will allow the panels to be visible at the same time, but it will take up more screen space.
Panels can be attached to the main document window as well. To do this, drag and drop the panel near the left or right margin of the main document window. Panels attached to the document window will resize and move with the window, making screen arrangements simpler, but using panels in this way, reduces the space available for the artwork display.
The content of the panels can be reduced or expanded using the double vertical arrow  icon left of the panel name. When this icon is clicked, the panel content will be changed to its next state. Most panels provide several content modes. If the icon is Shift+clicked, the panel content will change to the previous state.
Panels can be minimized using the double right arrow  icon next to the close icons. Minimized panels are shown as icons and can be opened by clicking the icon.
The state of the panels (visibility, location, arrangements) are stored persistently in the current workspace. This allows different panel states to be captured and stored in workspace files using the Workspaces commands from the application menu.
A few of the VectorStyler panels may have multiple instances. These include the Layers, Color Palette, Appearance, and various Styles and Presets panels. Having multiple instances of these panels can be used to improve design workflow on a complex document.
For example, the Layers panel instances can be opened on different parts of the document hierarchy, or different canvases of the same document. When multiple documents are open in VectorStyler, a Layers panel instance can be opened to access a document in the background. This enables the easy dragging and dropping of objects from one Layers panel to another, to easily reuse objects from one canvas or one document in an other.
Horizontal Panels
By default, the panels are in vertical mode, and can be docked only on the left or the right side of the application windows. In VectorStyler, some panels (depending on the panel content) allow a horizontal mode, when the panel can be docked at the top or bottom of the application window.
In horizontal mode, panels provide a more compact access to the specific options of the panel. Horizontal panels can also be floating, or docked on the top or bottom margin of the application window.
Examples of horizontal panels are shown in the next figure: (A) the Transform panel, (B) the Stroke panel, (C) the Alignment panel.

A

B

C
To flip a panel to horizontal mode, drag the panel from its title over the top or bottom region on the main window. If the panel can change its state to horizontal, a blue highlight indicates that it can be docked to the window margin.
To change a horizontal panel state back to vertical mode, drag the panel from its title area (the double line on the left side, under the close icon). Drag the panel over the left or right side of the application windows, or over the title area of other vertical panels. When released, the panel state is changed back to vertical and the panel is docked into the selected place.
As in the case of most vertical panels, the horizontal panel content can also be reduced by clicking on the panel state button (third from top down in the panel title area).


