Display Options
The finer details of displaying a VectorStyler document can be controlled with options available from the Display Options command of the View - Display menu. The Display Options view groups the display settings into several sections.
The Presets field can be used to create and reuse display options presets. The presets can be stored at application level, or in the document, when they are available to other users opening the same document.
The display options will be applied to the current document view. Other document views (if multiple views are opened) may contain different display options.
Display Section
The Display section contains the most common options used to configure the display of VectorStyler documents. Some of these options are available as separate menu commands.
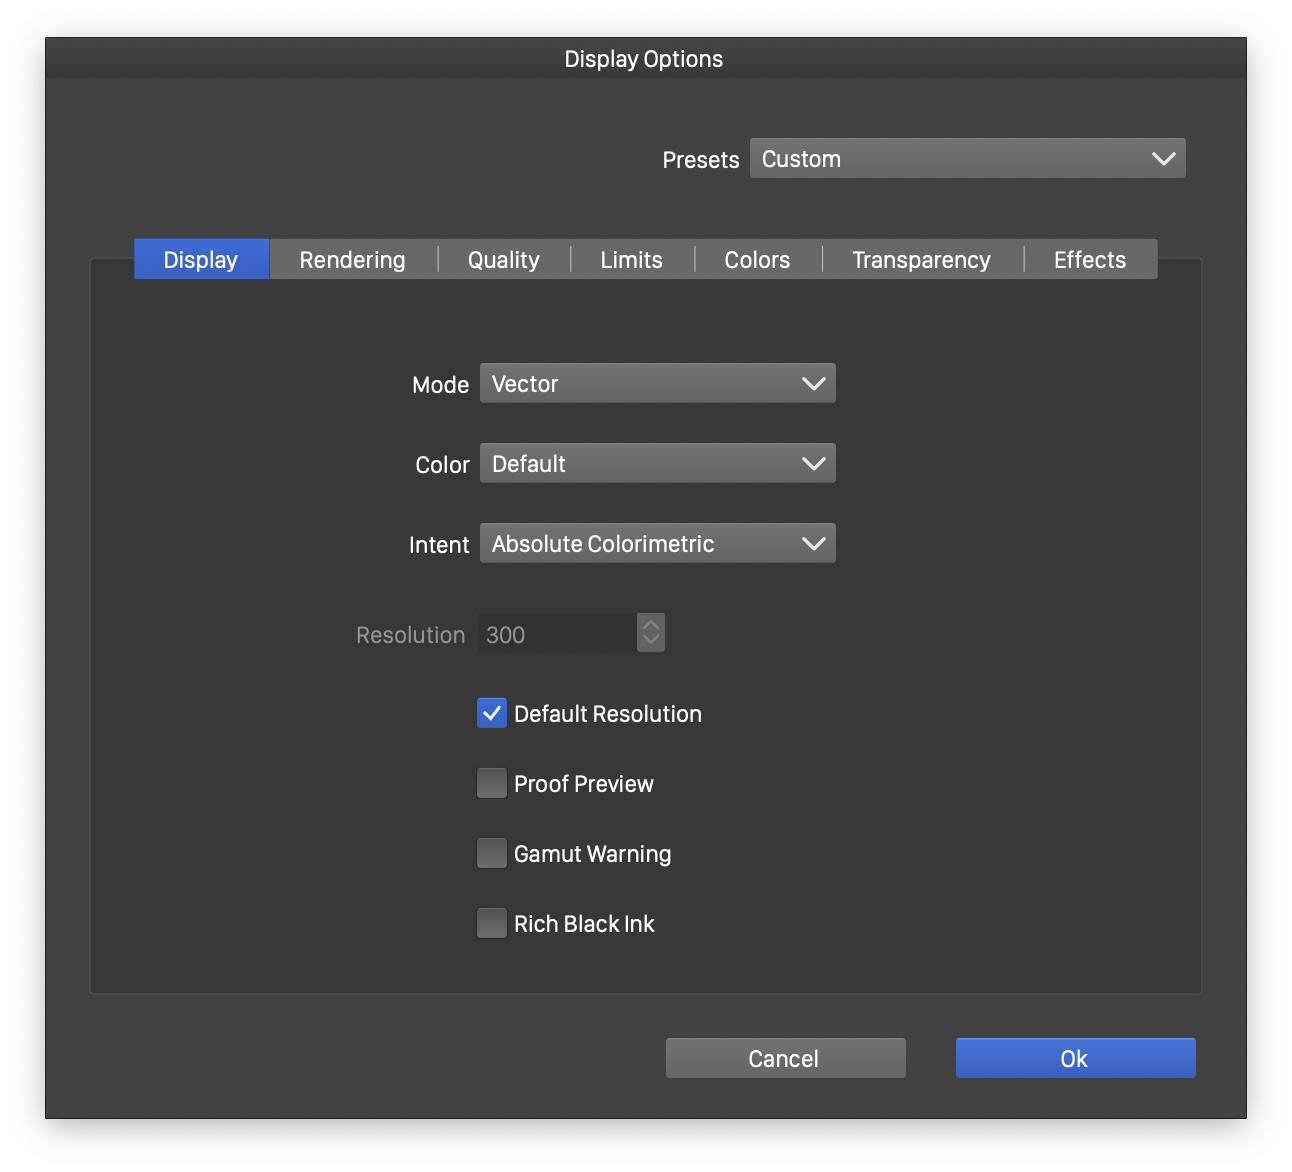
Display options opened to the *Display* section.
- Mode - Opens a list containing display modes. The display mode can be Outline, Pixel or Vector, these modes are also available from the View menu.
- Color - Opens a list of color modes used to display the document. The document will be rendered into an image with a format defined by the selected color mode.
- Intent - Opens a list of color intents used for the display color calibration.
- Resolution - Edits the display resolution used when rendering in Pixel mode, or when flattening vectors to images.
- Default Resolution - if checked, the resolution specified in the document settings is used.
- Proof Preview - Enable or disable the color proof preview mode.
- Gamut Warning - Enable or disable the gamut warning display of colors not printable with the current color profile.
- Rich Black Ink - Enable or disable the showing CMYK colors with rich black.
Rendering Section
The Rendering section contains various rendering performance and clipping options.
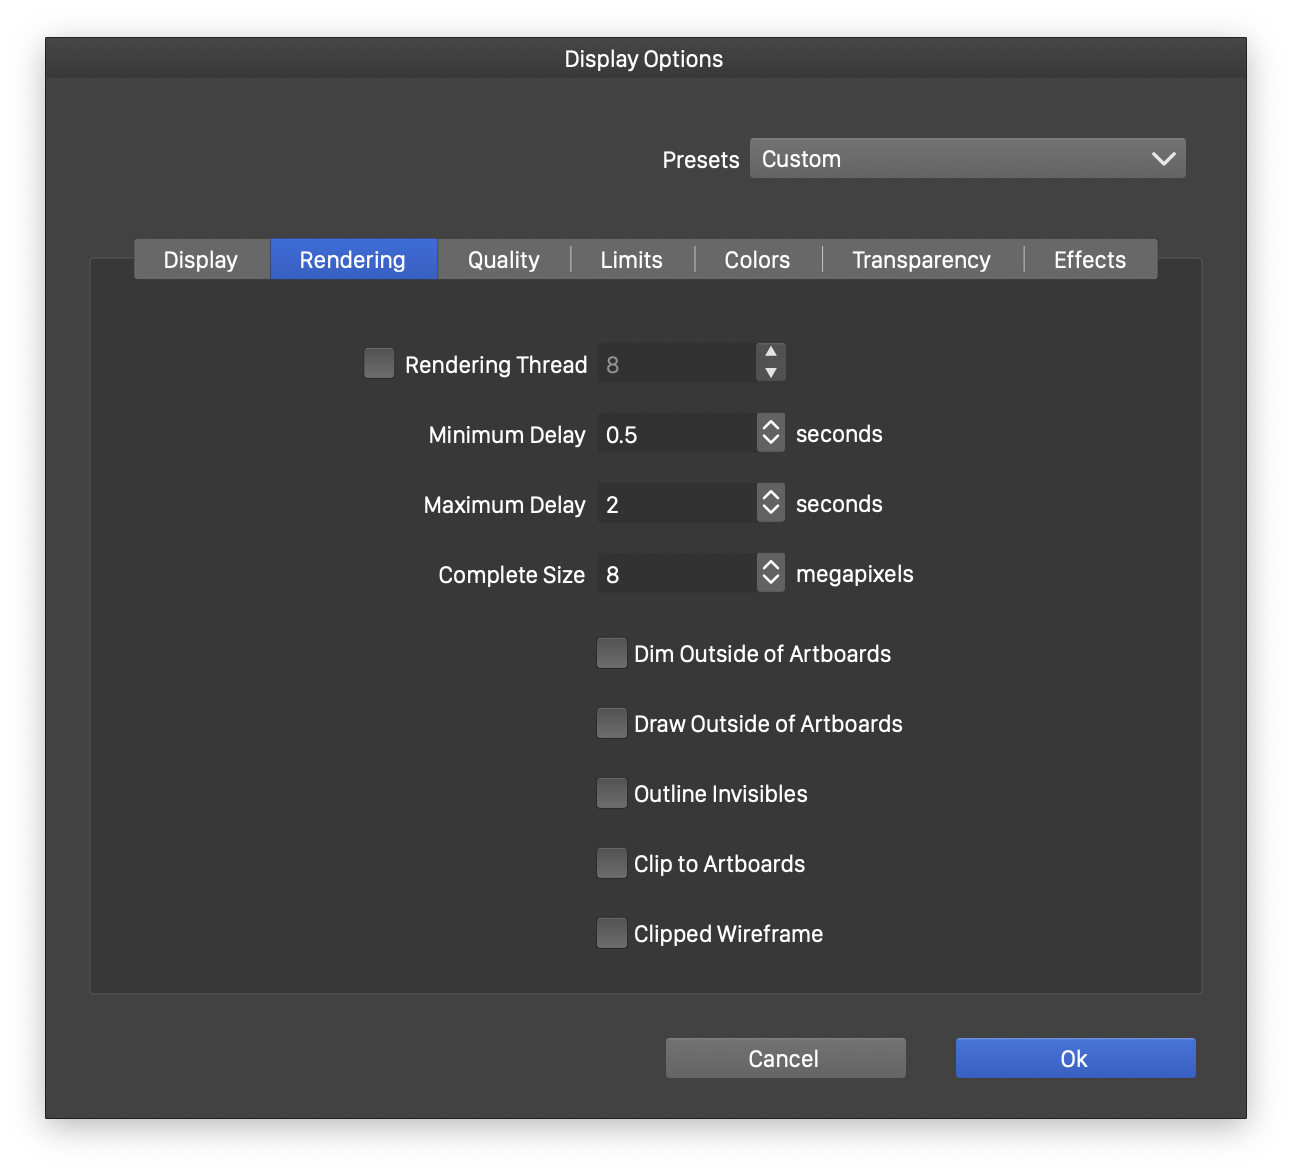
Display options opened to the *Rendering* section.
- Rendering Thread - Enable and set a fixed number of CPU threads used when displaying the document. When disabled, the CPU thread count is determined automatically using the number of available cores, and the document complexity.
- Minimum Delay and Maximum Delay - Set the minimum and maximum delay for rendering a complete version of the document image. The complete rendering is used when scrolling or zooming the document, when the actual screen rendering is not yet available. The complete image is created after a delay between the minimum and maximum amounts depending on the complexity of the document.
- Complete Size - Set the size (in megapixels) of the complete image of a document.
- Dim Outside of Artboards - Enable or disable the dimmed rendering of objects outside of artboards.
- Draw Outside of Artboards - Enable or disable showing objects as outlines outside of artboards when the Clip to Artboards is selected.
- Outline Invisibles - Enable or disable the showing invisinble objects and layers as outlines.
- Clip to Artboards - Enable or disable the clipping of objects into area defined by artboards. Objects on the canvas but outside of any artboard will not be visible.
- Clipped Wireframe - Enable or disable the clipping of objects in wireframe mode.
Quality Section
The Quality section contains various rendering quality settings.
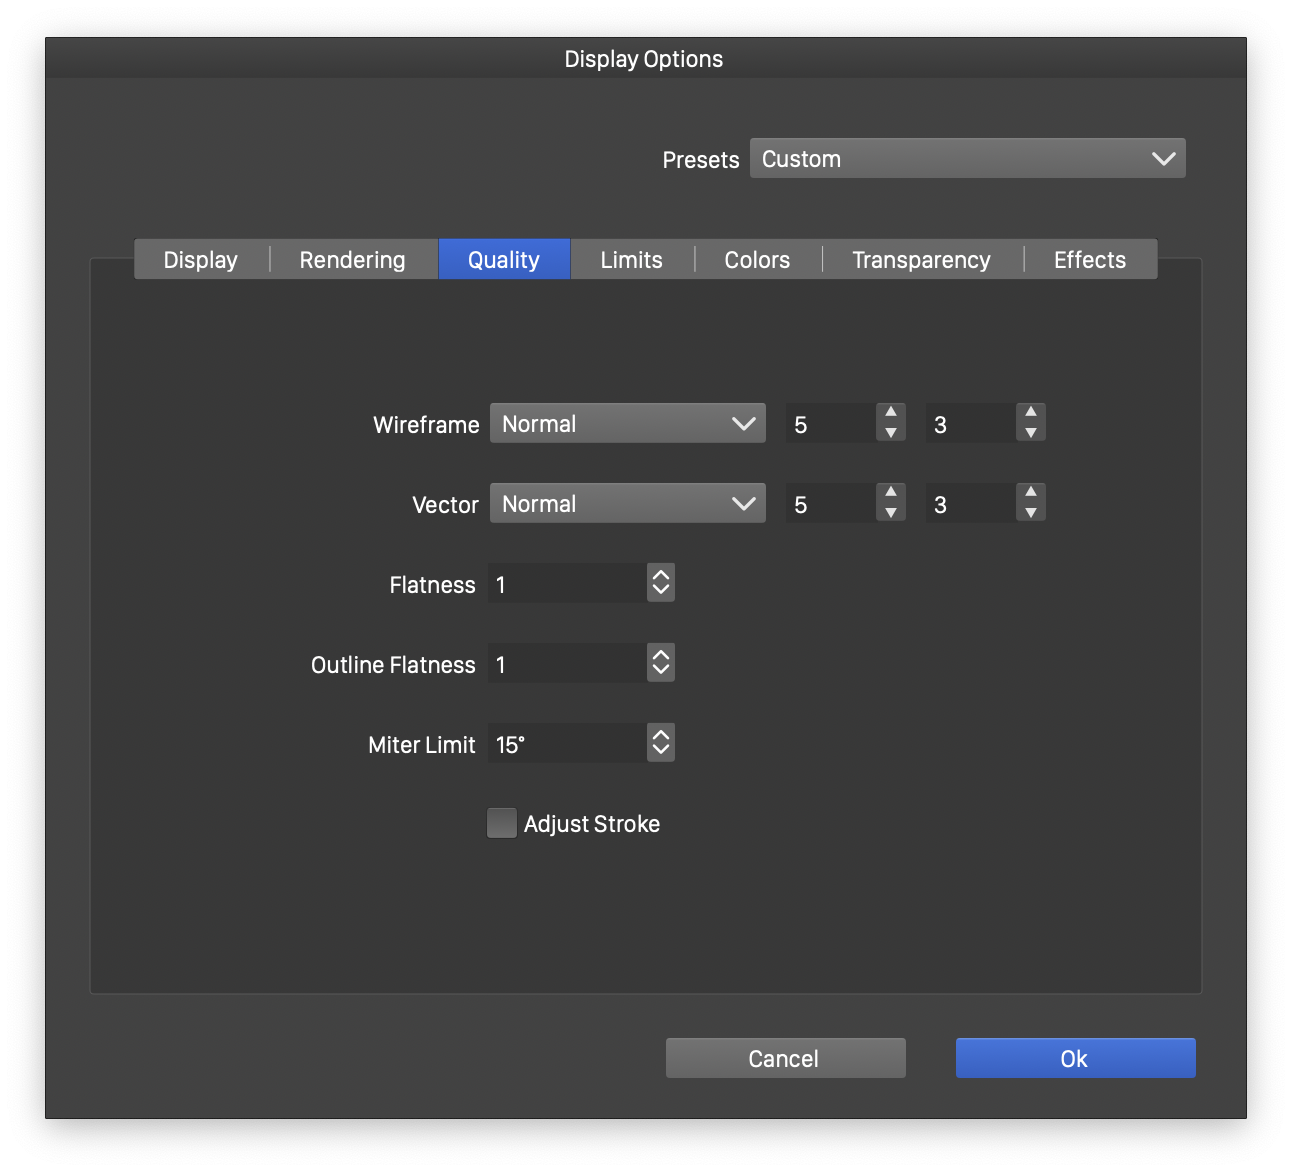
Display options opened to the *Quality* section.
- Wireframe - Set the sub-pixel resolution used when rendering objects in wireframe (or outline) mode.
- Vector - Set the sub-pixel resolution used when rendering in vector and pixel preview mode.
- Flatness - Select the precision used to approximate curves with lines when rendering the document display image.
- Outline Flatness - Select the precision of approximating stroke outlines and other curves while rendering the document.
- Miter Limit - Select the angle limiting the use of miter corners when rendering strokes. Below this angle, corners are rendered using a bevel corner.
- Adjust Stroke - Enable or disable the stroke adjustment to pixels boundaries while rendering.
Limits Section
The Limits section contains various rendering limits settings.
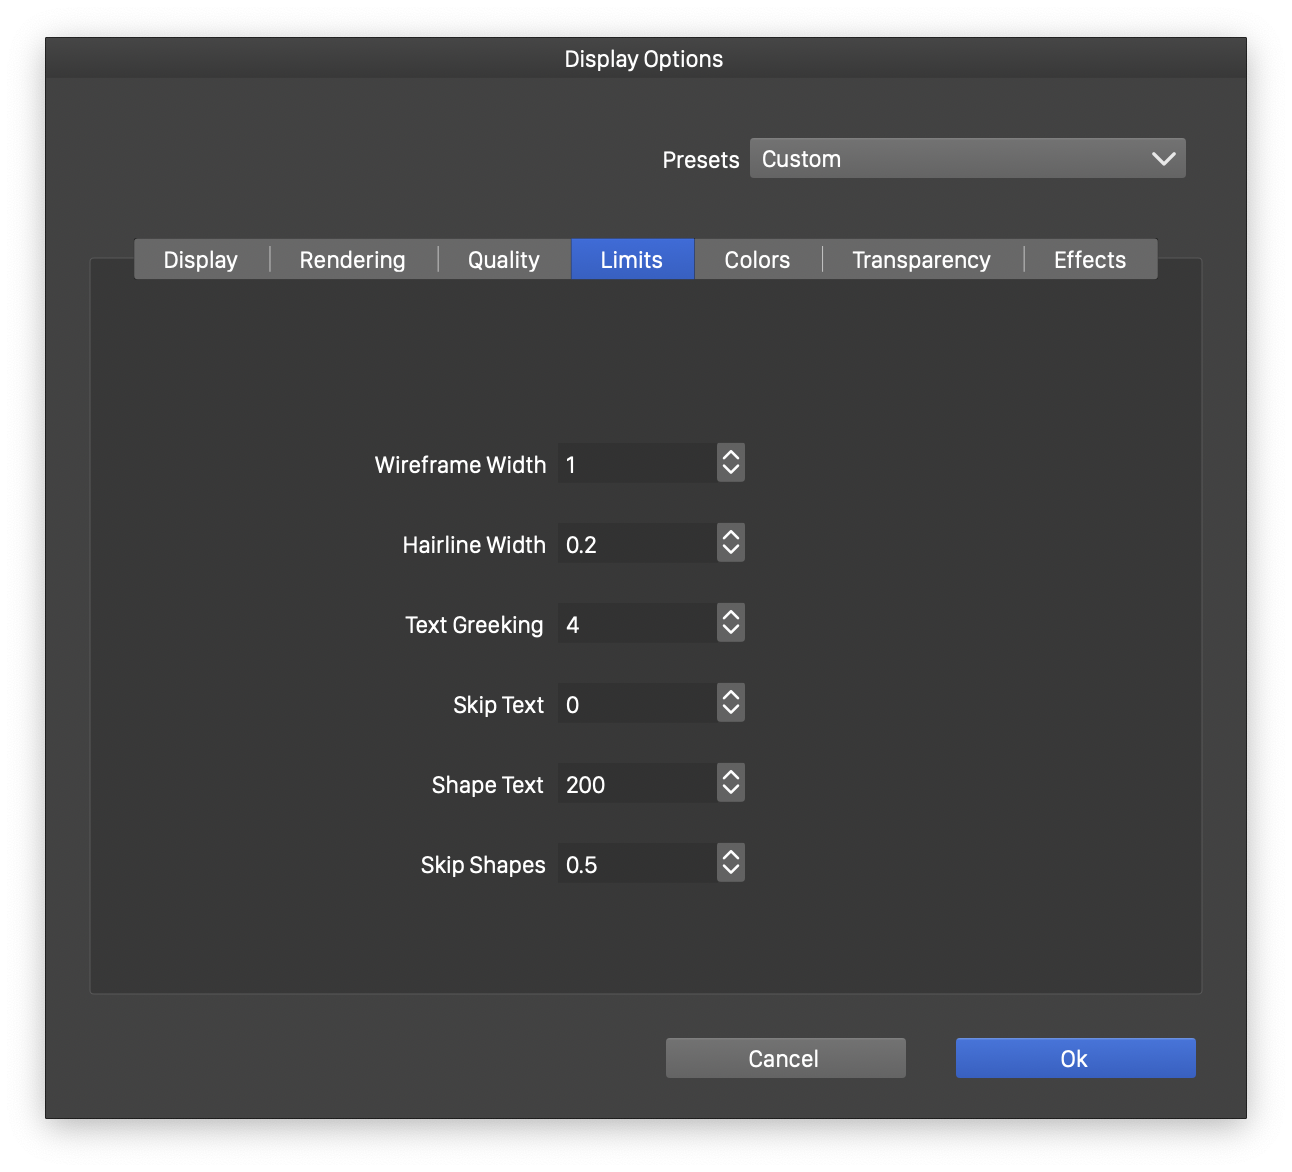
Display options opened to the *Limits* section.
- Wireframe Width - Select the width (in pixels) of the wireframe outlinres.
- Hairline Width - Select the width (in pixels) of the hairline stroke.
- Text Greeking - Select the limit used to render text as gray boxes (also known as greek text). This limit is set in pixels.
- Skip Text - Select the limit below which text rendering is skipped.
- Shape Text - Select the limit used to render text glyphs as shapes or images. Above this limit, no text glyphs are created, instead the glyph is rendered as shape.
- Skip Shapes - Select the limit below which shape rendering is skipped.
Colors Section
The Colors section contains color, opacity and size settings used in various indicators.
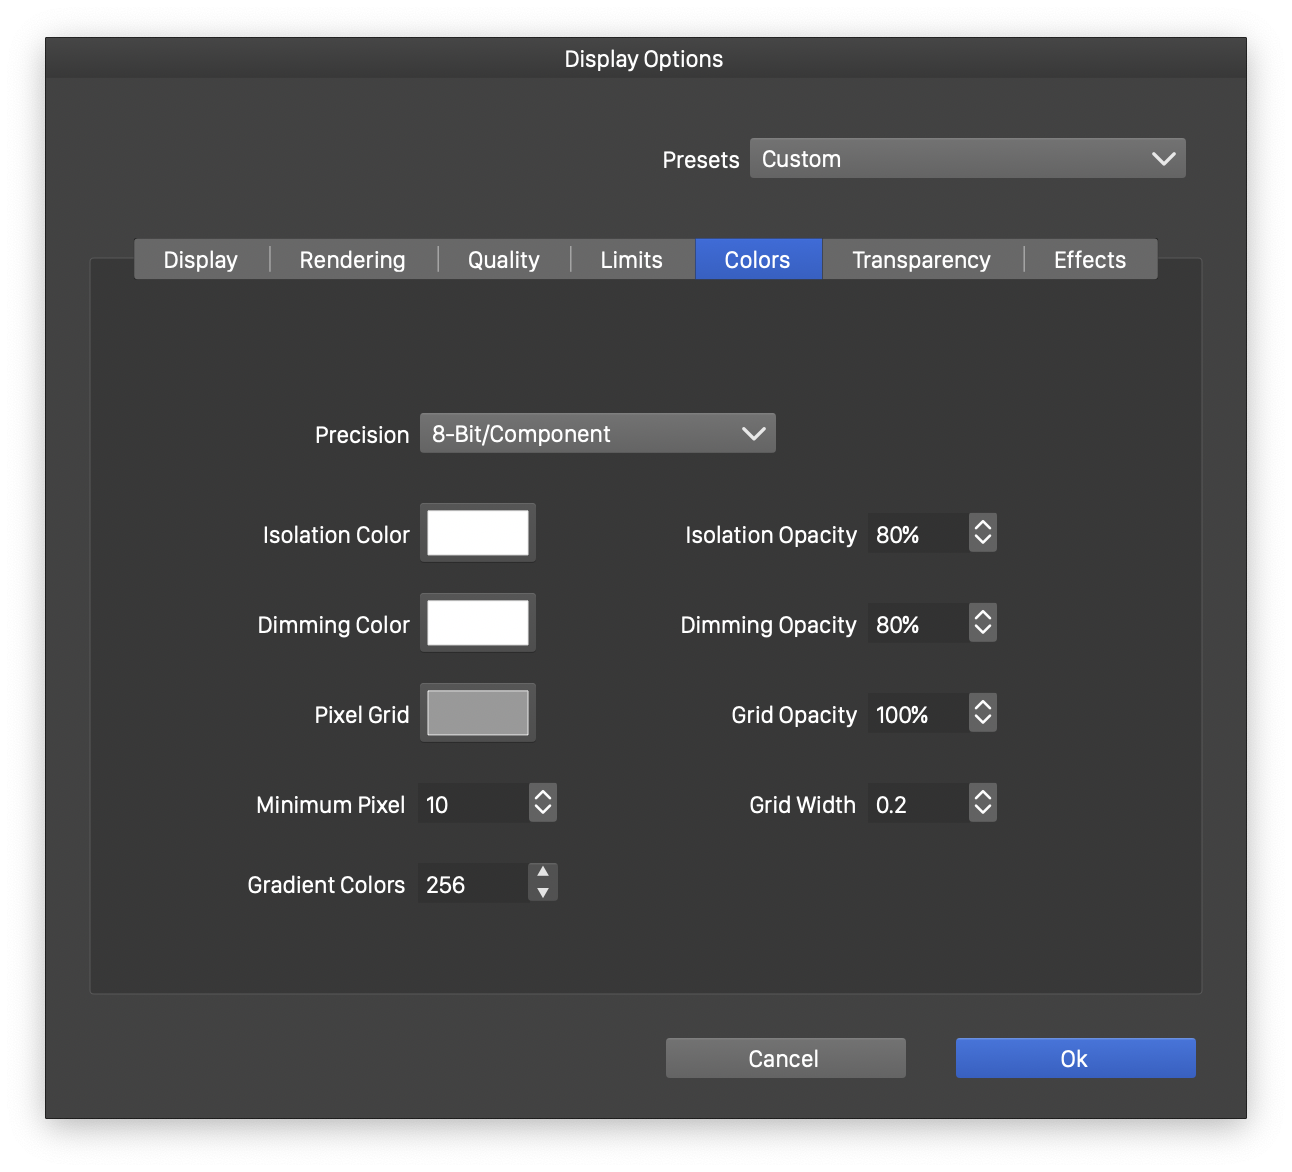
Display options opened to the *Colors* section.
- Precision - select the bit depth of color components in the display image. This can be 8, 16 or 32-bits. Depending on the screen capabilities, 16-bit rendering may provide deeper color resolution.
- Isolation Color - Select the color used to dim objects outside of the isolated group.
- Isolation Opacity - Select the opacity used to render the isolation color over objects outside of the isolated groups.
- Dimming Color - Select the color used to dim objects outside of artboards when the Dim Outside of Artboards option is set.
- Dimming Opacity - Select the opacity used to render the dimming color over objects outside of artboards.
- Pixel Grid - Select the color used to render the margin of pixels in pixel preview mode (at sufficiently large zooms).
- Grid Opacity - Select the opacity of the pixel margin lines rendered in pixel preview mode.
- Minimum Pixel - Select the minimum number of pixels used to render a single pixel when the pixel margins are also rendered in pixel preview mode.
- Grid Width - Select the width of the pixel grid margins.
- Gradient Colors - Select the number of gradient colors used when rendering gradient colors requires flattening the gradient transition (caused by using color transition functions).
Transparency Section
- Transparency section contains color and opacity settings used to render the transparency grid. The transparency grid is rendered using two colors, the primary and the secondary.
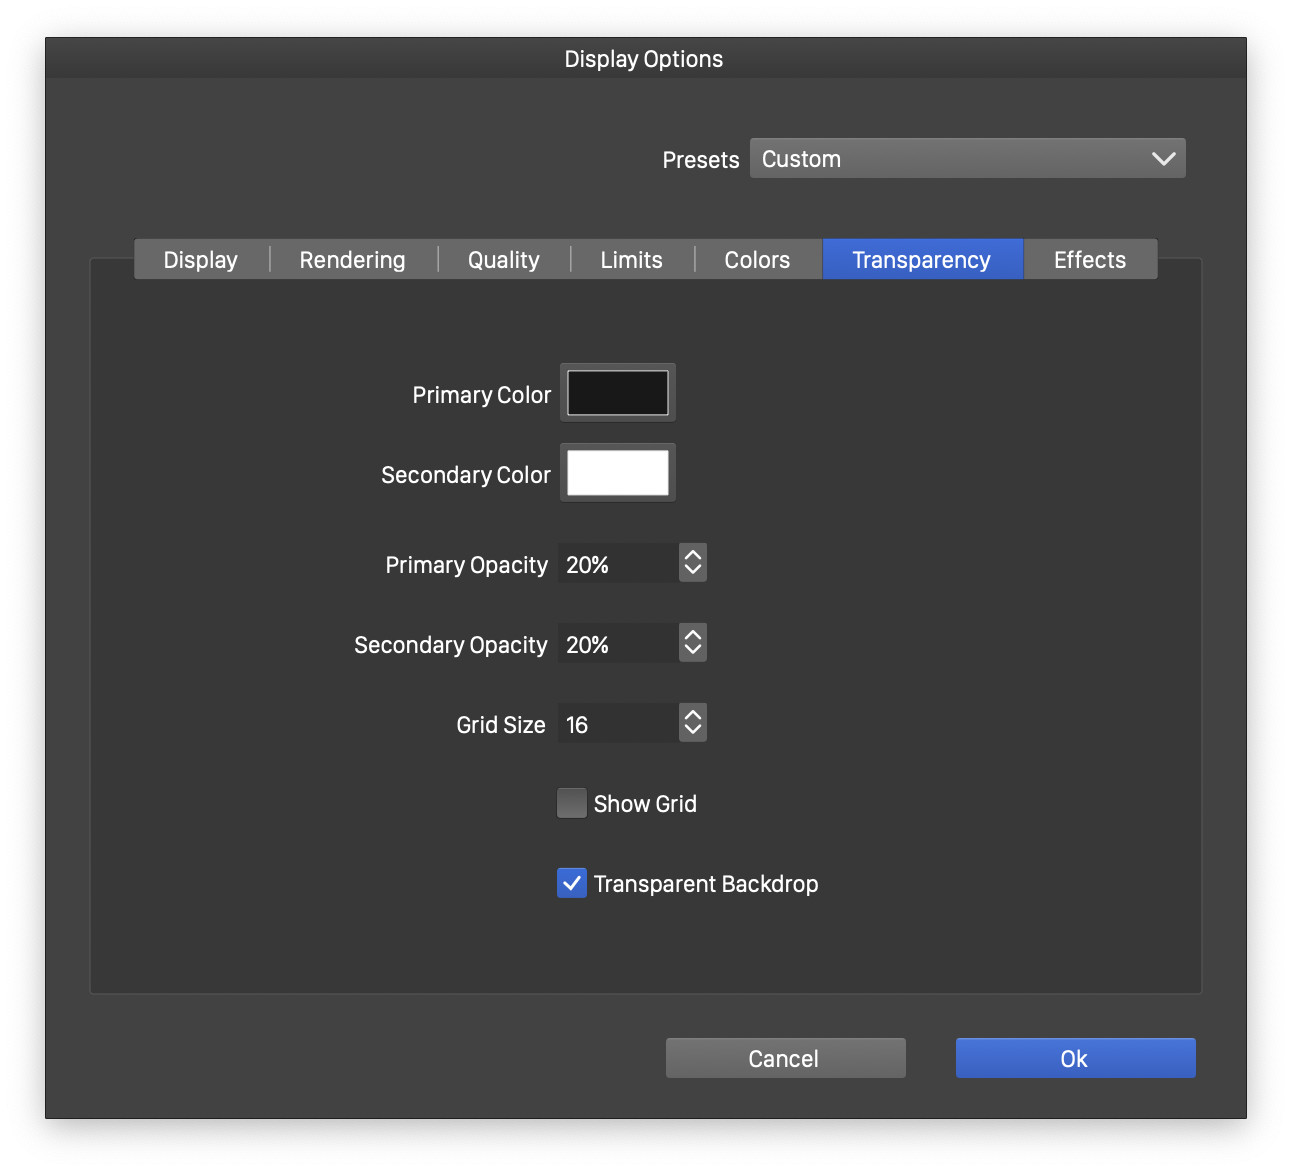
Display options opened to the *Transparency* section.
- Primary Color - Select the primary transparency grid color.
- Secondary Color - Select the secondary transparency grid color.
- Primary Opacity - Select the opacity of the primary transparency color.
- Secondary Opacity - Select the opacity of the secondary transparency color.
- Grid Size - Select the size of the transparency grid boxes in pixels.
- Show grid - Check to show the transparency grid.
- Transparent Backdrop - Enable or disable the transparent backdrop rendering mode. When enabled, the current canvas is rendered into a separate isolated layer, and then composited into the backdrop (containing the transparency grid, page frame and canvas color). Transparent backdrop is also used to correctly render blending modes composited against an empty backdrop. When disabled, the current canvas is rendered directly onto the canvas background color and transparency grid. The disabled mode may cause the blending modes to be composited incorrectly against the empty backdrop, but it may provide a slight performance improvement when rendering simple or moderately complex documents.
Images Section
The Images section contains options controlling the rendering of images and image effects.
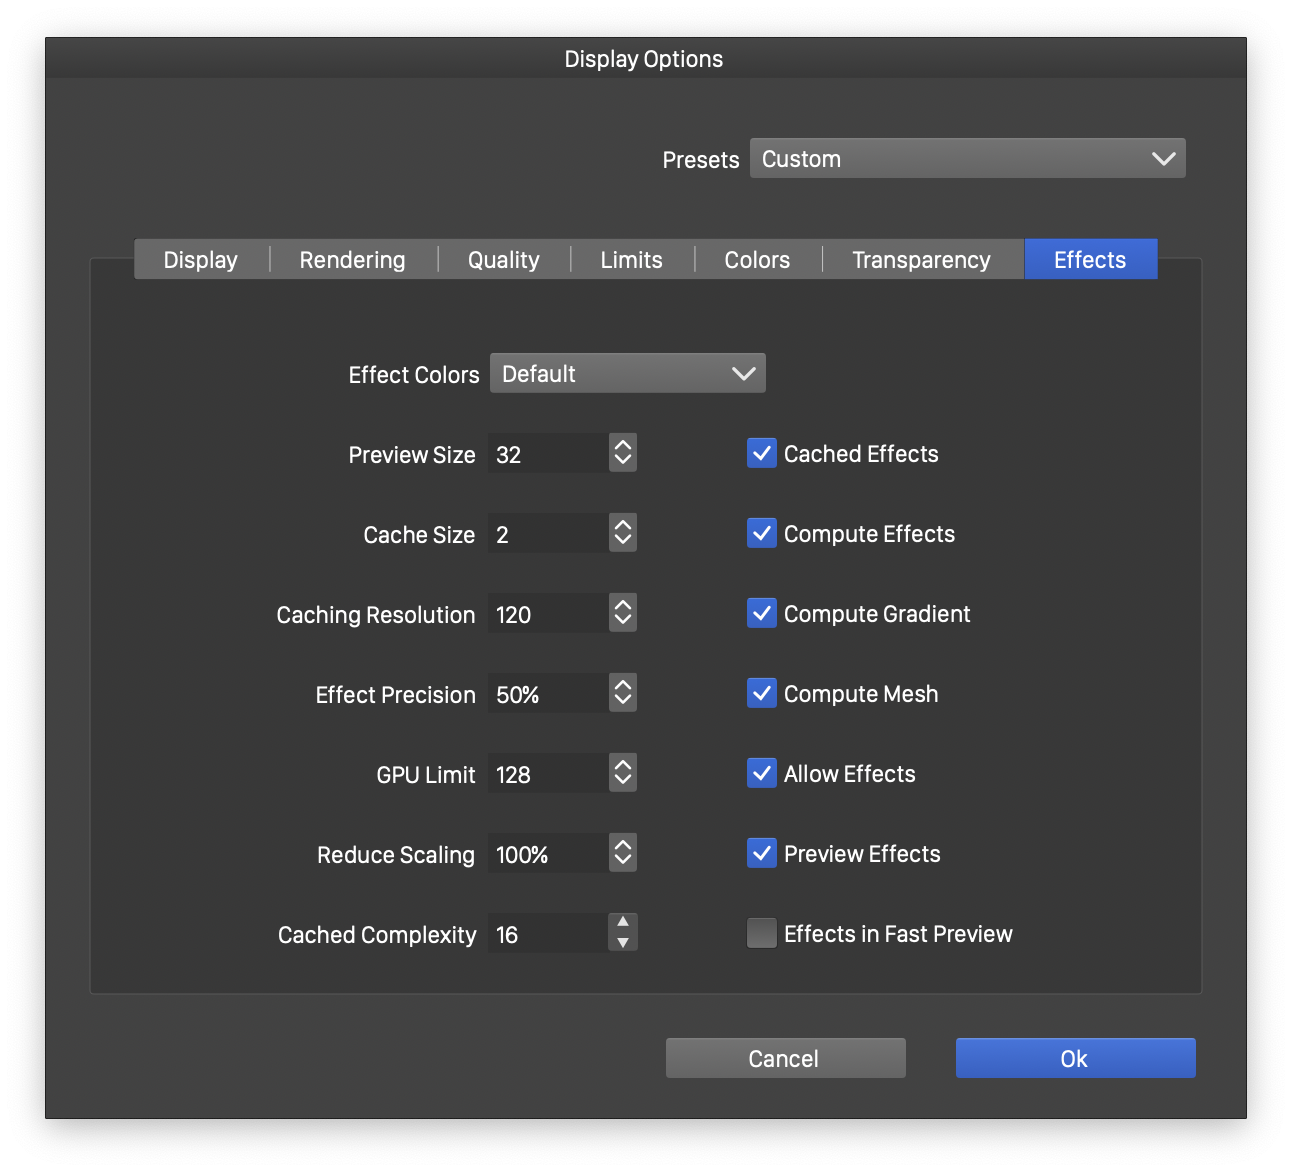
Display options opened to the *Images* section.
- Effect Colors - Open a list of image color component depth options, used when applying image effects while rendering a document. In VectorStyler, image effects are applied to the rendered layer during the rendering process. Selecting a higher color depth for images may result in more precise effect outputs, but may impact rendering performance negatively.
- Preview Size - Select the size of preview images (in mega-pixels) used to display linked content.
- Cache Size - Select the size limit of cached images (in mega-pixels) used while rendering objects. In VectorStyler, objects or group of objects (including layers) having the Image Render option selected are rendered as images. These images can be cached, improving the rendering of complex layers and objects.
- Caching Resolution - Select the resolution of cached object and layer images.
- Effect Precision - Select the precision used when applying effects to large images while displaying on screen. Some image effects can be slow to render at full resolution. When rendering on screen while editing, the precision of these effects may not be as important as the performance of refreshing the screen. Set this value to 100% for full on screen precision, and 10% for the lowest precision.
- GPU Limit - Select the maximum size (in mega-pixels) of an image processed on the GPU memory. This will be a limit on the size of a single image, to process a single effect. Multiple images of this size may be placed on the GPU memory. When rendering on screen, the image sizes are limited by the screen size also. Large images may be created when exporting to an image file format using a very large resolution. In such cases, the image effect calculations will fall back to CPU.
- Reduce Scaling - Select the amount of scaling applied to images when applying complex convolution effects. Reducing the image resolution while displaying complex convolution effects may improve rendering performance.
- Cached Complexity - Select the complexity level of effects for which object or layer images fill be cached. Caching object and layer images for complex effects may improve rendering performance while interacting with the document.
- Allow Caching - Enable or disable caching of object or layer images, while rendering the document on display.
- Compute Effects - Enable or disable the use of GPU to process image effects.
- Compute Gradient - Enable or disable the use of GPU to render various gradient types.
- Compute Mesh - Enable or disable the use of GPU to render gradient meshes.
- Allow Effects - Enable or disable the rendering of image effects when displaying the document on screen.
- Preview Effects - Enable or disable the rendering of image effects in object previews shown in the Layers and Appearance panels.
- Effects in Fast Preview - Enable or disable the rendering of image effects in the fast preview mode.
