Color Effects
The Color section of the image effect menu, contains various color adjustment effects. These effects modify the colors in the image of an object, using some color adjustment scheme.
The color adjustment effects are well suited to be used as effects for adjustment layers or adjustment objects, as these do not change the geometry of the filtered image.
These effects have no geometric interpretation, and therefore can only be edited using the options from the Image Effects panel or modal editor view.
The color adjustment changes can be controlled using a common fading, provided by the image effect mask settings at the bottom of the Image Effects panel.
Adjust Color
The Adjust Color image effect, adjusts the amounts of individual color channels in the selected color mode. The Adjust Color filter can be used to increase or decrease color component amounts.
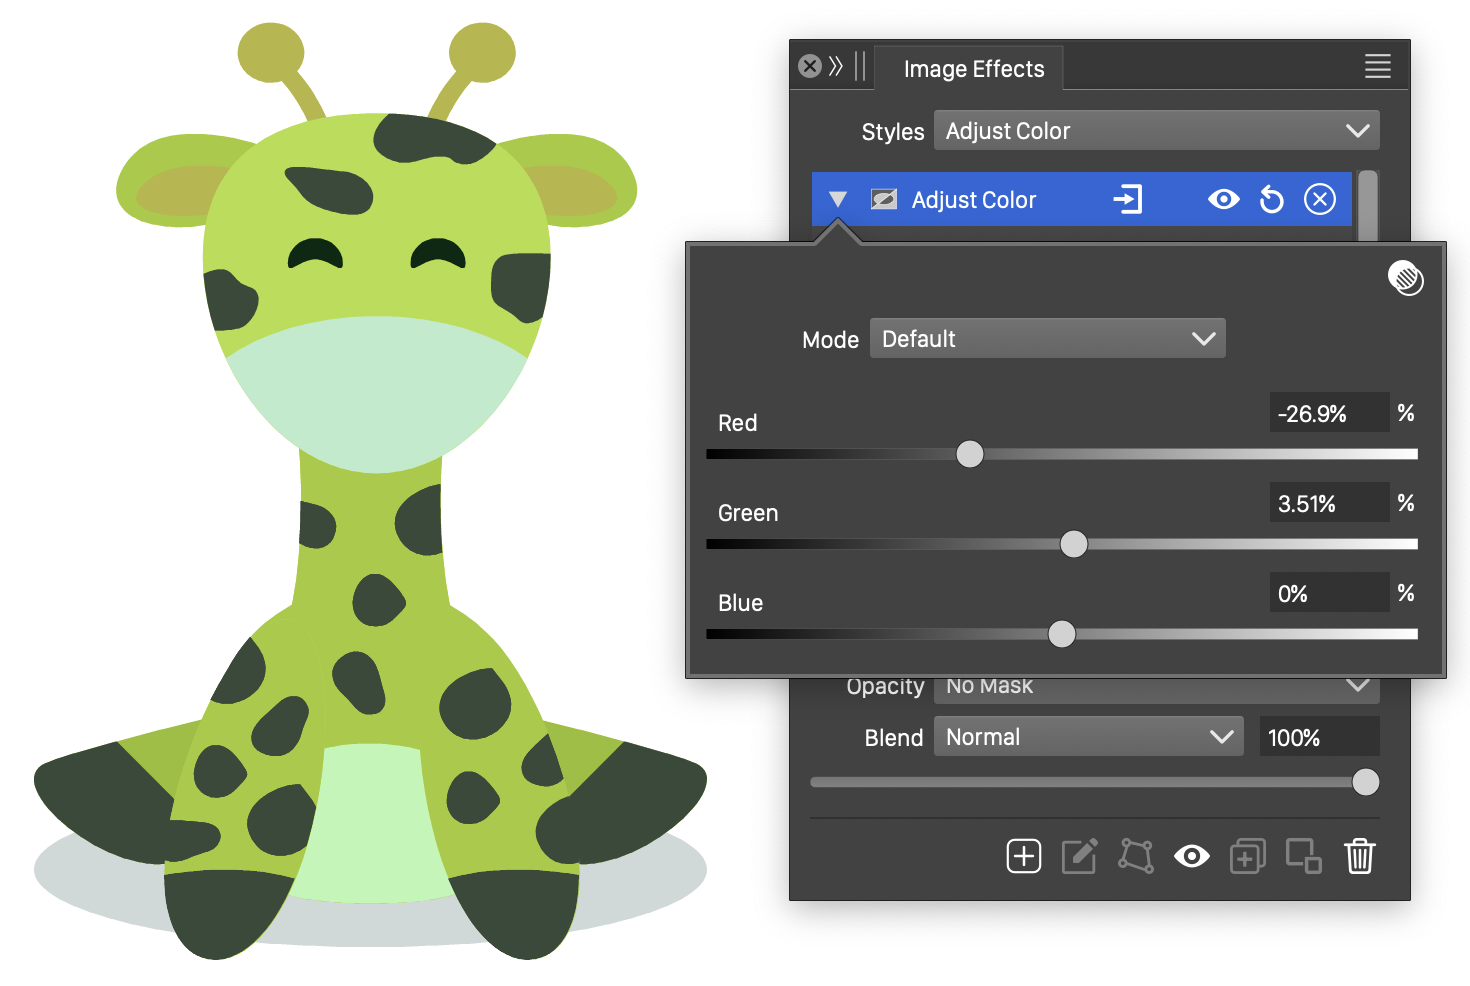
The Adjust Color effect and its options.
The Adjust Color effect uses the following options:
- Mode - Select the color mode used to adjust the color channels.
- The color channels of the selected color mode are shown as sliders and numeric editors. For example, for RGB color mode, the channels are Red, Green and Blue.
- Increase or decrease the color channel amounts using the sliders or the numeric editors.
Adjust Range
The Adjust Range image effect, adjusts colors using various levels of the same adjustment amount, based on the distance and matching to color adjustment nodes. The adjustment nodes are defined at image locations, with a color to search for.
When local adjustments are used, the matching colors in the region closer to the adjustment node are adjusted by larger amounts.
In global adjustment node, the color adjustment depends only on the matching to the reference color.
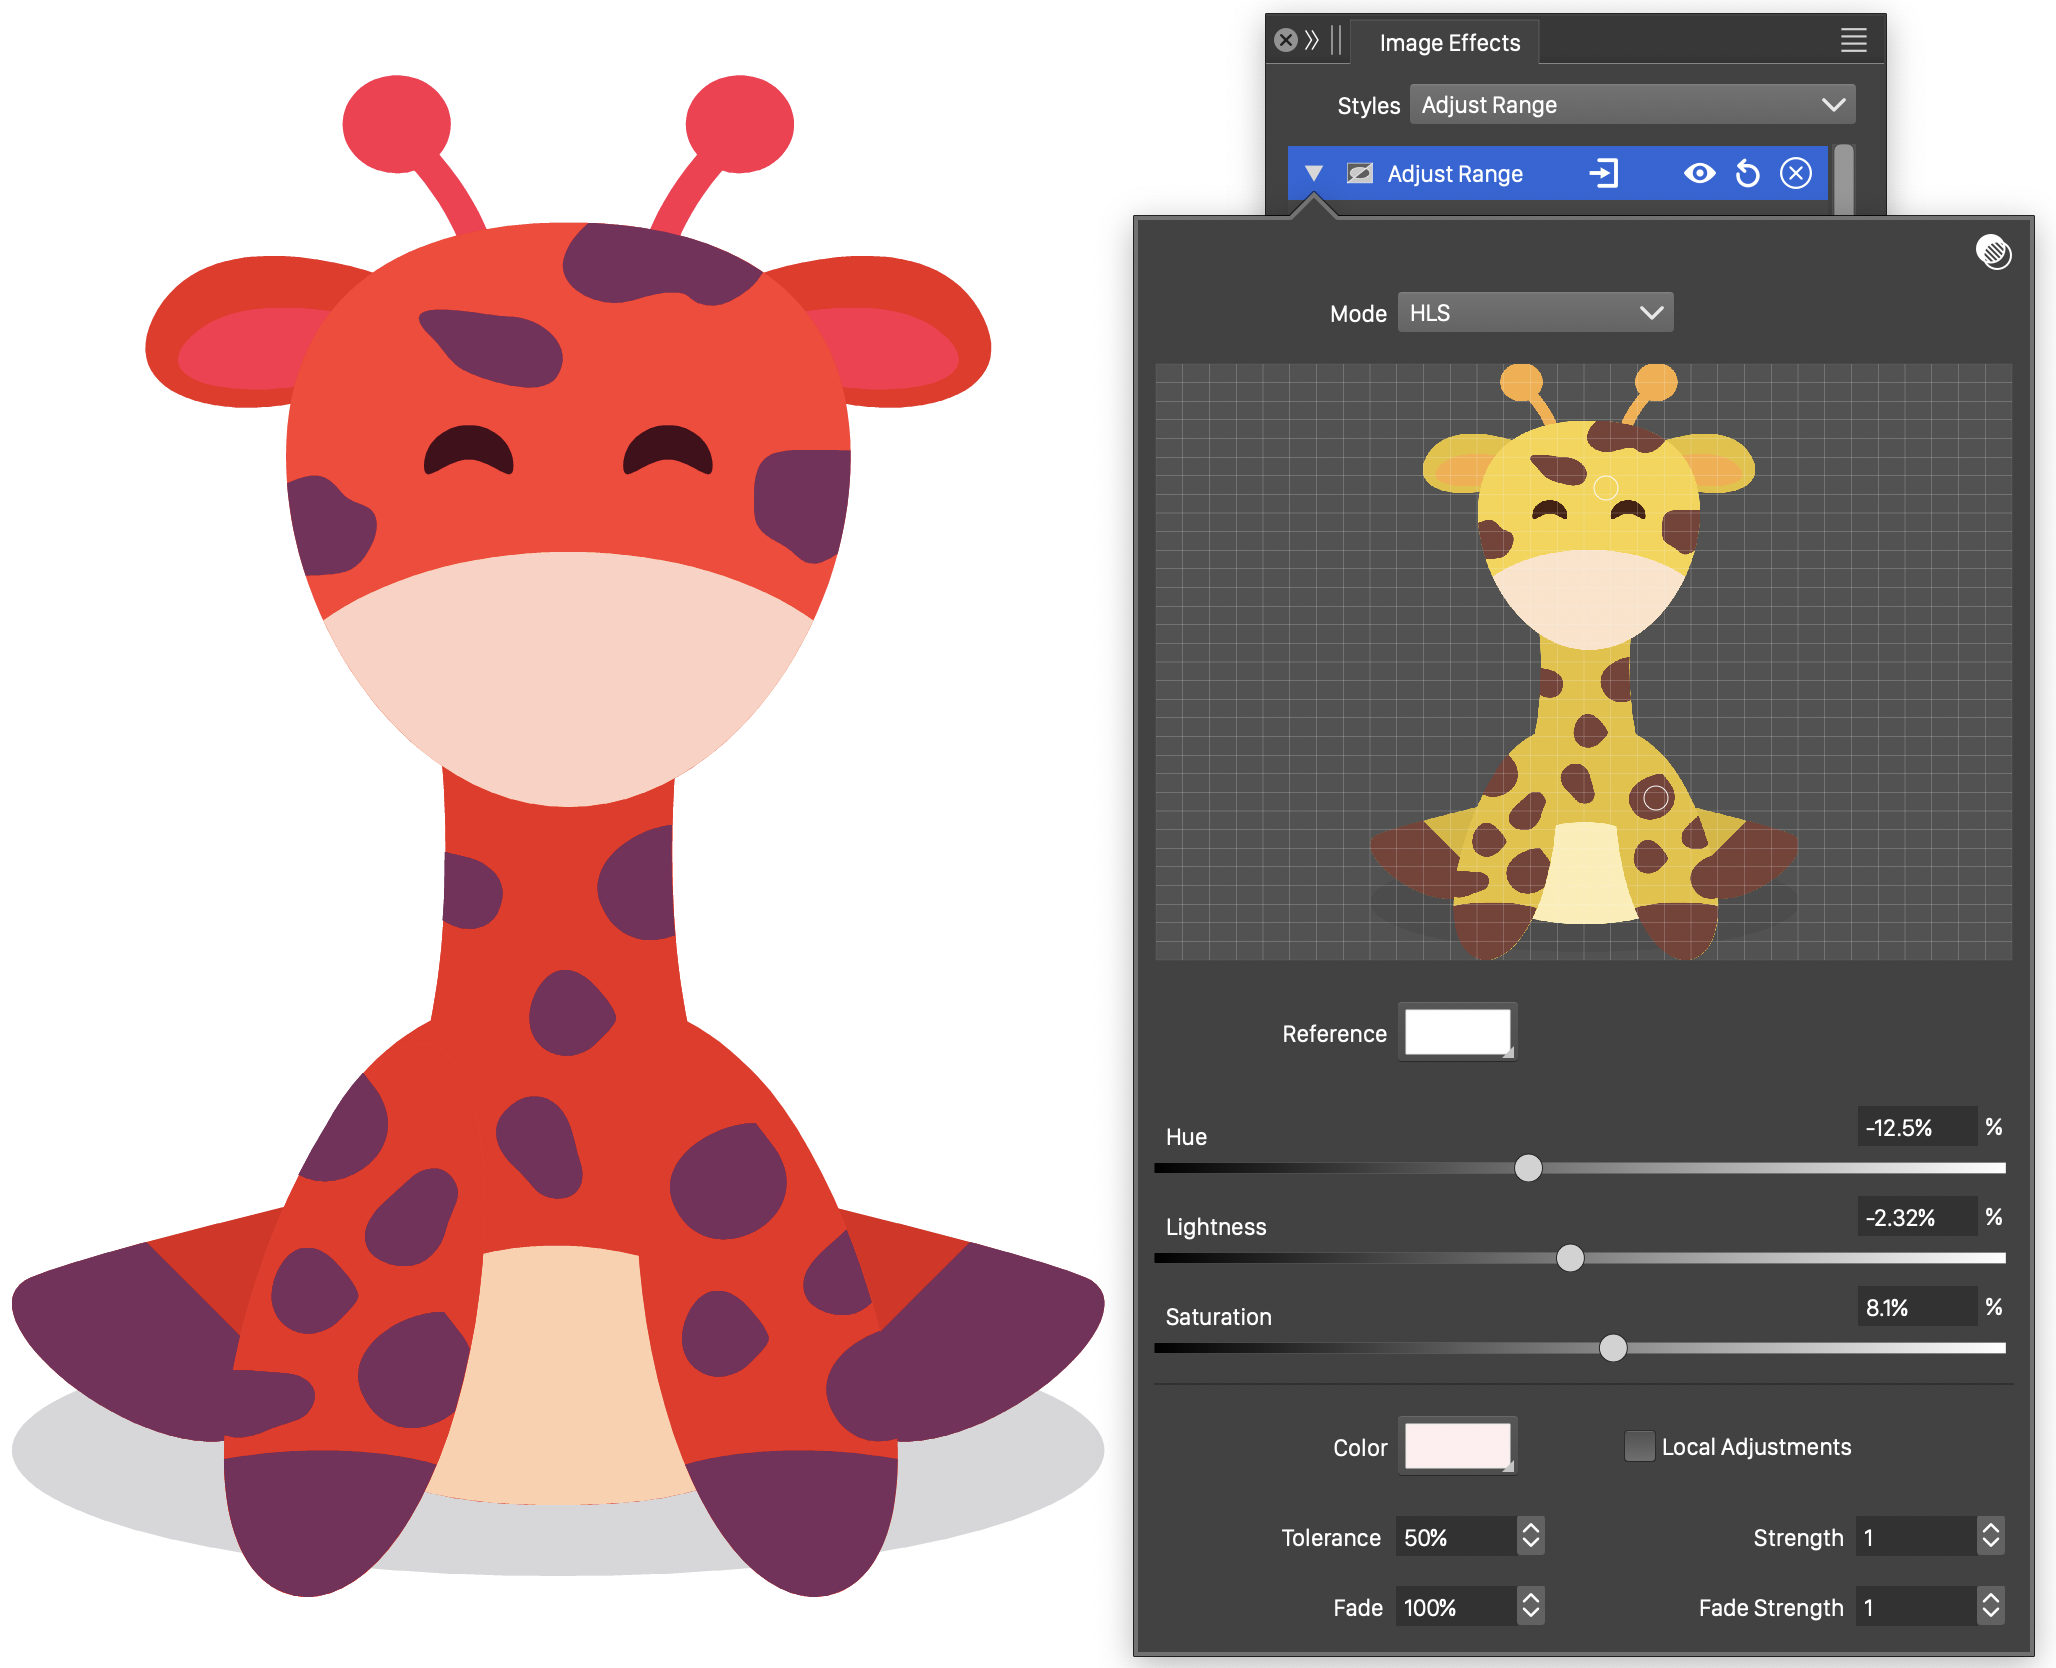
The Adjust Range effect and its options.
- Mode - Select the color mode used to adjust colors. The color adjustment is specified as an adjustment of a matching color. The adjustments are made in the color mode selected by the user.
- The original image of the selected object is displayed in the adjustment color editor region.
- The preview image can be zoomed by holding Option (Mac) or Alt (Windows) and scrolling with the mouse.
- The preview image can be panned by using mouse scrolling.
- Click on a pixel of the image to create an adjustment color node with the color of that pixel.
- Existing adjustment nodes are shown at their position on the image.
- Click on a node to select the node and edit its attributes. The reference and adjustment color values are associated with the selected node. All the options shown below the preview image region are specific to adjustment nodes.
- Move the adjustment node, by clicking and dragging on a node. The location of the adjustment node is important when the Local Adjustment mode is enabled.
- To remove an adjustment node, hold Option (Mac) or Alt (Windows), and click on the node.
- By default, the original or Reference color of the node is the pixel color at the location where the node was created. This can be changed by either moving the node, or selecting a different reference color.
- To set the reference color of the selected node from the image, hold Control and click on a pixel of the image. The image can be zoomed in to find the suitable pixel.
- Reference - Select the reference color to match in the original image.
- Replace - Select the color adjustment at the selected node.
- The color component adjustments (Hue, Lightness, Saturation by default) can be set using the sliders and numeric fields corresponding to the color component names.
- Tolerance - Set the tolerance in matching reference colors in the image. The tolerance is the same for all nodes.
- Strength - Set the strength of color adjustment amounts, used for colors that are different, but close to the reference color under the selected tolerance value.
- Fade - Set the maximum relative distance of the image pixel to a color node, when local adjustments are used. Pixels closer than this distance may be adjusted if they have a matching color. The adjustment strength depends on the distance.
- Fade Strength - Set the distance based adjustment strength, of the selected adjustment node.
- Local Adjustments - Enable or disable local color adjustments. When disabled, the color adjustment strengths are determined only by the closeness of the matching color, and are the same throughout the image. When enabled, the color adjustment strengths are determined also by the distance of the adjusted pixel from the color node.
Black and White
The Black and White image effect, converts the colors to a monochrome tone (black by default), using weights of various primary colors in the selected color mode. The Black and White filter can be used to create monochromatic renderings of color objects and images, using colors or gradients.
The color tone, is determined by the amount of Red, Green, Blue, Cyan, Magenta and Yellow tone of the colors. These color amounts participate on the resulting tone with a user selected weight.
The resulting tone is then converted to a monochrome gray tone, or to shades of a color or a gradient.
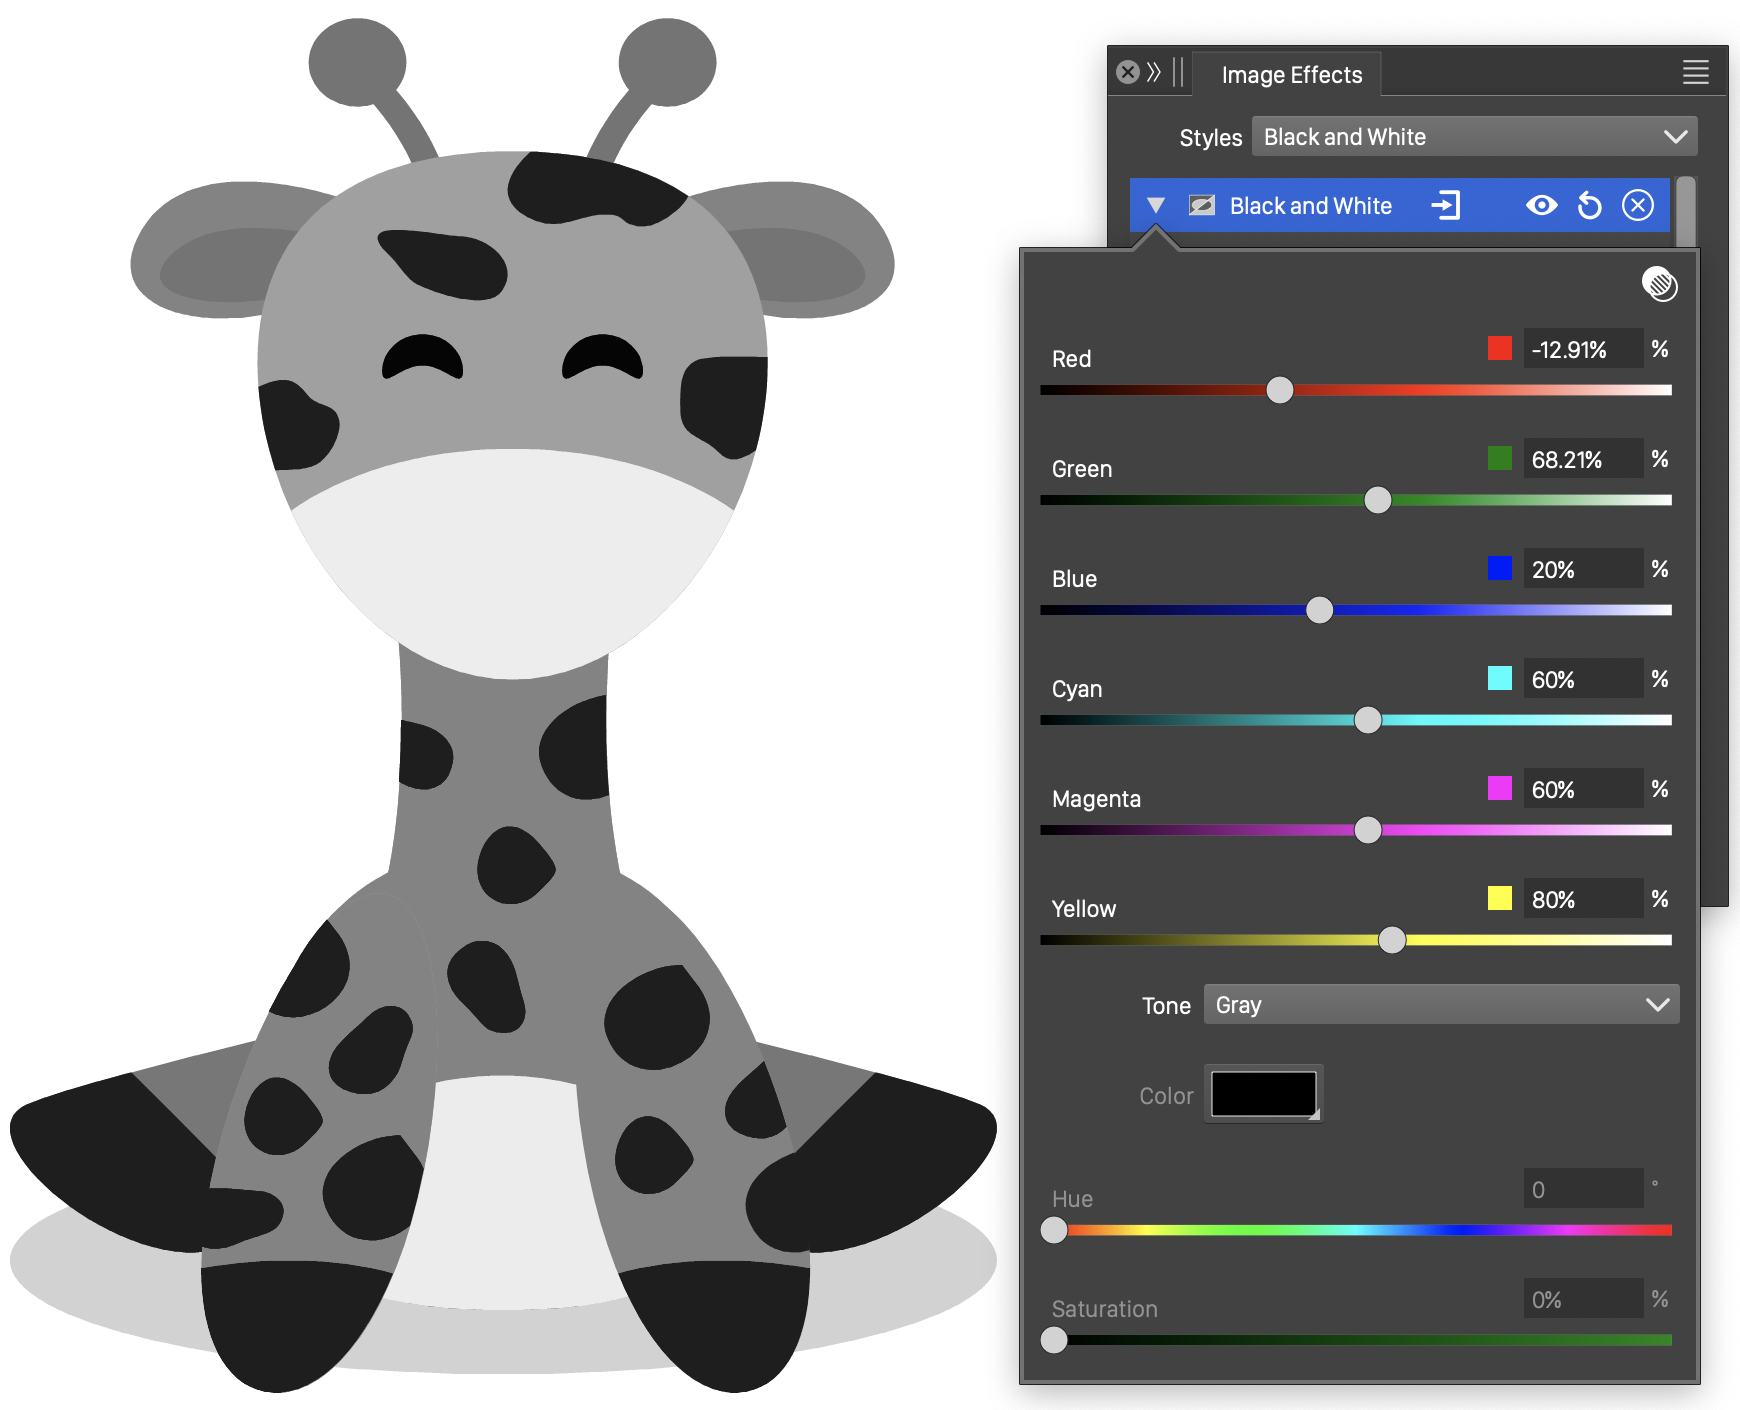
The Bland and White effect and its options.
The Black and White effect uses the following options:
- Red - Edit the weight of the Red color in the resulting tone.
- Green - Edit the weight of the Green color in the resulting tone.
- Blue - Edit the weight of the Blue color in the resulting tone.
- Cyan - Edit the weight of the Cyan color in the resulting tone.
- Magenta - Edit the weight of the Magenta color in the resulting tone.
- Yellow - Edit the weight of the Yellow color in the resulting tone.
- Tone - Select the tone conversion mode:
- None - Creates shades of gray tones in the RGB color mode.
- Gray - Creates shades of gray tones in the Gray color mode.
- Color - Creates shades of a color, converting the resulting color to the RGB color mode. The color can be selected in the Color field, or the Hue and Saturation fields.
- Gradient - Creates color shades from a gradient color transition. The gradient color can be selected in the Gradient field, or directly edited in the gradient slider.
- Color - Select the color tone from the color selector view, when the tone mode is set to Color.
- Hue - Edit the hue of the color tone, when the tone mode is set to Color.
- Saturation - Edit the saturation of the color tone, when the tone mode is set to Color.
- Gradient - Select the gradient color, from the list of existing gradient color presets and styles. Available, when the tone mode is set to Gradient.
Channel Mixer
The Channel Mixer image effect, maps the colors to a target color mode, from a source color mode, by using parts of the source color channels, to set the target color mode channels.
Each color channel of the source color mode can partially contribute to a target color mode channel. The amount of these contributions are set by the user, for each combination of target and source color mode channels. The contrast of the color in the source color mode can also contribute to the color channels in the target color mode.
Alternatively, it is possible to mix the colors into tones of a single color, or colors from a gradient transition, using the Tone option.
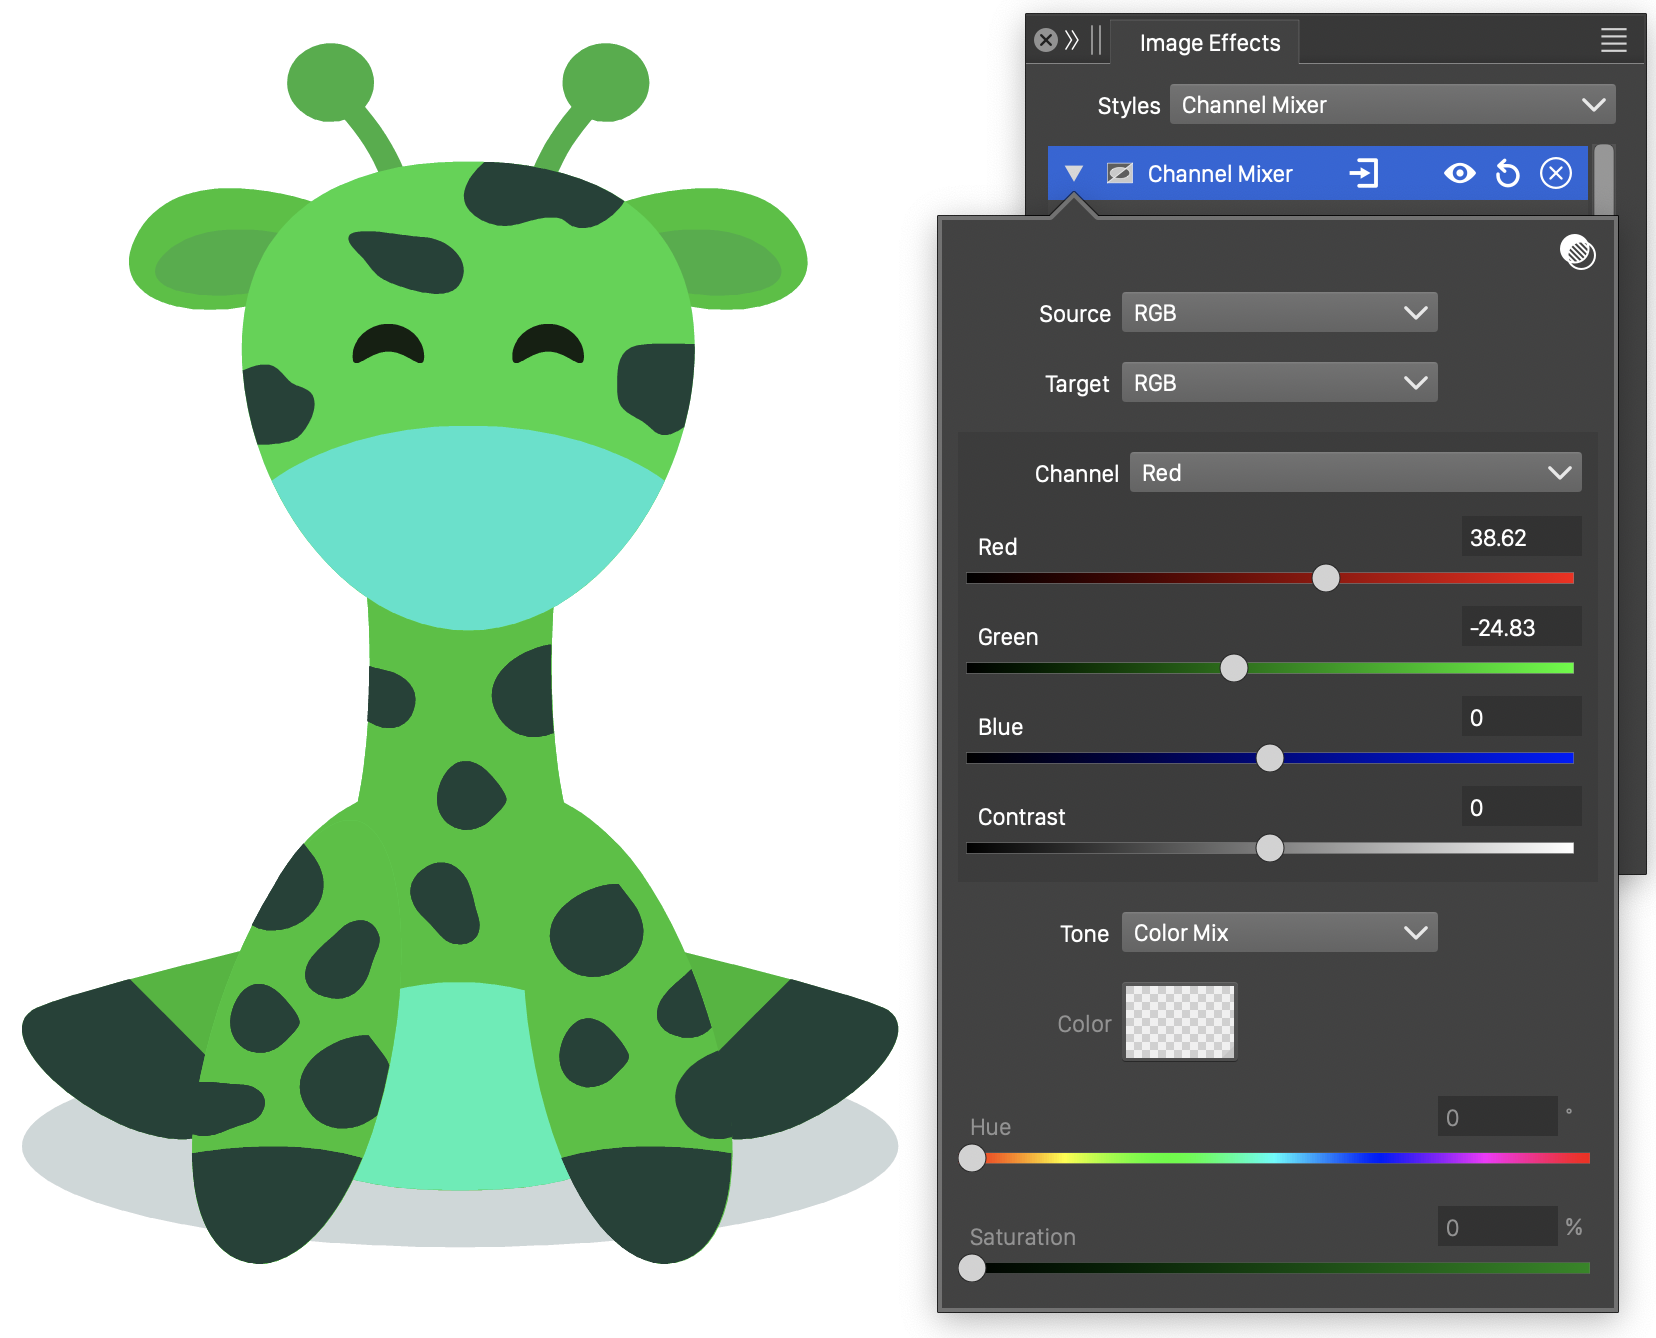
The Channel Mixer effect and its options.
The Channel Mixer effect uses the following options:
- Source - Select the source color mode. Colors are first converted to this color mode, and then the color channel amounts are used to calculate the target color mode channels.
- Target - Select the target color mode. The color channel amounts of the target color mode are calculated from the source color mode channels.
- Channel - Select a color channel from the target color mode, to set the source color channel amounts.
- The sliders and editors with the source color channel names (for example Red, Green and Blue) edit the amounts of the source color channels used in the selected target color channel.
- Contrast - Set the contrast amount used in the selected target color channel.
- Tone - Select the color mixing mode:
- Color Mix - Create a color mix, by setting the target color mode channels from the source color mode channels, using the specified amounts.
- Color Tone - Create tones of a selected color. The color can be selected in the Color field. The tone of the color is calculated from the source color channels.
- Gradient - Select colors from a gradient transition.
- Color - Select the color used in the Color Tone mode.
- Hue - Select the hue amount of the color used in the Color Tone mode.
- Saturation - Select the saturation amount of the color used in the Color Tone mode.
- Gradient - Select the gradient used in the Gradient tone mode.
Color Balance
The Color Balance image effect, changes the color component amounts in a selected color mode, to adjust the balance individual color channels.
For each color channel of the selected color mode, the Shadows, Midtones and Highlights are adjusted by the user specified amounts.
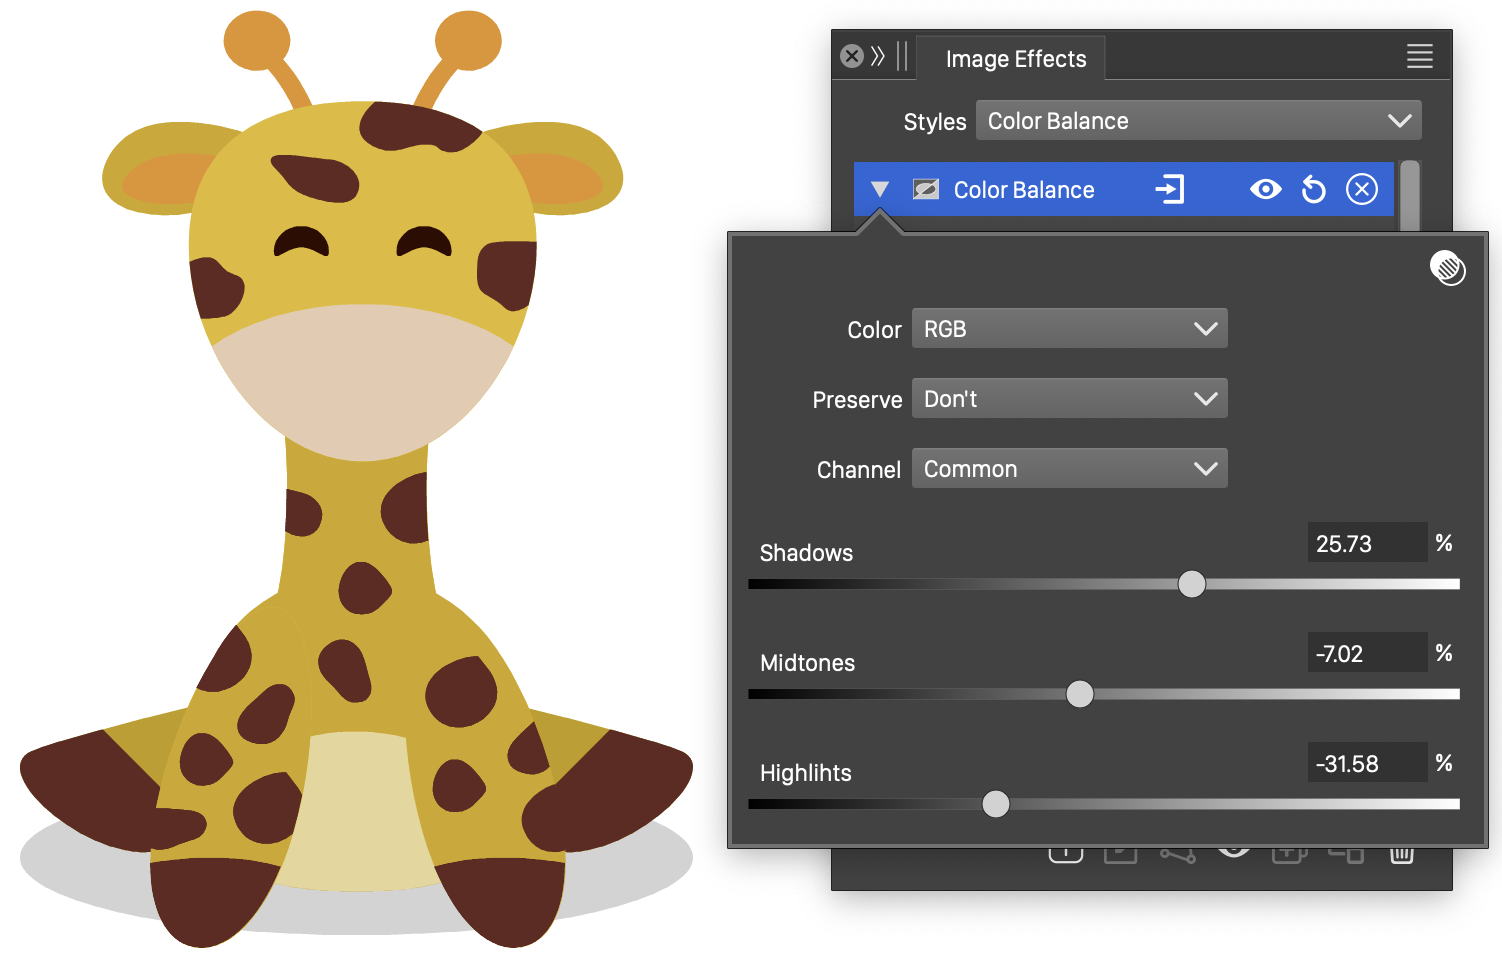
The Color Balance effect and its options.
The Color Balance effect uses the following options:
- Mode - Select the color mode used in balancing the color components. The default color mode is the document color mode.
- Channel - Select the color channel of the current color mode, to make the tonal range adjustments.
- Highlights - Adjust the high tone ranges. The interpretation of a color tone depends on the selected color mode.
- Midtones - Adjust the medium tone ranges.
- Shadows - Adjust the low tone ranges.
- Preserve Luminosity - Select the color luminosity preservation mode. The luminosity is either not preserved (Don’t) or a color mode with a luminosity component is used to keep the luminosity channel unchanged.
Color Map
The Color Map image effect, converts the colors into tones from a gradient, by using the color component amounts in a selected color mode to calculate a single color tone value.
The color tone, is determined by the color component amounts in the selected source color mode, with each component participating in the resulting tome with a user selected weight.
The resulting tone is then converted to a color into the target color mode, by using the tone as a position in a gradient color transition.
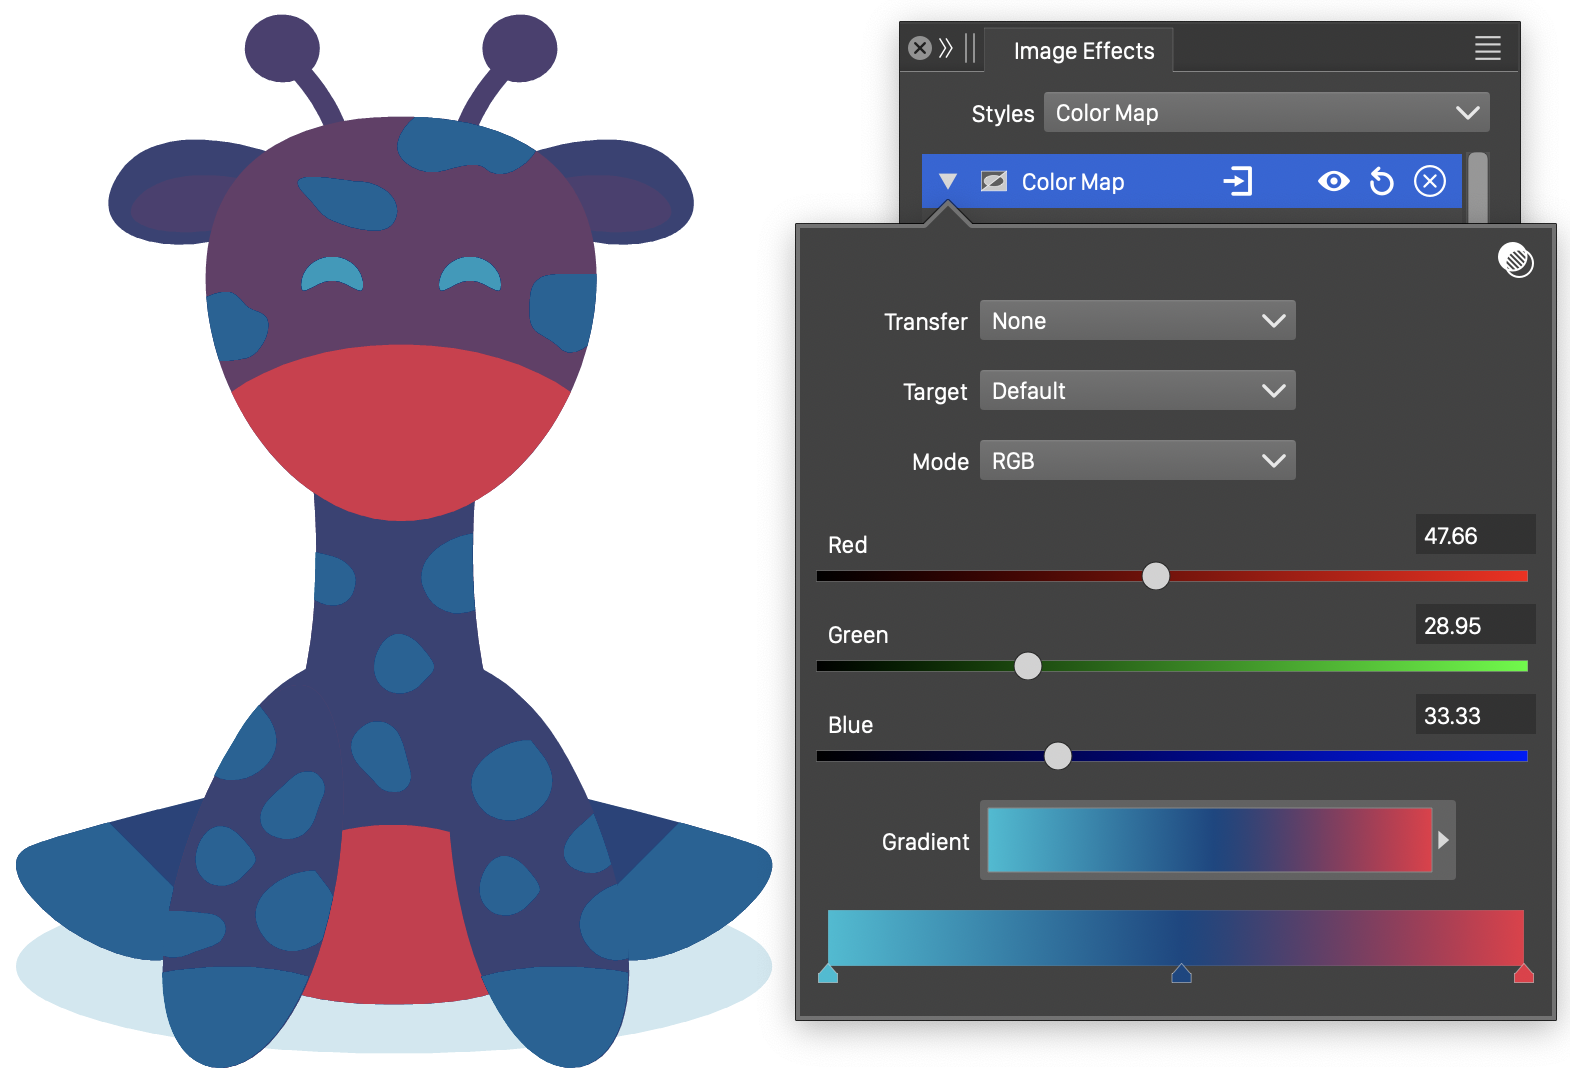
The Color Map effect and its options.
- Source - Select the source color mode. The filter colors are converted to the source color mode, and the color channels in the source color mode are used to calculate the resulting tone.
- Edit the color channel contribution to the final tone, in the sliders and editors named by the source color mode channels. The number and name of these sliders and editors depend on the selected source color mode.
- Target - Select the target color mode. The gradient transition is calculated in the target color mode.
- Gradient - Select the gradient from the list of existing gradient presets and styles. The gradient color stops and colors can be edited in the gradient slider.
Contrast
The Contrast color image effect is used to adjust the brightness and the contrast of colors in the image of a rendered object, using a selected color mode.
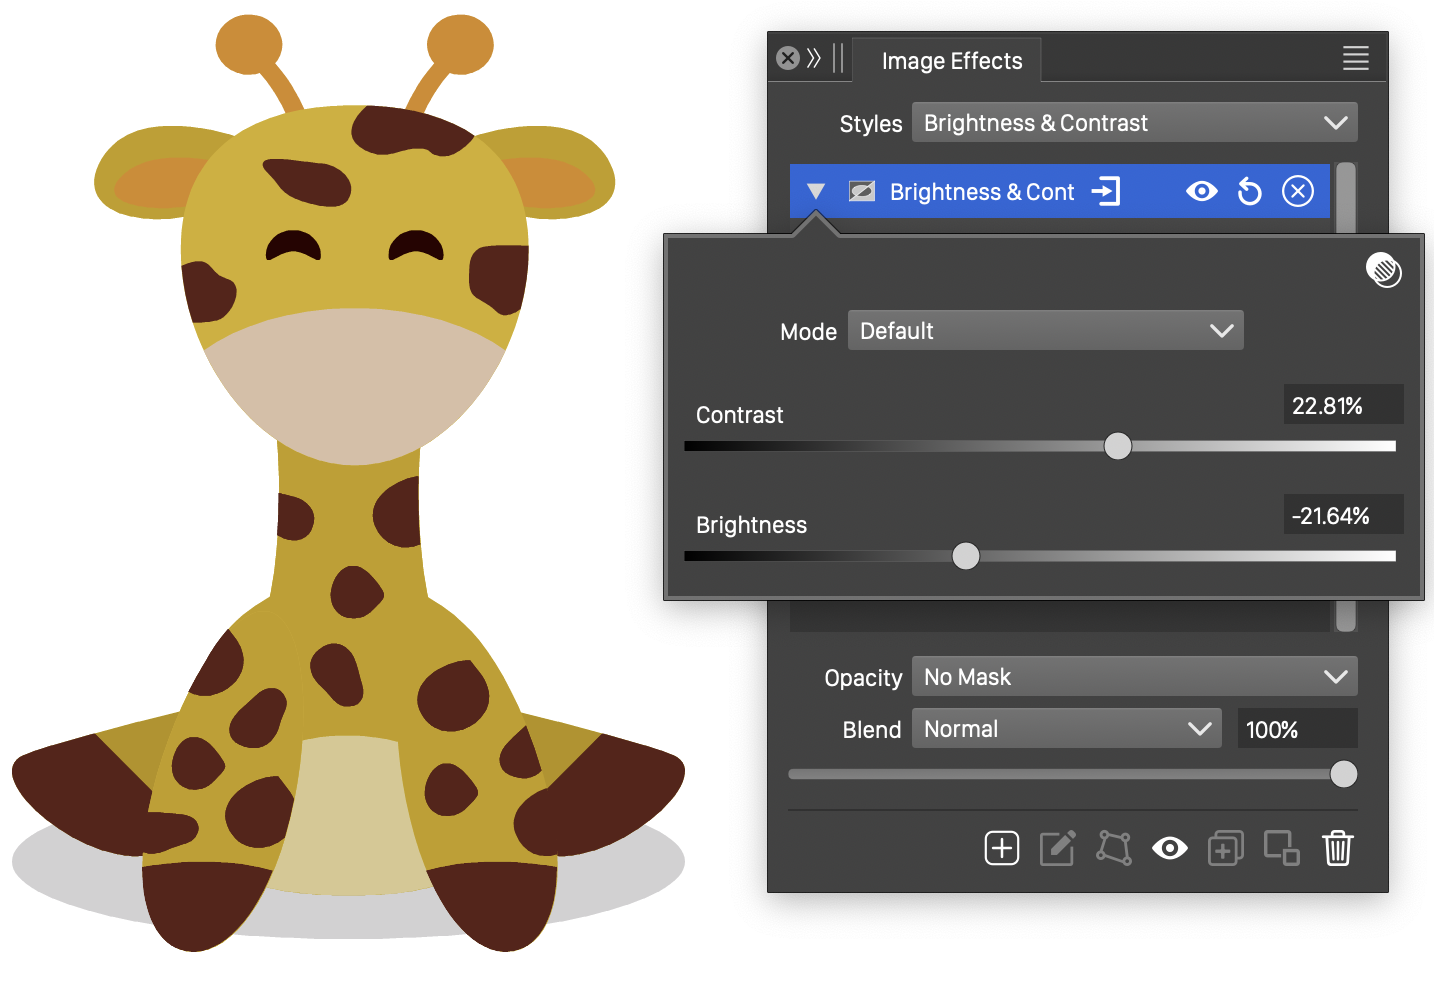
The Contrast effect and its options.
- Color Mode - Opens a list of color modes, used to make the color adjustment. Adjusted colors are converted to the selected color mode, before the adjustment is applied. The image is then converted back to the rendering color mode.
- Contrast - Increase or decrease the contrast of the colors.
- Brightness - Increase or decrease the brightness of the colors.
Curves
The Curves image effect, is used to adjust the individual color channels in a color mode, by user defined curves. The adjustment is applied to each color channel separately.
The curve of the adjustment determines how to change a color component. The adjustment curve can be interactively edited by the user, in the curve viewing area.
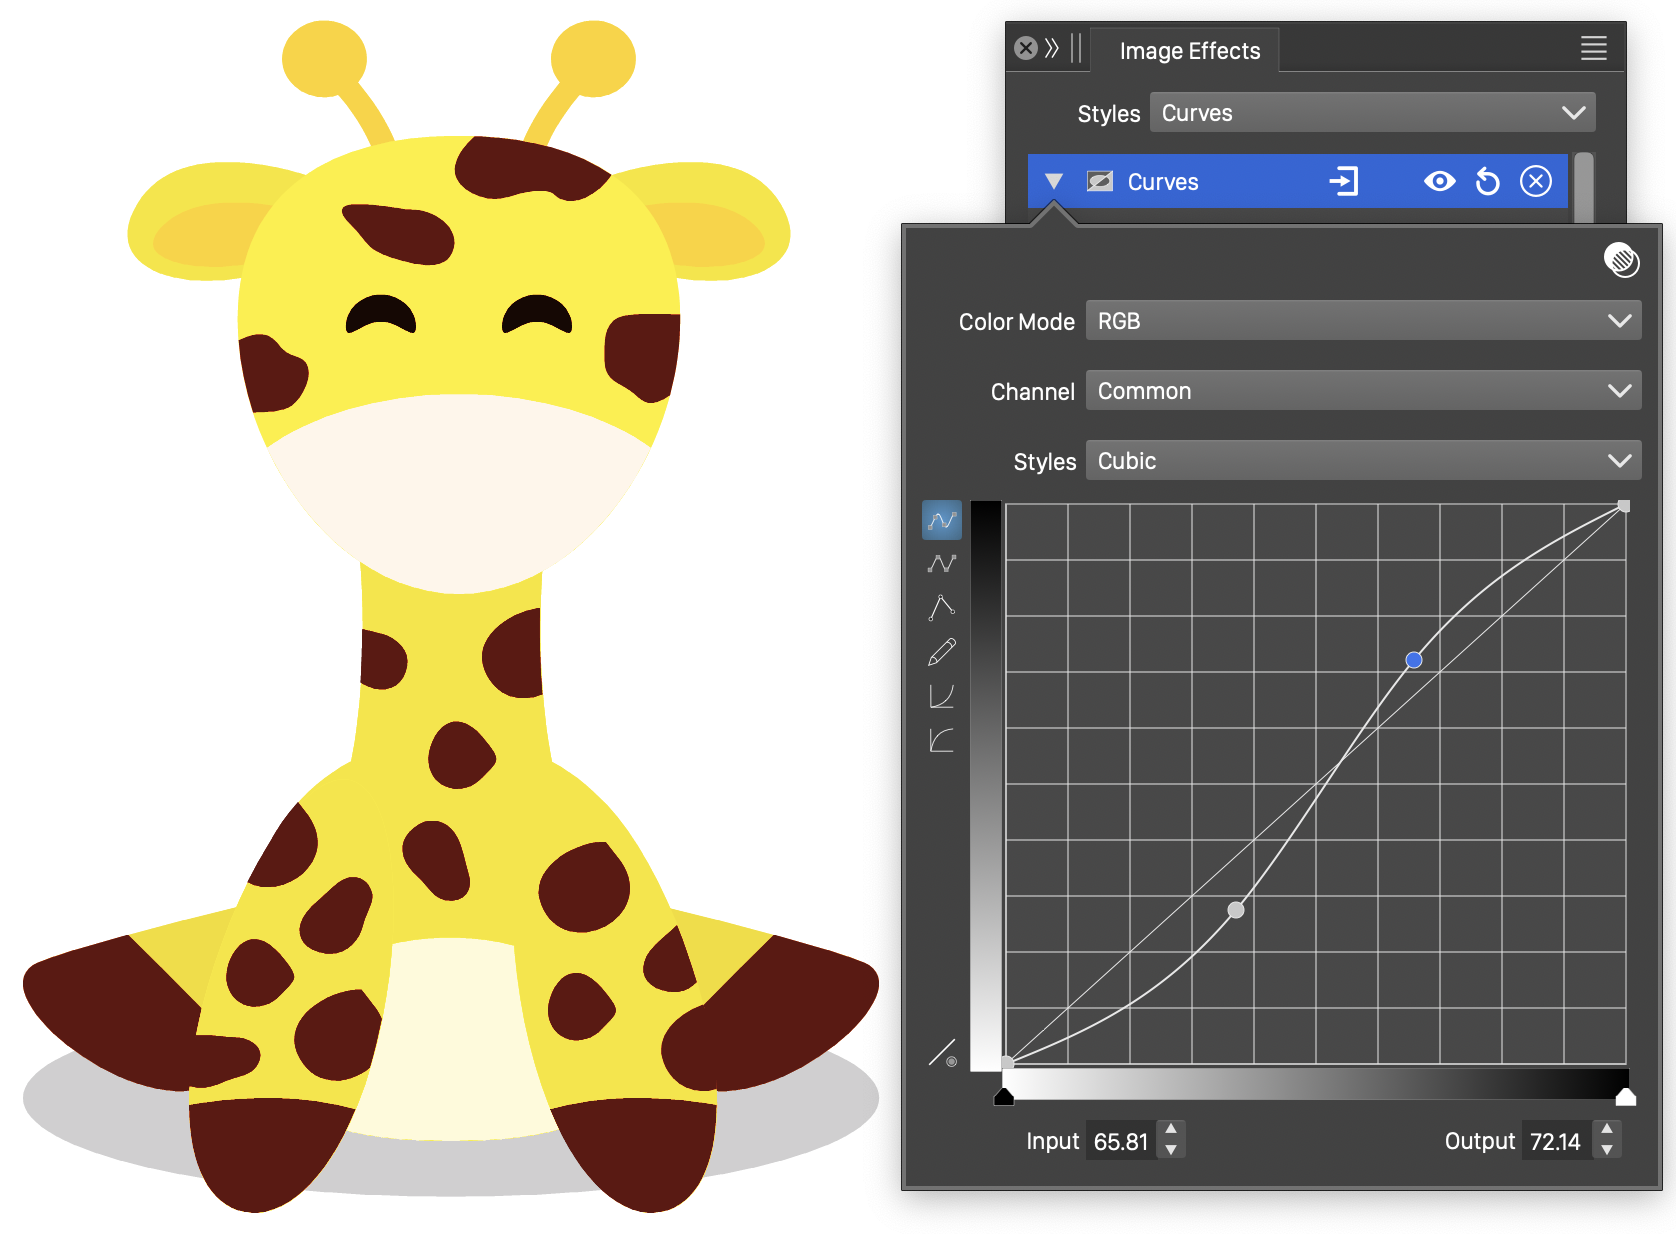
The Curves effect and its options.
- Color Mode - Select the color mode used to make the color component adjustments. Colors of the image are converted into the selected color mode and the adjustments are made on the color channels in this mode.
- Channel - Select the current color channel, to edit the adjustment curve for that channel. Selecting the color mode name will edit an adjustment curve for all channels.
- Styles - Select a function style or preset, used to make the color adjustments. New function styles and presets can be created by saving the current function as a style (Create Style) or as a preset (Create Preset)
- The adjustment curve is edited interactively in the curve preview region, by dragging a location of the curve with the mouse.
- The adjustment curve editing mode can be:
 - Cubic curve, adjusted by modifying a few locations along the curve. Cubic curves may overshoot between two locations.
 - Monotone cubic curve, between locations selected by the user. Monotone cubic curves will not overshot between two locations.
 - Color adjustment using a sequence of lines.
 - Freely drawn curve. This mode allows the drawing of an arbitrary color adjustment curve.
 - Select gamma adjustment curve. Tones are adjusted using a uniform speed of variation.
 - Select reverse gamma adjustment curve. Tones are adjusted using a uniform speed of variation.
 - Restore the edited curve to the identity state.
- The triangular sliders, at the bottom of the adjustment curve region, are used to adjust the input interval of the color channels. Color channel values outside of this interval will not be modified.
Exposure
The Exposure color image effect adjusts the color exposure of the object image.
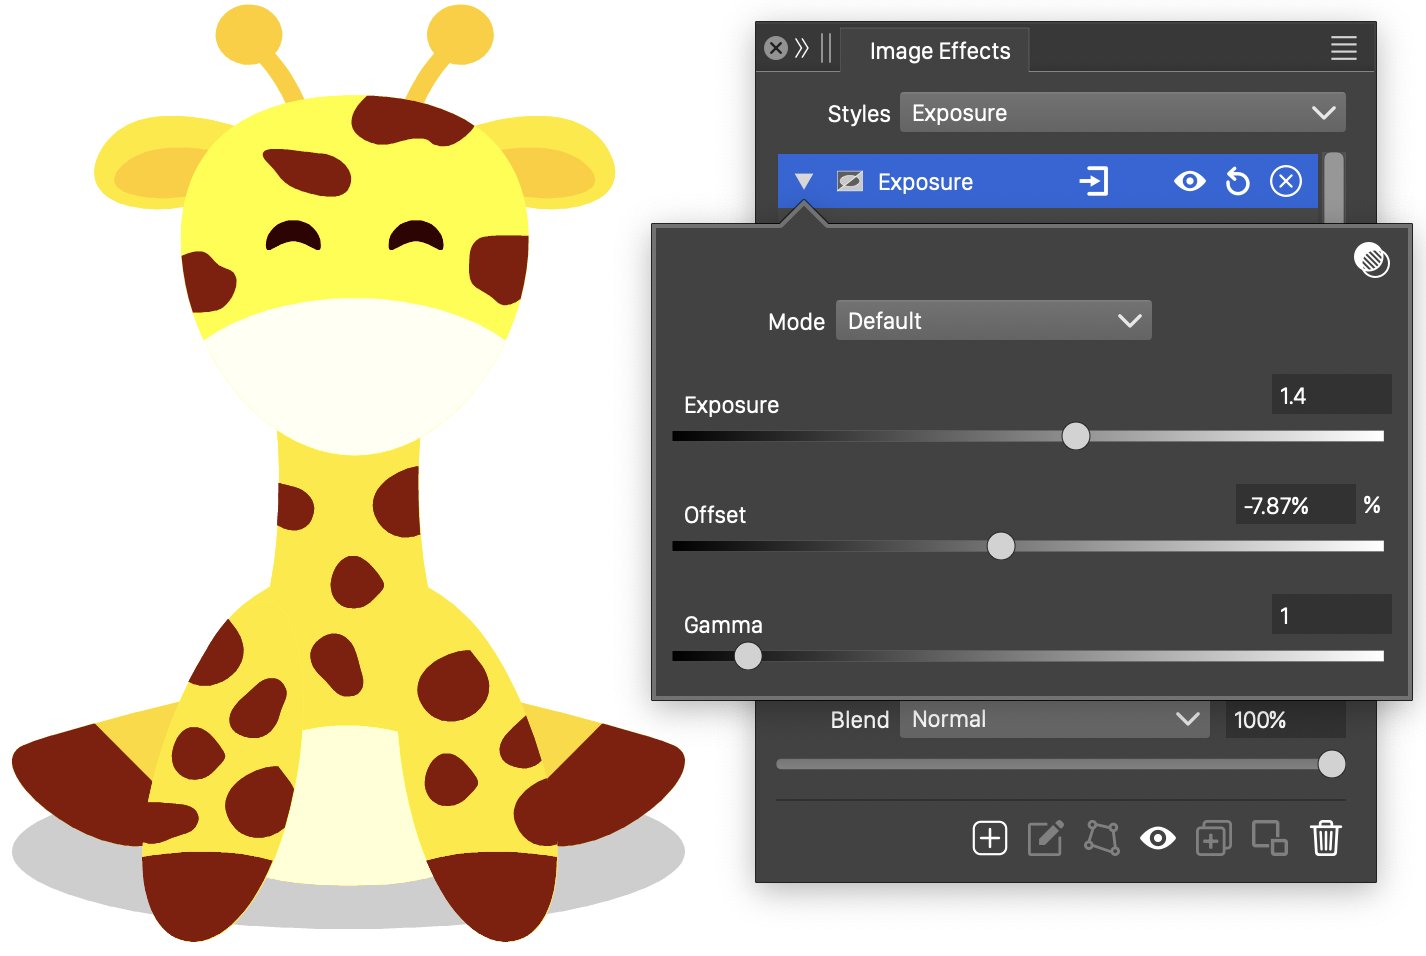
The Exposure effect and its options.
- Mode - Opens a list of color modes, used to make the color adjustment. Adjusted colors are converted to the selected color mode, before the exposure adjustment is applied. The image is then converted back to the rendering color mode.
- Exposure - Increase or decrease the exposure of the colors.
- Offset - Shift the color component values.
- Gamma - Adjust the color exposure variation.
Hue Adjustments
The Hue Adjustments image effect, adjusts hue, saturation and lightness of multiple color ranges, selected by their hue value.
The hue of the adjusted color is used to select a user defined adjustment interval. The adjustment interval determines the amount of adjustments made on the hue, saturation and lightness channels of the filtered color.
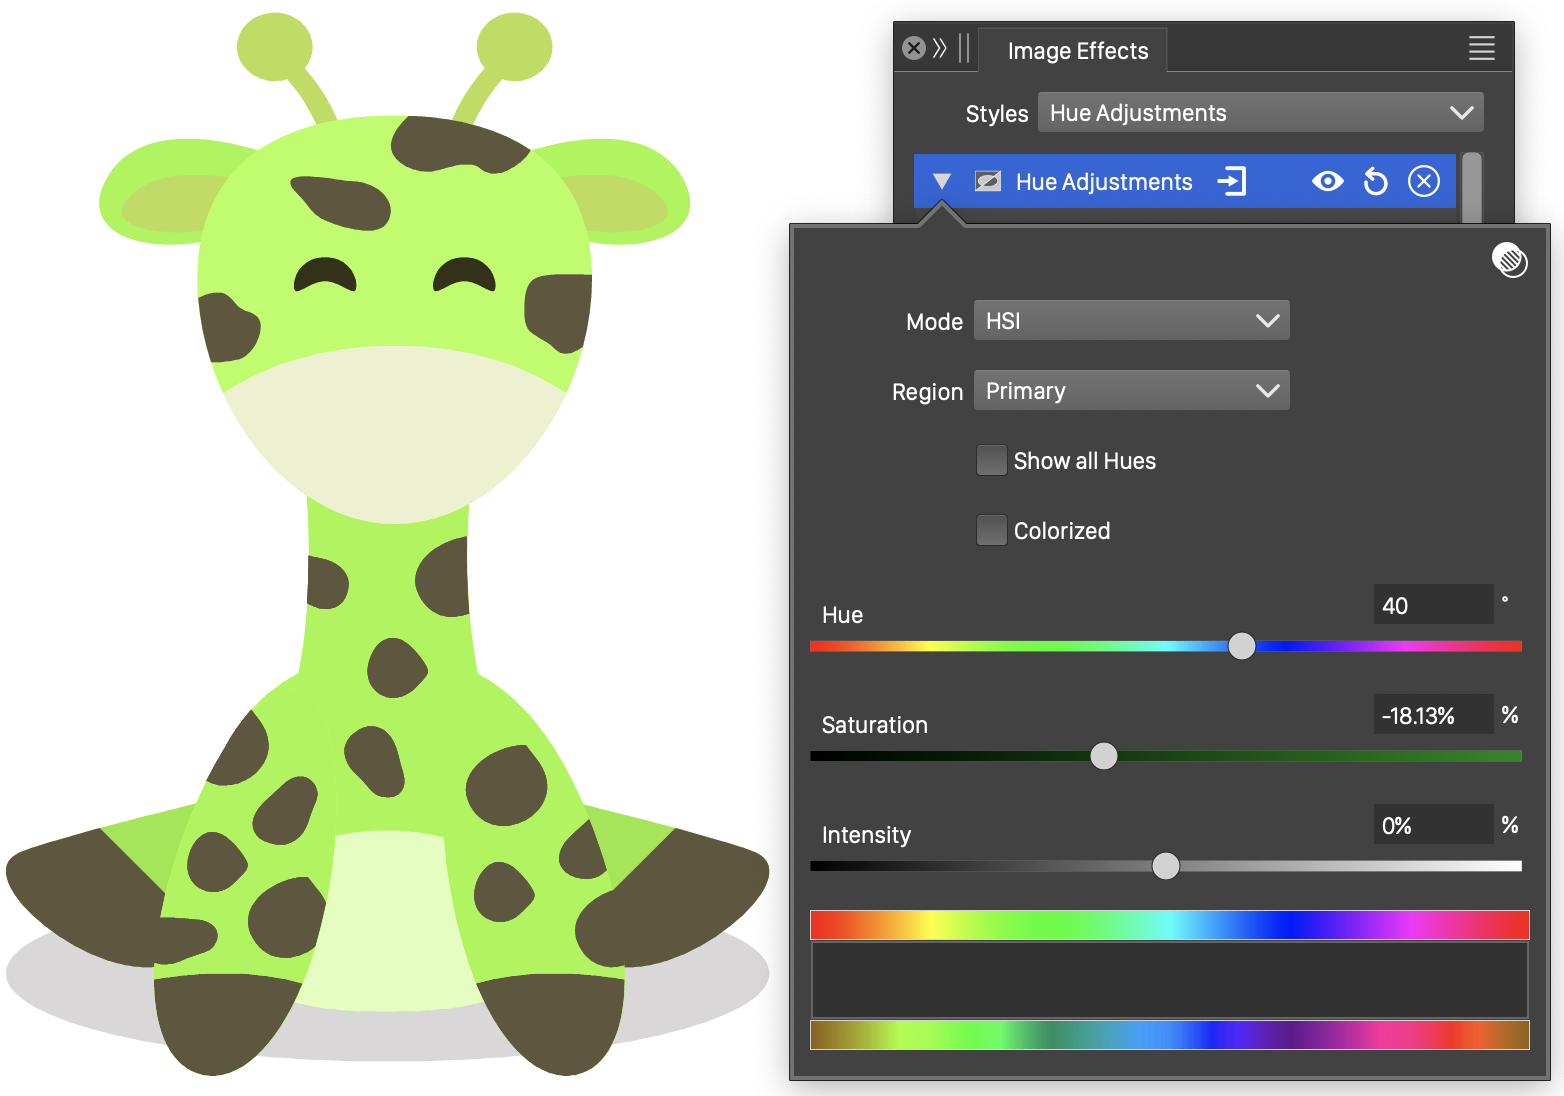
The Hue Adjustments effect and its options.
- Mode - Select the color mode containing a hue space. The color adjustment is made in the selected color mode.
- Region - Select the color region to adjust hue values.
- Show All Hues - Show all or a single hue adjustment in the hue adjustment editor.
- Colorize - Set the hue and saturation of the color to the selected Hue and Saturation amounts and only adjust the luminosity component.
- Hue - Set the hue adjustment amount for the selected interval.
- Saturation - Set the saturation adjustment amount for the selected interval.
- Lightness - Set the lightness adjustment amount for the selected interval. The name of the adjusted color channels depends on the selected color mode.
- The color adjustment intervals are created and selected in the hue adjustment editor, consisting of the original and adjusted hue tones and a region to preview the intervals. The hue adjustment editor is active only when the Colorize mode is disabled.
- Double click inside the hue adjustment region to create a new interval.
- Click and drag an adjustment interval from its inner region.
- Adjust the fade out margins, by clicking and dragging on the margins of the interval.
- Adjust the interval side, by clicking and dragging inside an interval margin.
- To remove an adjustment interval, drag the interval outside of the hue adjustment region.
Invert Color
The Invert Color image effect, inverts the image colors using the selected color mode.
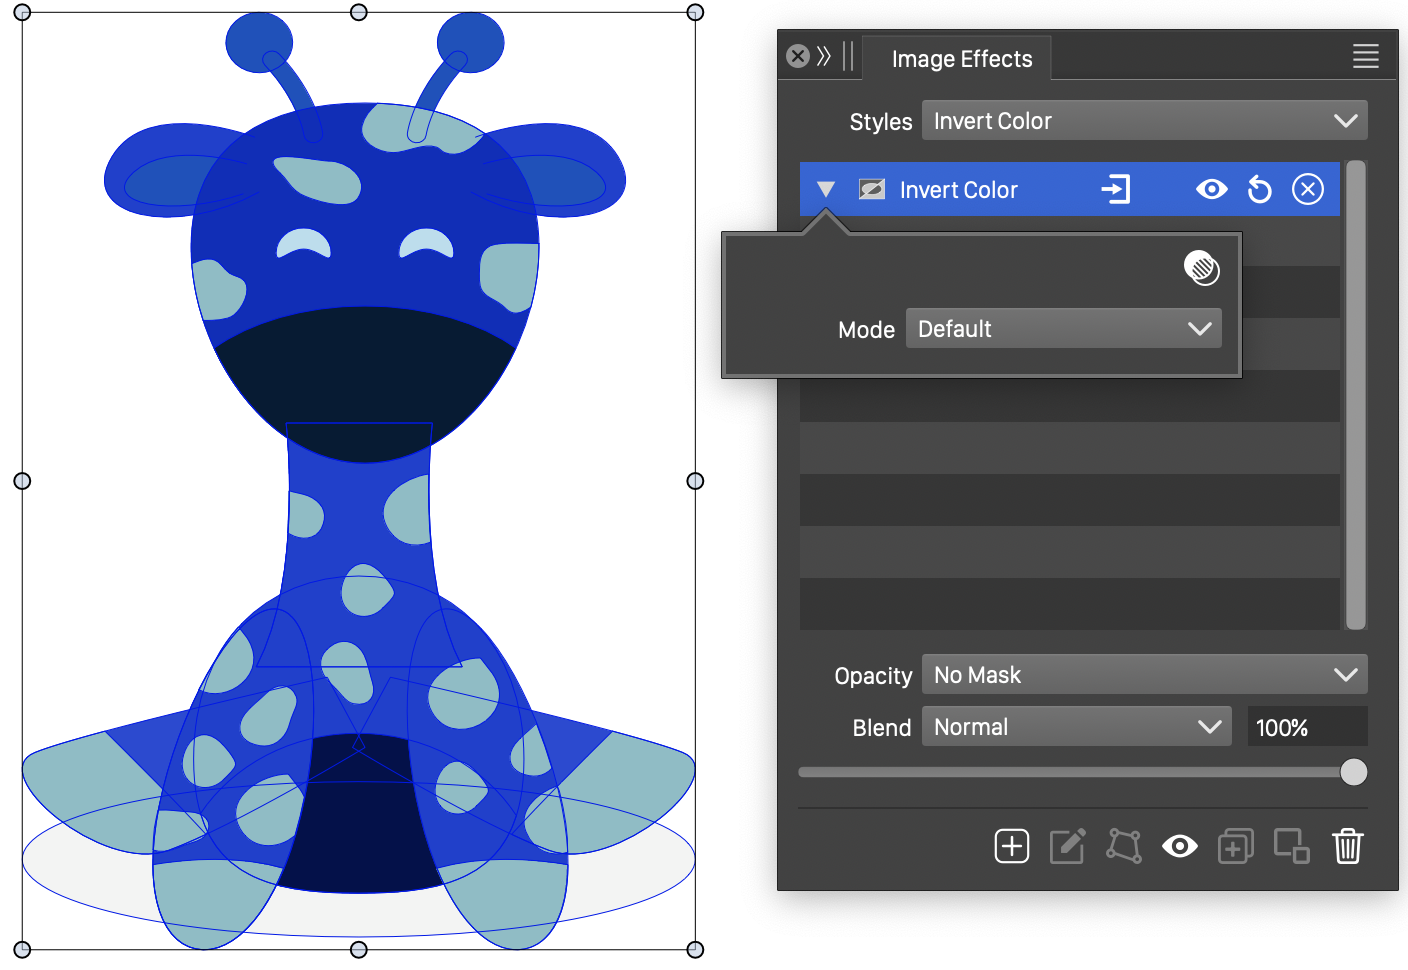
The Invert effect and its options.
- Mode - Select the color mode used to invert the color component values.
Levels
The Levels image effect, is used to adjust individual color channels, in a color mode, by mapping low and high intensity tones to new tones, and by increasing or decreasing the transition of tones between.
The resulting adjustment is similar to the Curves color filter, but with a restricted and more specific adjustment of color tone transitions.
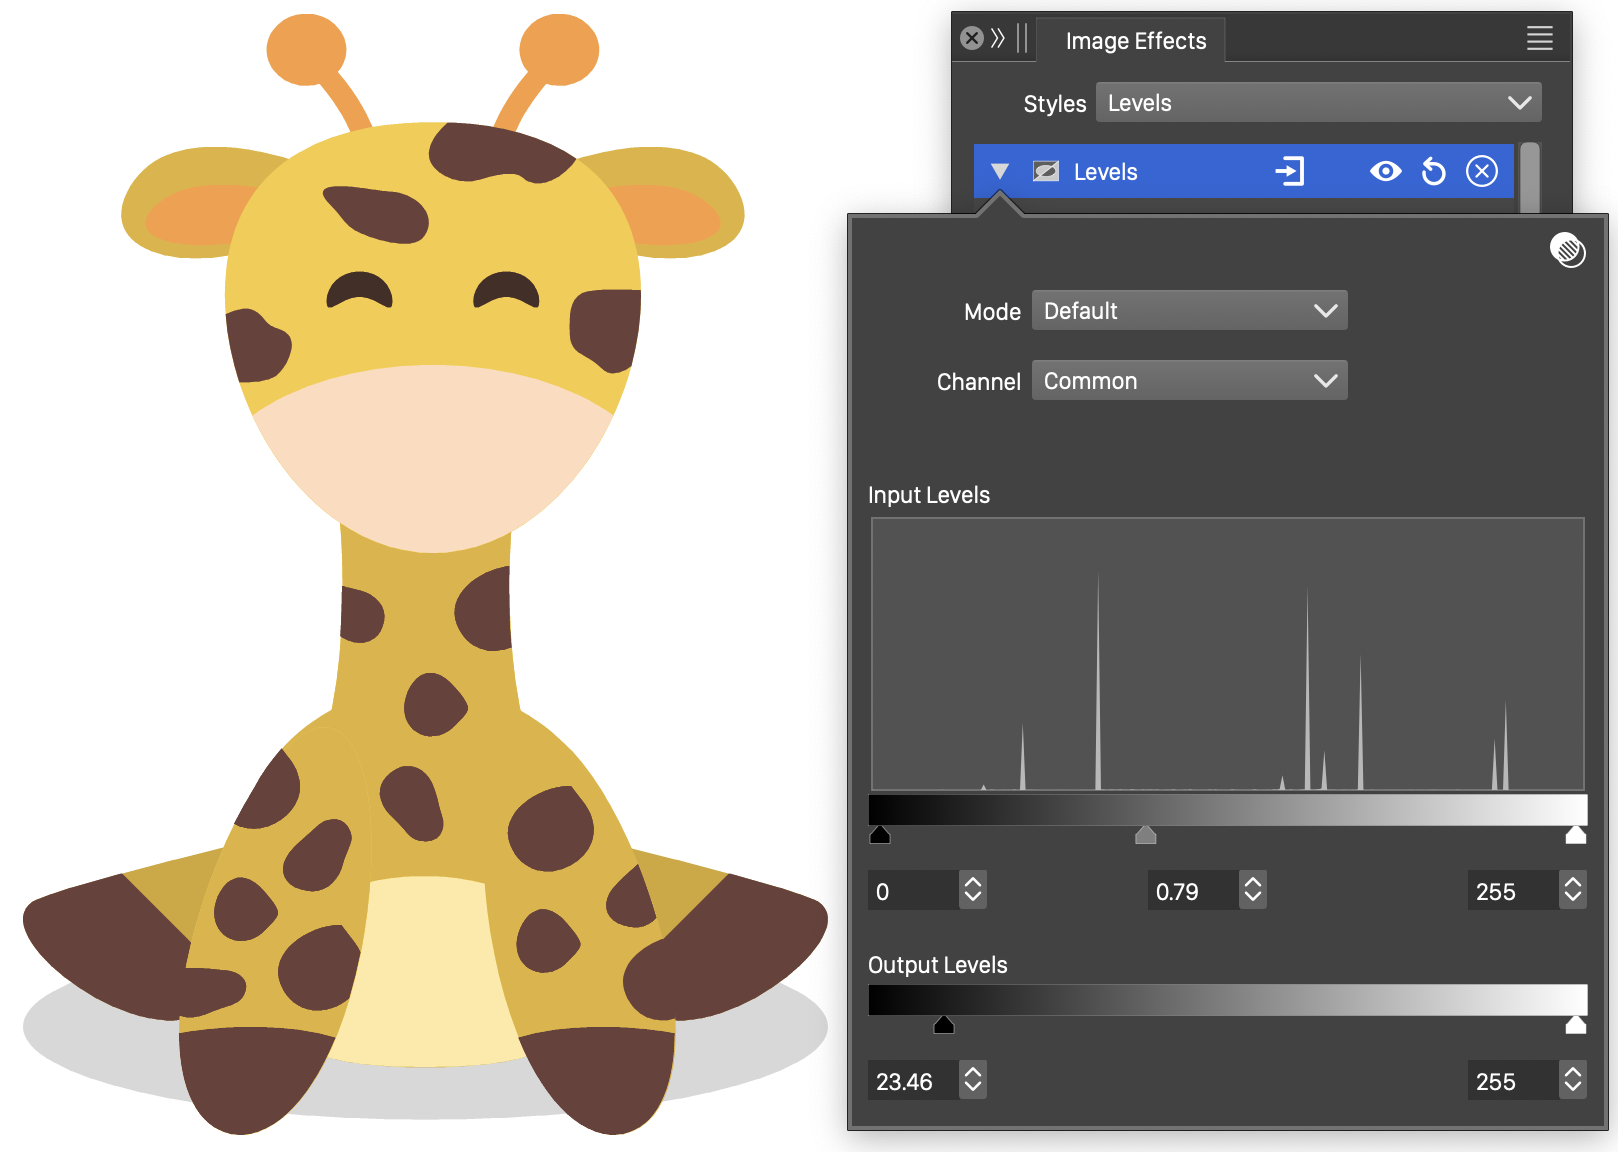
The Levels effect and its options.
- Mode - Select the color mode used to adjust the color components.
- Channel - Select the current color channel, to edit the adjustment of levels for that channel. Selecting the color mode name will edit the color level adjustment for all channels.
- Input Levels - Edit the input color tone adjustment. The color tones are adjusted between the minimum (leftmost slider and editor) and the maximum (rightmost slider and editor) levels, by increasing or decreasing the medium (center slider and editor) tone value transitions.
- Output Levels - Edit the output color tone interval. Adjusted colors are mapped into the low (leftmost slider and editor) and high (rightmost slider and editor) tones.
Min/Max Color
The Min/Max Color image effect, converts the colors to gray tones, by selecting between the minimum and maximum the color channel value in the selected color mode.
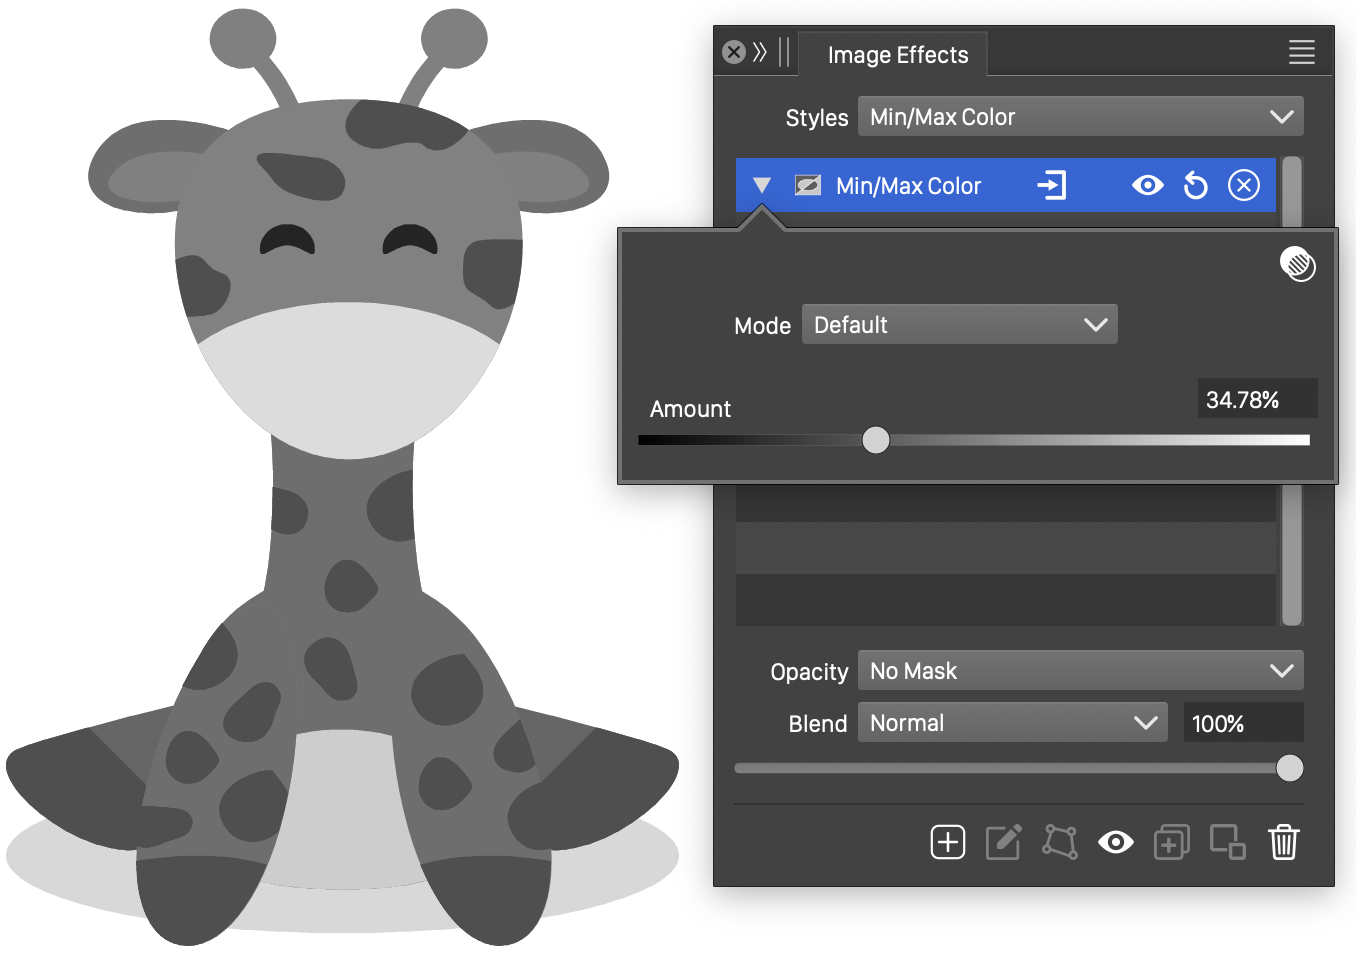
The Min/Max effect and its options.
- Mode - Select the color mode used to calculate minimum and maximum color channel amounts.
- Amount - Choose a gray tone level between the minimum and maximum color channels. Selecting 0% will set the gray tones to the smallest color channel value. Selecting 100% will set the gray tones to the largest color channel value.
Photo Filter
The Photo Filter image effect, adjusts the colors in the image, by simulating the use a colored filter in front of the camera lens. The photo filter transforms the colors by using a user selected color as the base white color of the filtered colors.
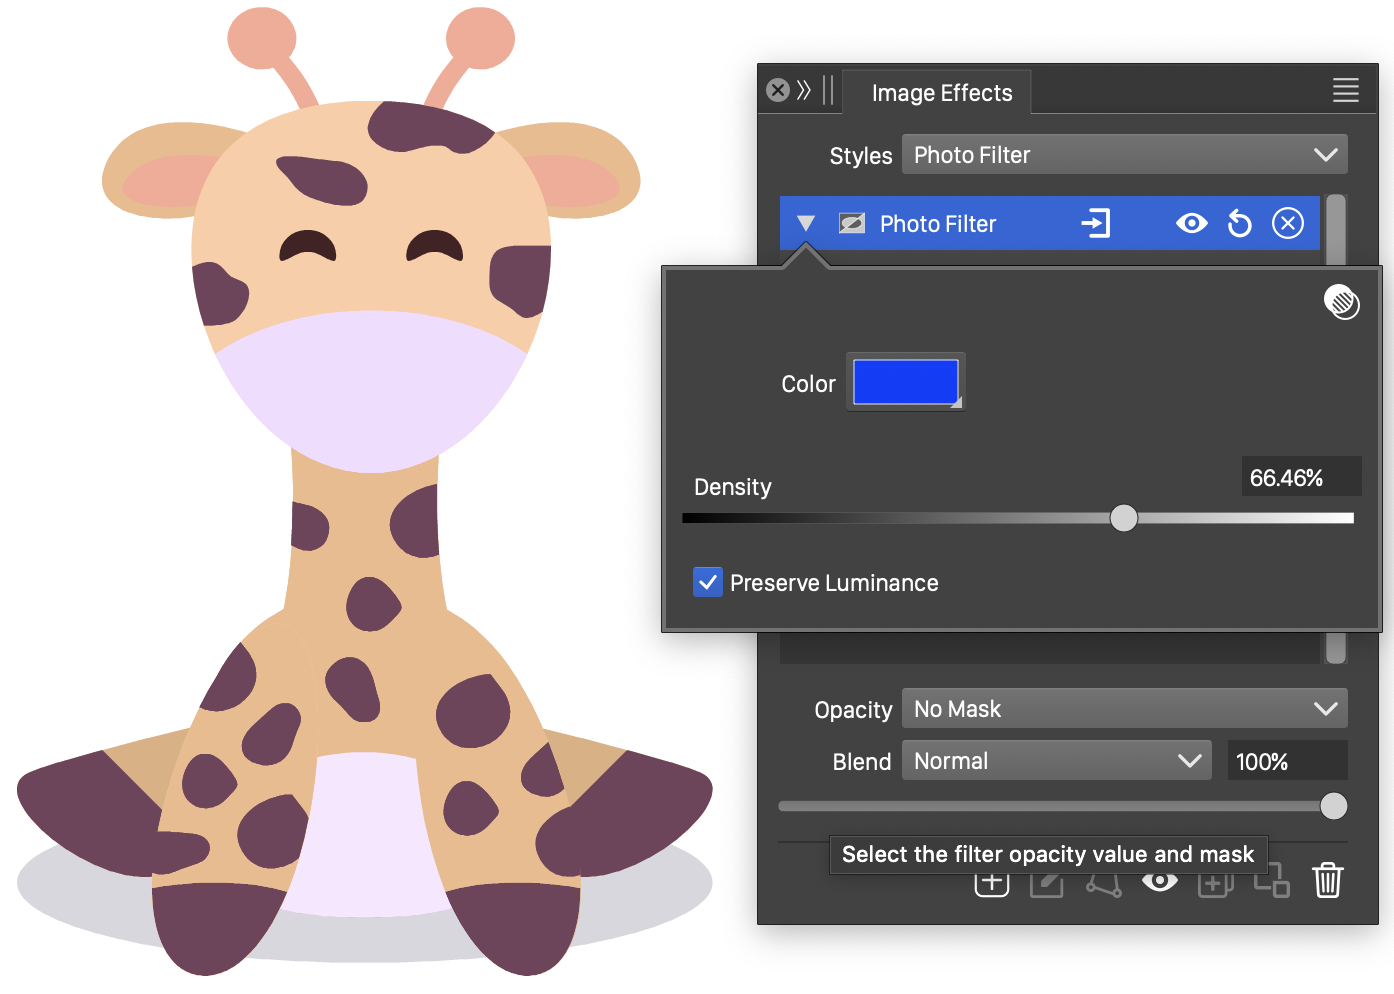
The Photo Filter effect and its options.
- Color - Select the base color of the filter applied to the changed colors.
- Preserve Luminance - Enable or disable the preserving of the color luminance.
- Density - Set the density of the color filter placed in front of the camera lens.
Posterize
The Posterize image effect, reduces the number of different tone levels in the filtered colors. The posterize colors simulate the effect of the reduced number of color tones present in a typical poster. The color component levels are reduced to a user selected number of different steps.
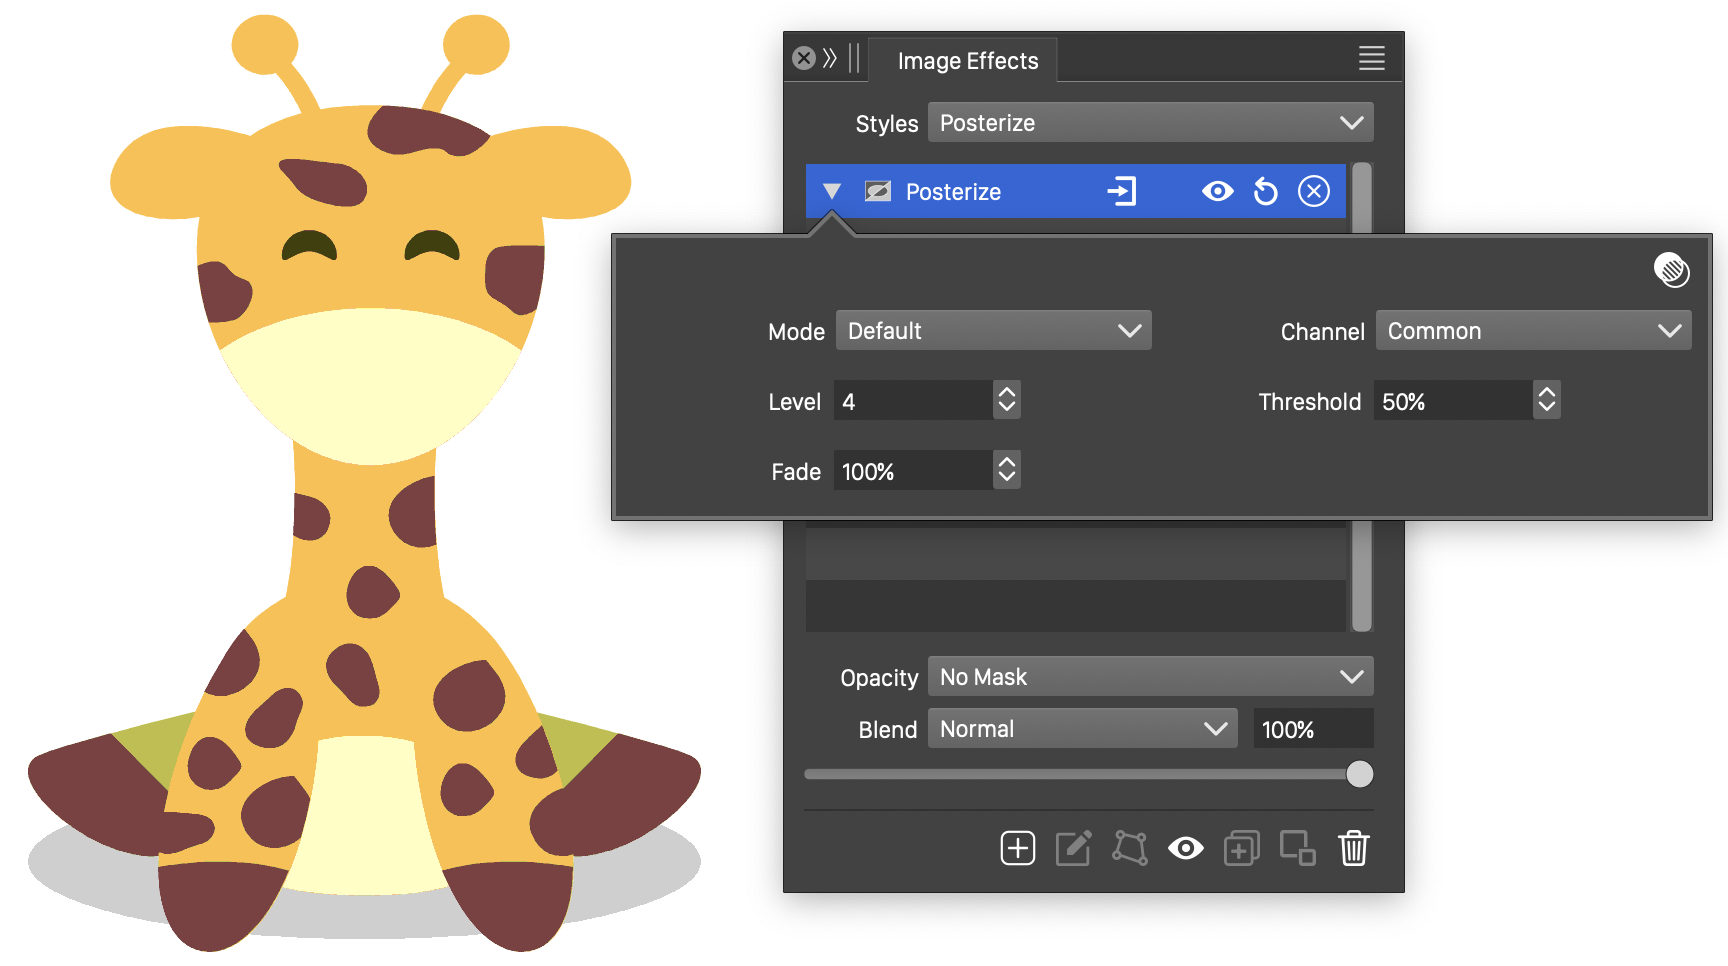
The Posterize effect and its options.
- Mode - Select the color mode of the posterize filter. The colors are converted to the selected color mode, and the color component amounts are reduced to the selected steps in this color mode.
- Channel - Select the color channel, to set different number of tone levels per channel.
- Level - The number of allowed different color component steps for all components. The Levels field is available when the Uniform mode is enabled.
- Threshold - Set the cutoff threshold between two consecutive color component steps. The threshold controls the limit used when rounding down or up the color component values.
- Fade - Fade the output color between the original and posterized color.
Replace Color
The Replace Color image effect, replaces colors of the image using global or local color mappings. The color replacement is controlled by tolerance values per color and similar colors can be adjusted by the replacement color.
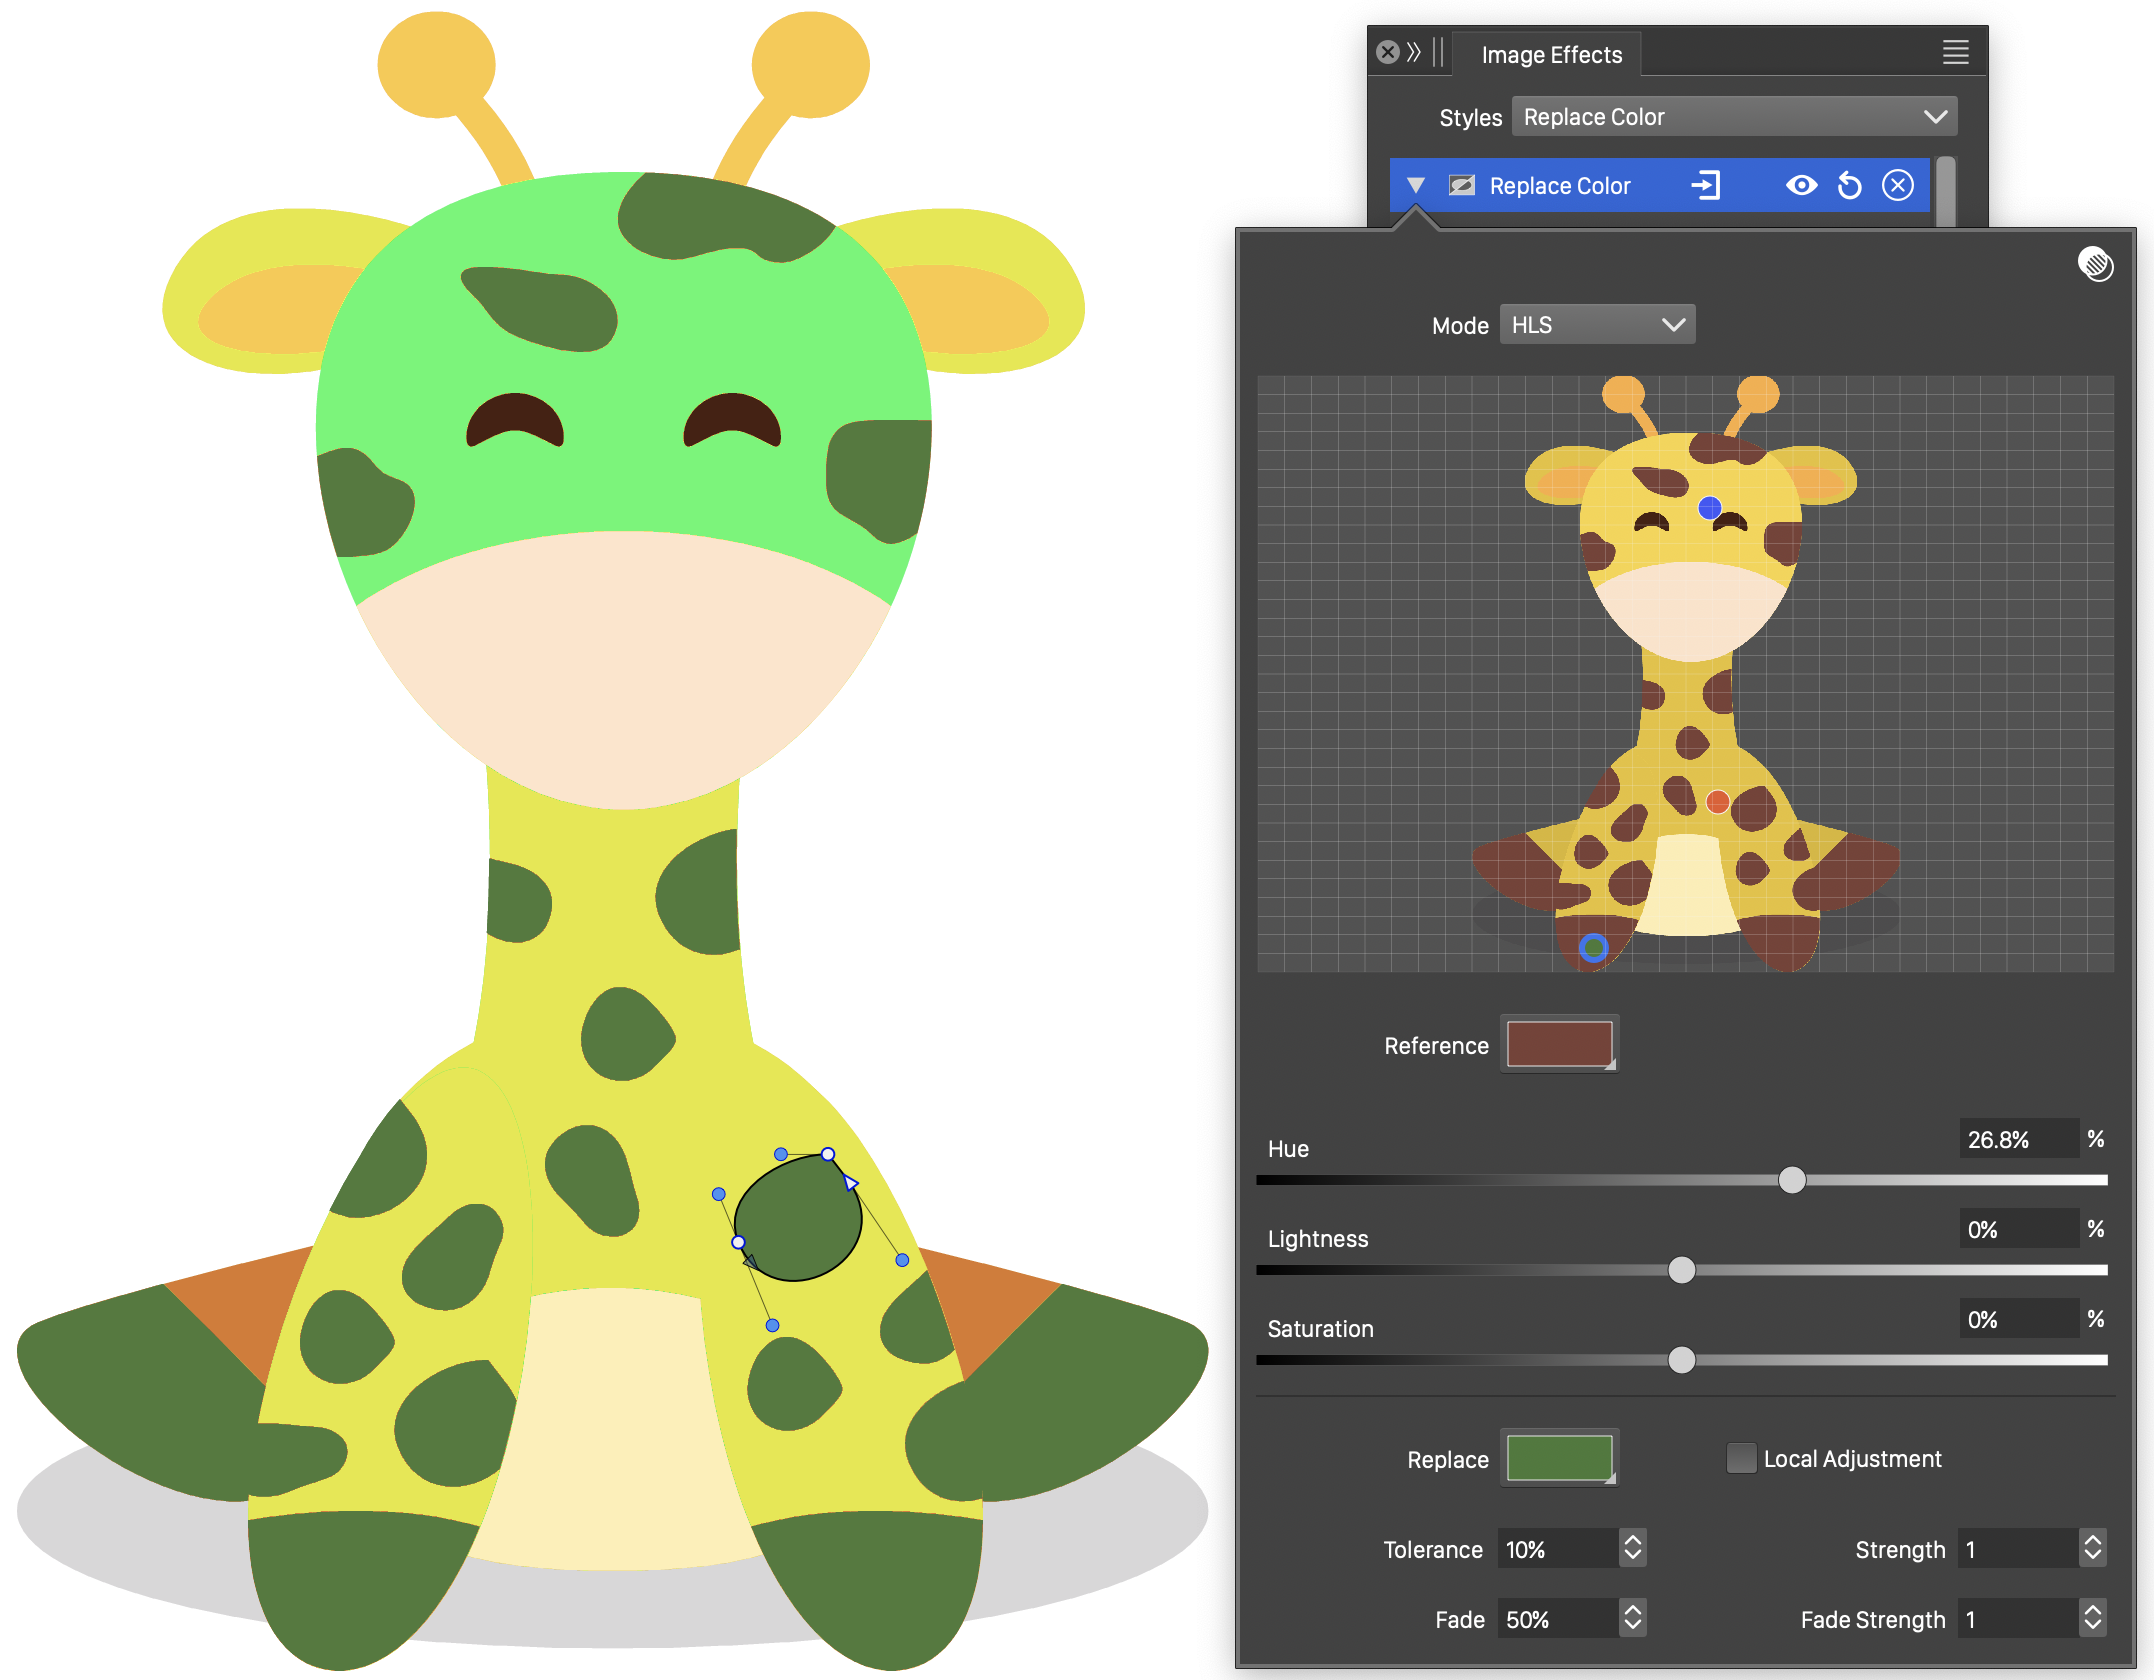
The Replace Color effect and its options.
- Mode - Select the color mode used to adjust colors. The color replacement is specified as an adjustment of a matching color. The adjustments are made in the color mode selected by the user.
- The original image of the selected object is displayed in the replacement color editor region.
- The preview image can be zoomed by holding Option (Mac) or Alt (Windows) and scrolling with the mouse.
- The preview image can be panned by using mouse scrolling.
- Click on a pixel of the image to create a replacement color node with the color of that pixel.
- Existing replacement nodes are shown at their position on the image.
- Click on a node to select the node and edit its attributes. All the options shown below the preview image region are specific to replacement nodes.
- Move the replacement node, by clicking and dragging on a node. The location of the replacement node is important when the Local Adjustment mode is enabled.
- To remove a replacement node, hold Option (Mac) or Alt (Windows), and click on the node.
- By default, the original or Reference color of the node is the pixel color at the location where the node was created. This can be changed by either moving the node, or selecting a different reference color.
- To set the reference color of the selected node from the image, hold Control and click on a pixel of the image. The image can be zoomed in to find the suitable pixel.
- Reference - Select the reference color to match in the original image.
- Replace - Select the replacement color.
- The color component adjustments (Hue, Lightness, Saturation by default) can be set using the sliders and numeric fields corresponding to the color component names.
- Tolerance - Set the tolerance in matching reference colors in the image.
- Strength - Set the strength of color adjustment amounts, used for colors that are different, but close to the reference color under the selected tolerance value.
- Fade - Set the maximum relative distance of the image pixel to a color node, when local adjustments are used. Pixels closer than this distance may be adjusted if they have a matching color. The adjustment strength depends on the distance.
- Fade Strength - Set the distance based adjustment strength, of the selected replacement node.
- Local Adjustments - Enable or disable local color adjustments. When disabled, the color adjustment strengths are determined only by the closeness of the matching color, and are the same throughout the image. When enabled, the color adjustment strengths are determined also by the distance of the adjusted pixel from the color node.
Saturation
The Saturation image effect, adjusts the saturation of the colors of the image.
The color saturation is adjusted by selecting a color mode containing a saturation component, and then decreasing or increasing the saturation amounts of the colors using the selected color mode.
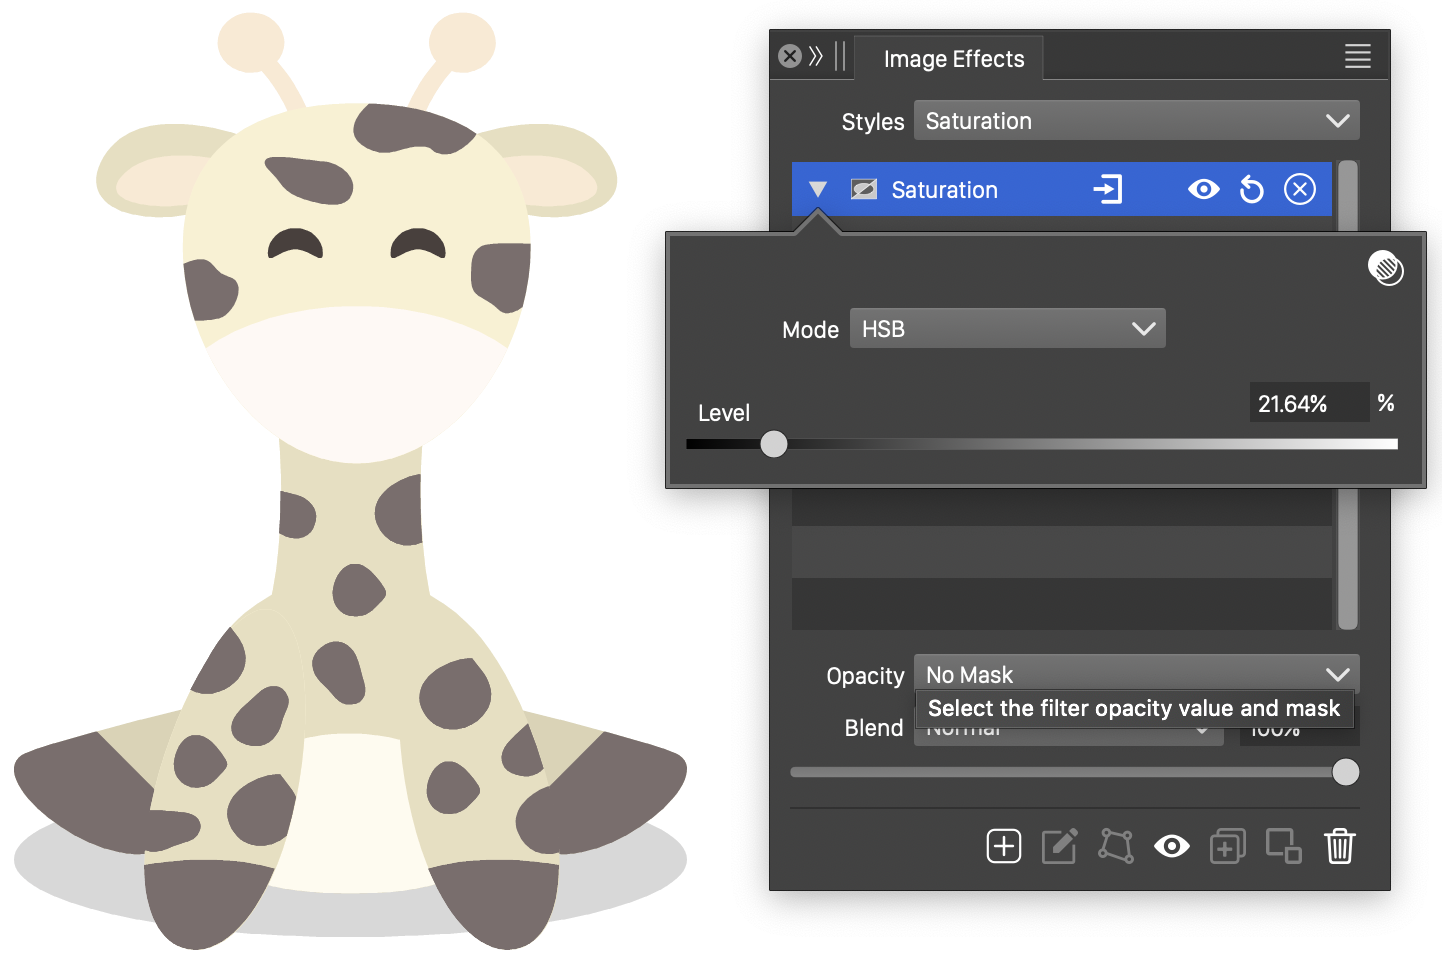
The Saturation effect and its options.
- Color Mode - Select the color mode containing a saturation component. Color saturations are adjusted by converting the colors to the selected color mode.
- Level - Adjust the level of saturation. Levels between 0% - 100% will decrease the saturation, while levels above 100% will increase the saturation of the filtered colors.
Selective Color
The Selective Color image effect, adjusts the color component amounts selectively, based on existing color tone regions.
Each color region (Blue, Magenta, Neutrals, etc) defines the amount of adjustments made to the color channels near that color region.
The color adjustment is made with a user defined a selective color scheme. The selective color scheme can be edited by the user, to create color adjustments using different color modes.
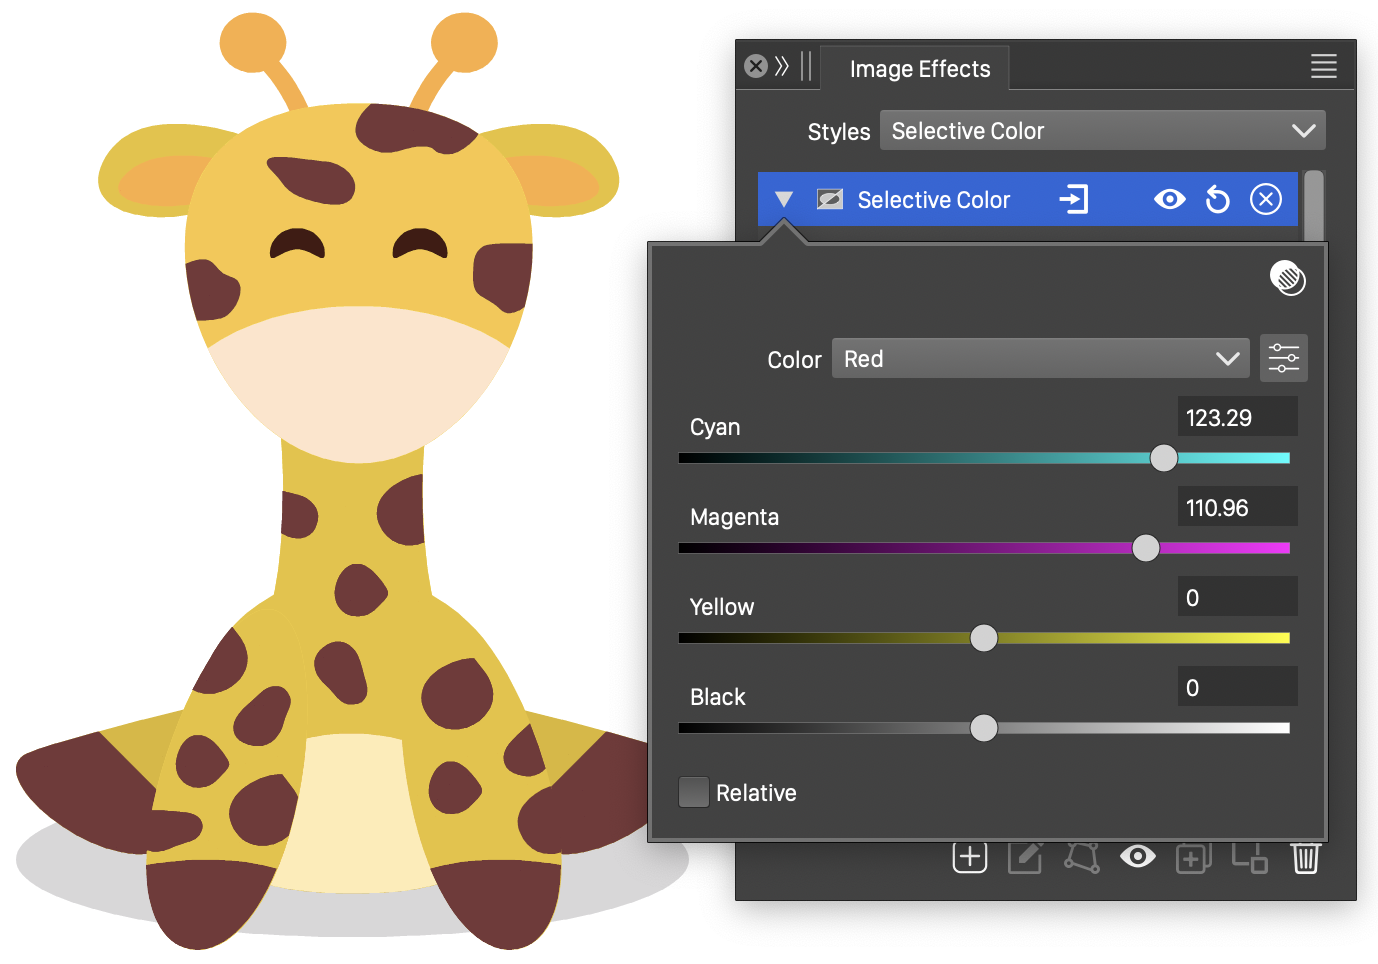
The Selective Color image effect and its options.
- Color - Select the color region to be adjusted. The list of available color regions are defined in the selective color scheme.
- Set the color adjustment amounts with color component editors and sliders (Cyan, Magenta, Yellow or Black by default). Each color region can define a different color adjustment amount.
- Relative - Select relative or absolute adjustment mode. In relative mode, the adjustment values are used relative to the existing color component amounts. In absolute mode, the adjustment values are added to the existing color component amounts.
The selective color scheme can be edited by clicking the  button, next to the Color field.
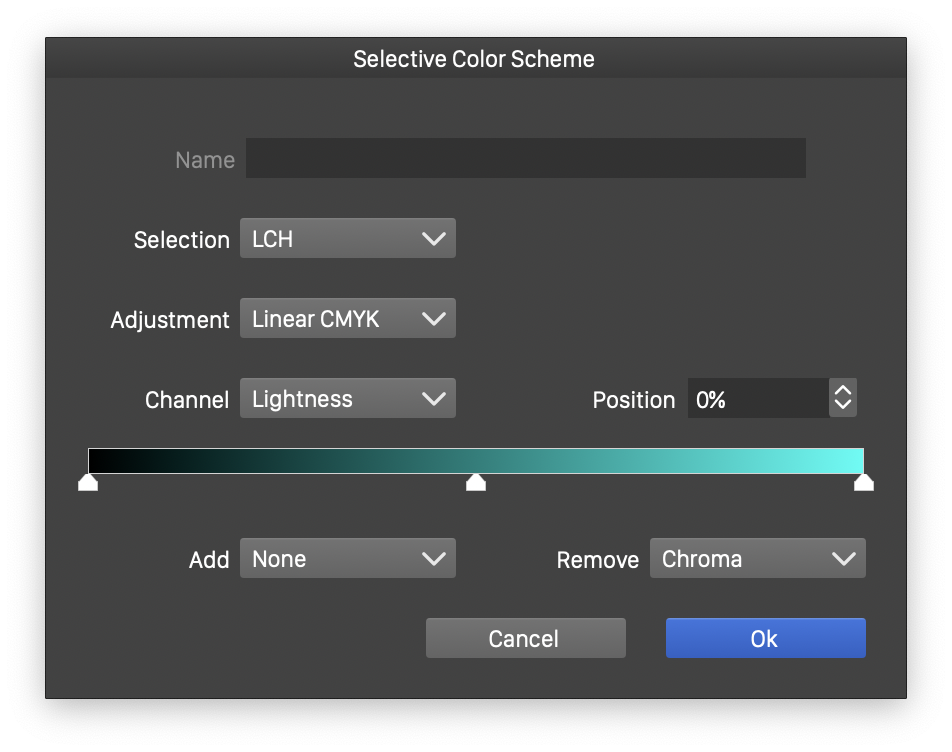
The selective color scheme editor.
A selective color scheme is defined by picking a Selection color mode, and creating selection points along the components of the selection color mode.
The filtered color is converted to the selection color mode, and the resulting color components are used to determine which adjustment values are applied to the color. The adjustments are made in the Adjustment color mode, by converting the original color to the adjustment color mode and changing its components.
When defining custom selective color schemes, it is recommended that these are saved as presets by saving the selective color filter as a preset using the Presets field.
- Name - Edit the name of the selected color region. The color region is selected in the color slider, of the current selection color channel.
- Selection - Choose the selection color mode. The color adjustment points are defined along the color channels of the selection color mode.
- Adjustment - Choose the adjustment color mode. The color adjustment amounts are set in the adjustment color mode.
- Channel - Select a color channel of the selection color mode. Each color channel may define one or more tone regions, where adjustments can be made.
- Position - The color channel amount of the selected adjustment region.
- The color channel slider is used to create and edit color adjustment regions. The name of the selected region can be set in the Name field, and it is initialized to a default name, depending on the selected color tone.
- To create a new selection region, double click in the color channel slider. The new region center is indicated with a triangular slider handle.
- To adjust the position of a selection region, drag the triangular handle to a new position.
- The position of the selected region can be edited numerically in the Position field.
- To remove a selection region, drag the region handle outside of the slider area.
- The intensity color adjustments in the selected region can be increased or decreased by a color component amount of the filtered color, in the selected color mode.
- Add - Select a color component name, of the selected color mode, to use the value of that color component as an increasing factor of the adjustment.
- Remove - Select a color component name, of the selected color mode, to use the value of that color component as an decreasing factor of the adjustment.
Shadows and Highlights
The Shadows and Highlights image effect, makes color corrections to shadow and highlighted regions. These adjustments are more suitable for photographic images imported into the document, than flat vector objects.

The Shadows and Highlights effect and its options.
- Mode - Select the color mode used to make the shadow and highlight adjustments.
- Shadows - Set the adjustments made in low light regions:
- Amount - Set the amount of adjustment made to shadow tones.
- Tone - Set the tonal width of the shadow tones.
- Radius - Set the radius of the region used to find shadow tones.
- Highlights - Set the adjustments made in highlighted regions:
- Amount - Set the amount of adjustment made to highlight tones.
- Tone - Set the tonal width of the highlight tones.
- Radius - Set the radius of the region used to find highlight tones.
- Correction - Set the additional color correction made on the adjusted pixel colors.
- Contrast - Set the contrast of the resulting colors.
- Shape - Both the Shadows and the Highlights section contains a shape selection field, to select the shape of the region used to determine the color tones.
- Offset - Set the shadow or highlight tone offset.
- Gamma - Set the shadow or highlight tone variation.
- Black Limit - Set the limit for the amount of black in the adjusted colors.
- White Limit - Set the limit for the amount of white in the adjusted colors.
- Chroma - Set the maximum amount of chromatic adjustments of the colors.
- Strength - Set the strength of the shadow and highlight adjustment amounts.
Solarize
The Solarize image effect, increases the intensity of the colors in the selected color mode.
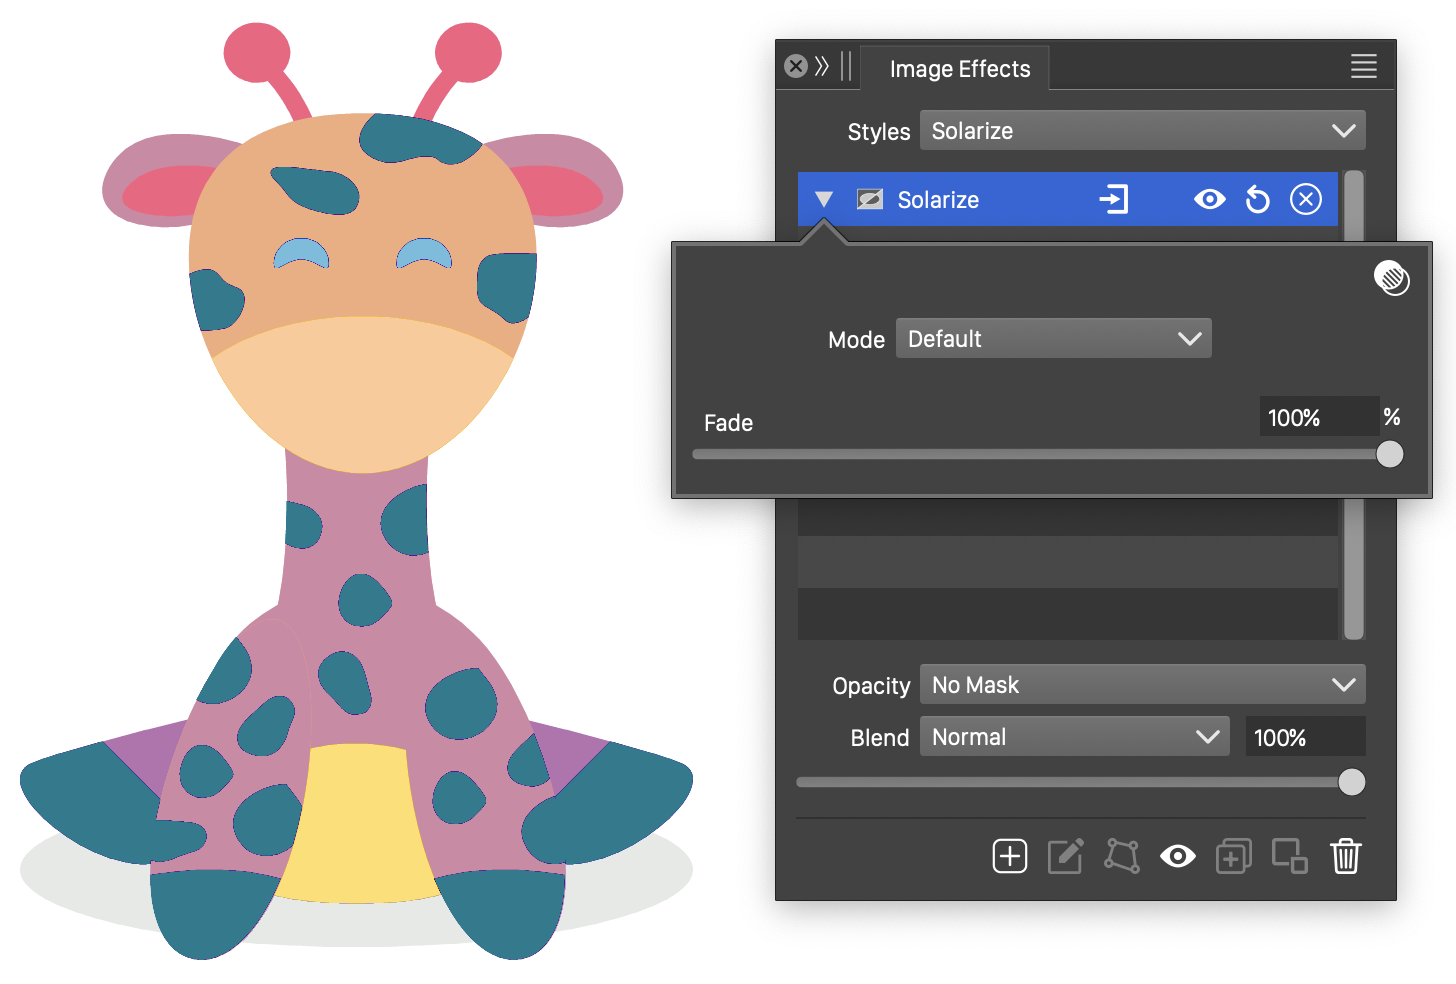
The Solarize effect and its options.
- Mode - Select the color mode of the solarize filter.
- Fade - Fade the output color between the original and solarized color.
Vibrance
The Vibrance image effect, adjusts the vibrance and the saturation of the colors in the selected color mode.
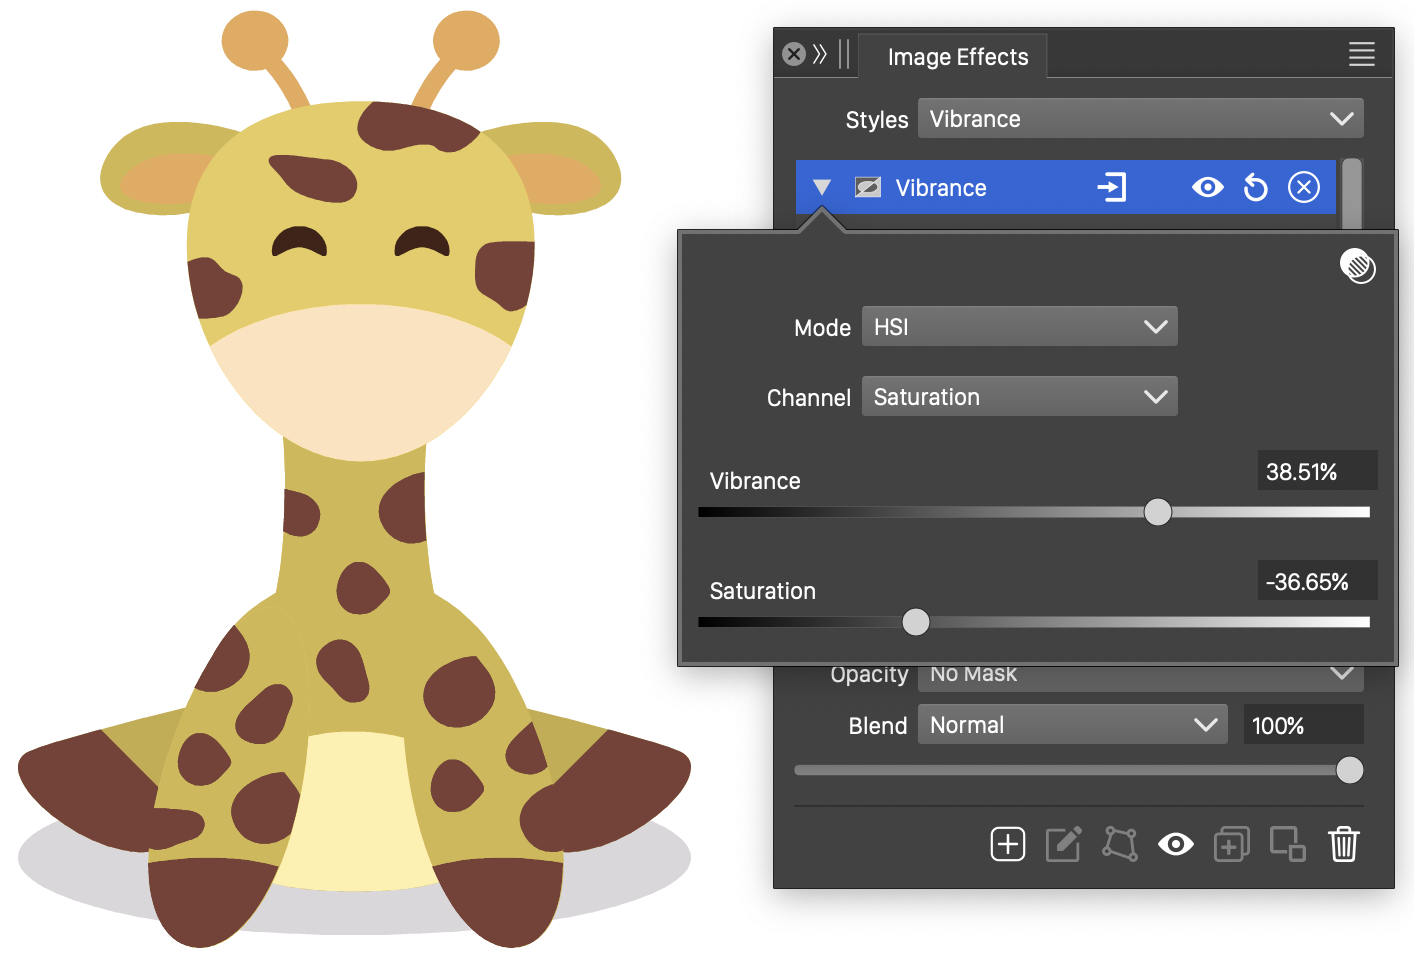
The Vibrance effect and its options.
- Mode - Select the color mode of the vibrance filter.
- Channel - Select the adjusted channel of the color mode.
- Vibrance - Adjust the vibrance of the colors in the selected color mode.
- Saturation - Adjust the saturation of the color intensities.


