Export Slices
Export slices are regions of a canvas marked for batch exporting. Each export slice contains multiple export format options, including style overrides, to specify how to export the slice in multiple variants.
Each canvas contains a different set of export slices, enabling the creation of documents containing thousands of batch exported assets, by organizing these over multiple canvases.
VectorStyler provides multiple batch exporting features, including artboard, object and slice exporting. Export slices allow the cutting of any rectangular region of the canvas, that may partially overlap with objects, to be exported into a separate file.
Export profiles are created and managed using the Slice  tool and Slices panel.
Use multiple export profiles with the same file format but different style override settings, to export style variations of a single object or symbol.
Each export slice may use a custom set of file formats, or a common set by selecting export profile styles. Export profile styles can be used to define a collection of file formats as a single exporting style.
The slice exporting selection and options are stored with the document, and can be repeated using the Export Again command.
Slice Tool
Export slices are created and adjusted using the Slice  tool.
tool.
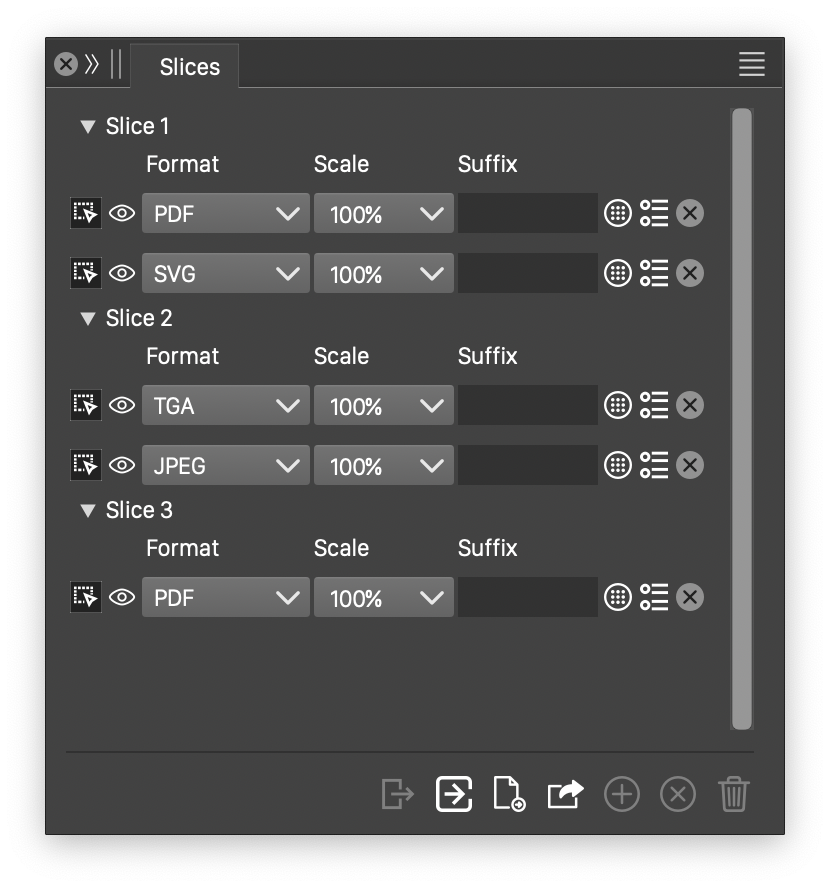
The Slices panel.
To create a new slice:
- Select the Slice
 tool from the application toolbox. The slice tool is grouped under the Artboard
  tool (second from bottom) in the default configuration.
 - Draw the rectangular region of the slice by clicking and dragging the mouse.
- The newly created slice is selected, and shown in the Slices panel.
- Slices are indicated using a dashed margin.
- The color used to indicate the slice regions can be set in the Document Setup.
The Slice  tool can be used to select and modify existing slices of a canvas.
- Select the Slice
 tool from the application toolbox.
 - Click inside an existing slice to select it.
- The regular transform handles are shown around the slice.
- The slice can be moved, scaled and rotated similarly to objects. A slice cannot be skewed.
- The movement, scaling and rotation can also be adjusted from the Transform panel.
- The selected slice is highlighted in the slice panel.
Slices Panel
The Slices panel contains the list of slices from the current canvas. Each slice is indicated by its name. A slice can be opened using the list arrow, to reveal the list of export file formats and settings associated with the slice.
Each slice contains a set of export format settings, exporting the region delimited by the slices with these file formats. An export format may also be an export profile style, selecting a collection of file formats in a single step.
Selecting a slice in the panel will also select it in the canvas. The slice name can be edited by selecting the slice in the panel and clicking on the name again. The name of the slice is also displayed on the top of the slice region, in the canvas. To hide or show the slice name, use the Hide / Show Slice Label command from the View - Margins menu.
Multiple slices can be selected by holding the Command (Mac) or Control (Windows) key and clicking on the slice names.
The export format settings associated with a slice can be edited using the rows shown under each slice (when opened):

Export profile settings.
- (1) - Click on this icon to select the export profile.
- (2) - Enable or disable the export profile in the row. Disabled export profiles remain in the slice, but will not be exported.
- (3) - Select an export format type, or a previously defined export profile style or preset.
- (4) - Select or edit a scaling amount used when exporting with this profile.
- (5) - Edit the file name suffix, used when exporting with this profile.
- (6) - Opens a menu of export profile markers, used in creating automatic slice and profile selections. Export profile markers are described below.
- (7) - Opens the export profile editor view, to edit the file format options and the profile settings.
- (8) - Removes the export profile from the slice.
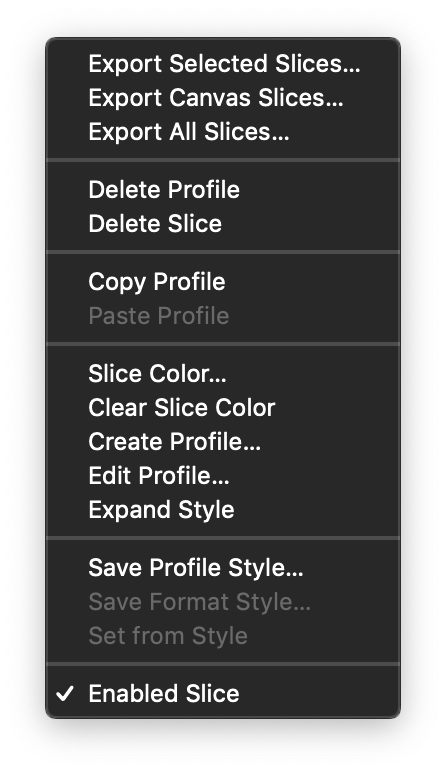
The Slices panel menu.
The slice panel icon section provides access to the following commands:
 - Export the selected slices. The Export Slices modal view is opened, with the selected slices marked for exporting. The slice selection can be modified in the view. Click Ok and select a folder to export the selected slices.
 - Opens the Export Slices modal view with the list of slices from the current canvas only. Mark the slices to be exported and confirm the selection.
 - Opens the Export Slices modal view with all the slices of the current document.
 - Repeats the last exporting operation.
 - Adds a new export profile to the selected slice.
 - Remove the selected export format or profile from the slice.
 - Delete the selected slices.
The Slices panel menu contains the following command:
- Export Selected Slices - Exports the selected slices, by opening the Export Slices modal view.
- Export Canvas Slices - Opens the Export Slices modal view listing the slices of the current canvas for selection and exporting.
- Export All Slices - Opens the Export Slices modal view listing the slices of the current document for selection and exporting.
- Delete Profile - Deletes the selected export profiles from the slices.
- Delete Slice - Deletes the selected export slices from the current canvas.
- Copy Profile - Copies the selected export profiles into an internal panel clipboard.
- Paste Profile - Pastes the export profiles from the internal panel clipboard, into the selected slice.
- Slice Color - Changes the color of the selected slices.
- Clear Slice Color - Restores the default color for the selected slices.
- Create Profile - Adds a new export profile to the selected slice.
- Edit Profile - Opens the export profile editor to edit the selected profile.
- Expand Style - Detaches the export profile styles into local settings.
- Save Profile Style - Creates a new export profile style, from the selected export profiles. An export profile style may contain multiple export formats and profiles.
- Save Format Style - Creates a new export format style, from the selected export format. Export format styles can be created and reused to easily select variations of format specific settings.
- Set from Style - Select an export format or profile style to replace the selected profile.
- Enabled Slice - Enables or disables the selected slices. Disabled slices are skipped when exporting.
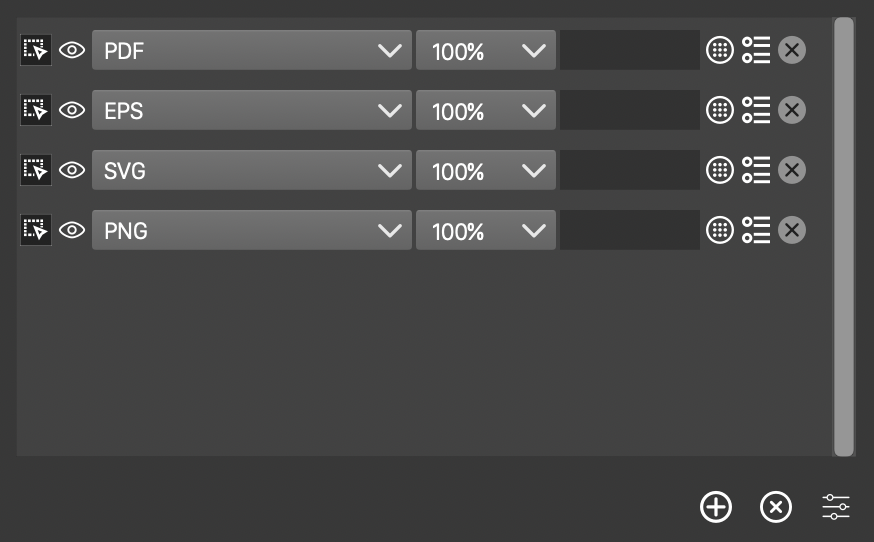
The Export Profile section used in Artboard Options.
To reuse a collection of export format settings across multiple slices, use the following steps:
- Setup the list of export formats or profiles under a slice.
- Select the export profiles by holding the Command (Mac) or Control (Windows) key and clicking on the
 icon.
icon. - Create an export profile style from the selection, using the Save Profile Style command from the panel menu.
- A new export profile style is available in the list of file formats,
- Remove the list of profiles from the slice used to setup the profiles, leaving only one.
- Select the newly created profile name from the list of file formats.
- The export formats and their options of a profile style can be edited by editing the style with the Document Styles command or the Styles panel.
Export Profiles
An export profile is a collection of export formats, format specific options and a number of extra options associated with each format, like visibility, scaling and naming suffix.
Export profiles are created and edited for slice, artboard or object batch exporting. Export profiles can be saved and reused as styles, to simplify the reuse of the same collection of export settings.
The Export Profile editor view used in Artboard Options.
The list of export options of an export profile is edited in the same way as in the Slices panel. The export format list can also appear when batch exporting artboards or objects, or in the Object Export panel.
Export Markers
Export markers are named selectors used to enable or disable the exporting of a profile from one or more slices. Export markers are used to temporarily enable or disable export profiles, while exporting slices using the Export Slices command.
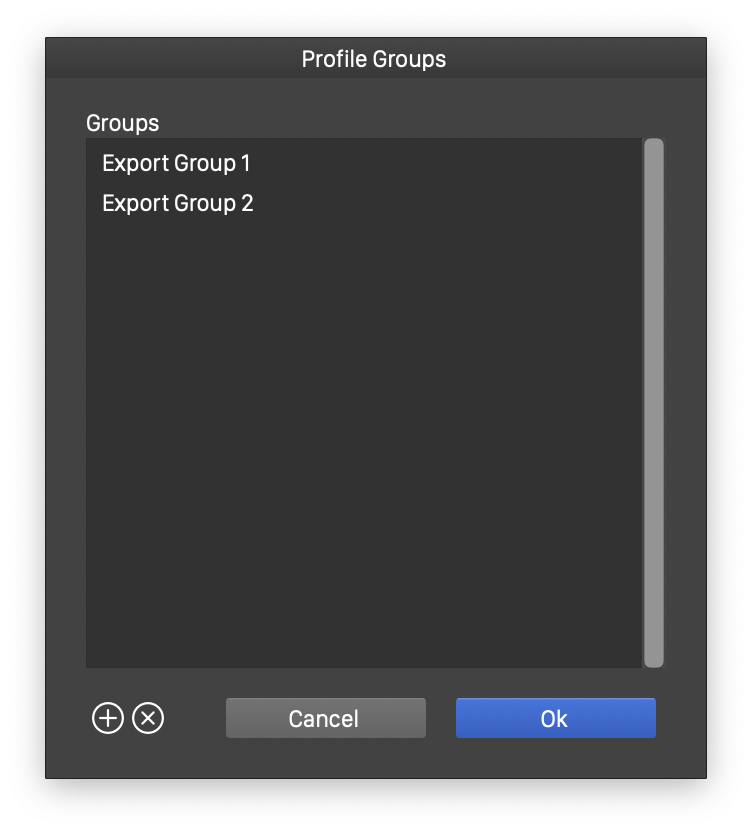
To edit the list of export marker names, select the Edit Groups option after clicking on the marker selection icon  in an export profile row.
- The list of existing group marker names is shown under the Groups label.
- To create a new export group marker, click on the
 icon.
icon. - To remove an export group marker, click on the
 icon.
icon. - To edit the name of a group marker, select the marker in the list and click on the name again.
An export group marker can be associated with an export profile. When exporting slices, instead of selecting slices, it is possible to select export group markers (by enabling the Select Markers checkbox), if export markers were used in the export profiles.
When using export group markers, instead of selecting slices for exporting, one or more markers are selected. The export profiles having these markers checked in the menu opened with icon  are exported. All other profiles, even if enabled, are not exported.
Export Slices
The slices of the current document can be exported using the Export Slices command of the File menu. This opens the Export Slices view, used to select the slices for exporting.
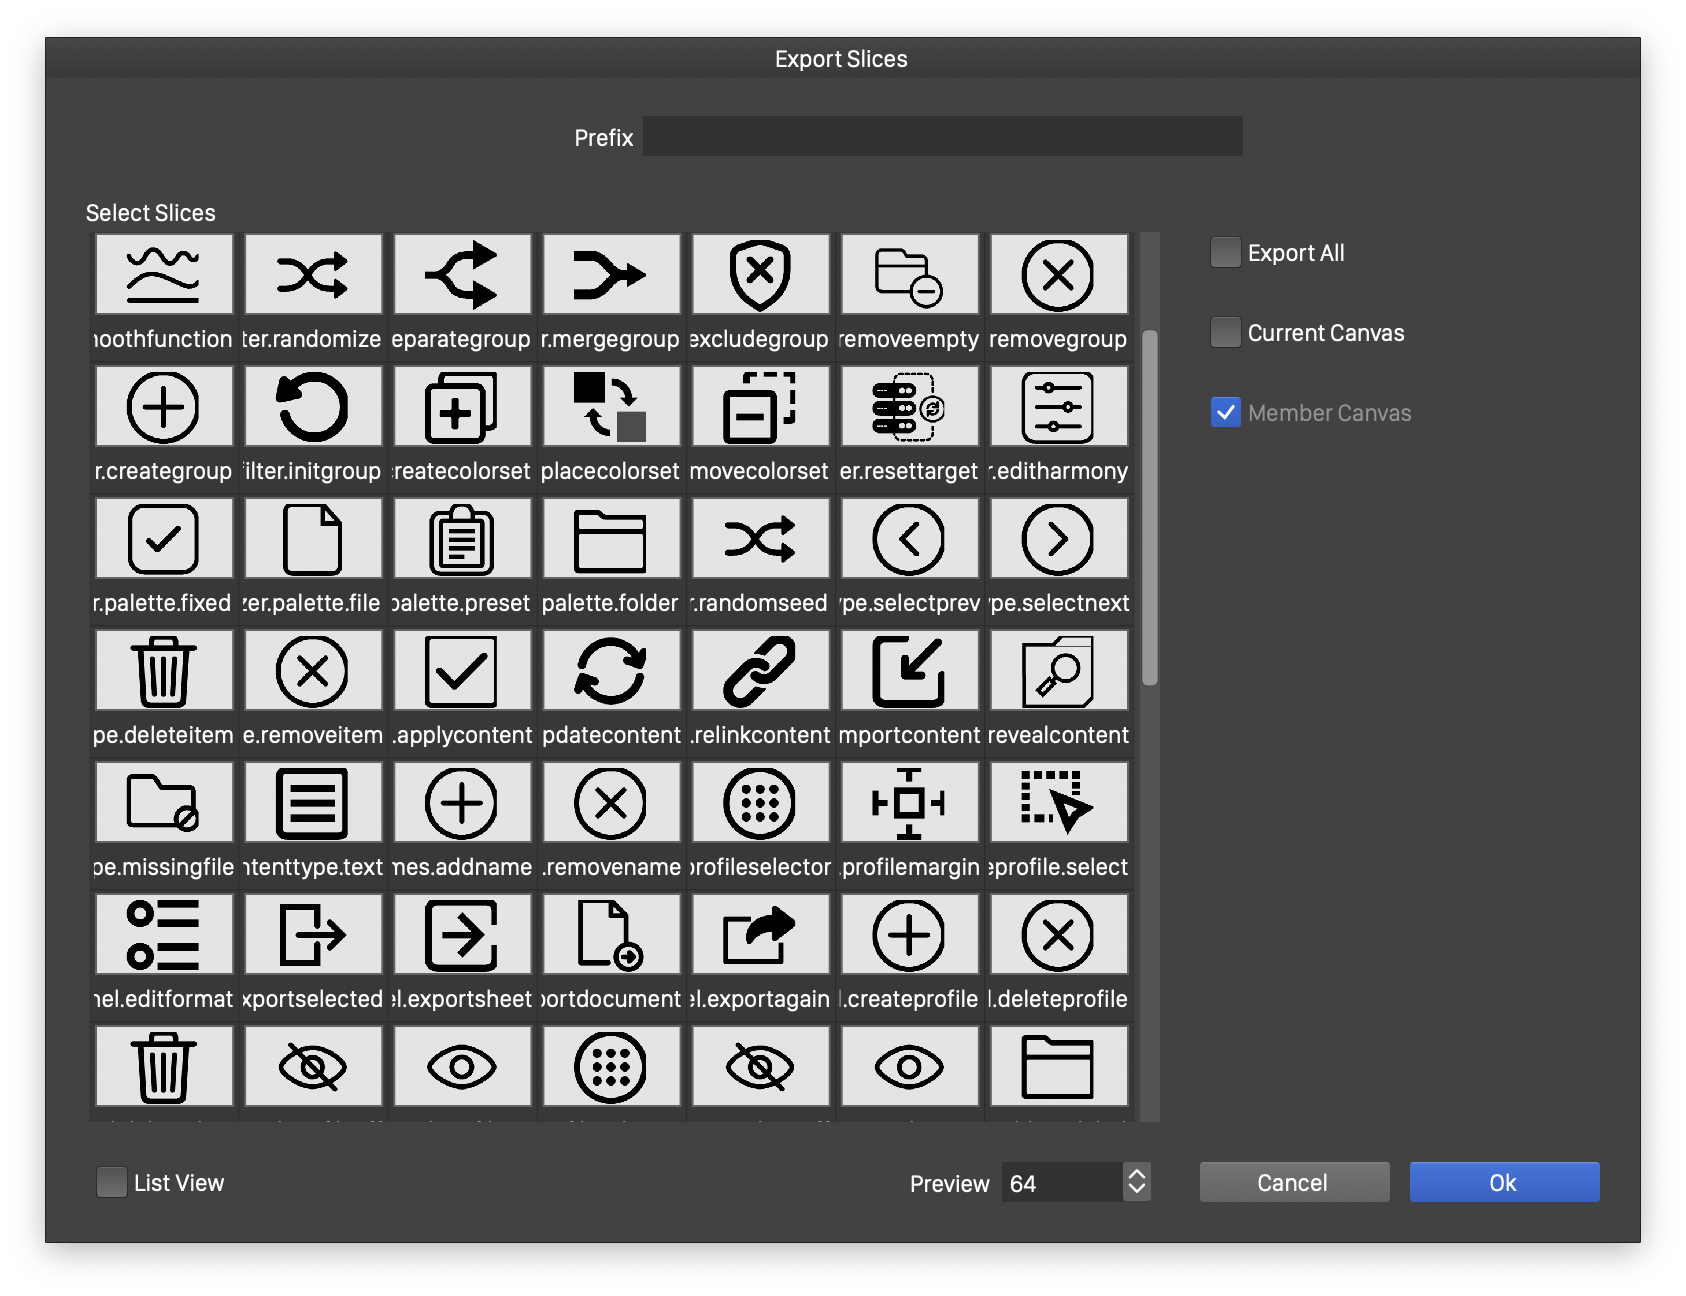
The Export Slices view.
- Prefix - Edit a file name prefix, used in the file names generated in the batch exporting of slices.
- Select Slices - Shows the list of slices of the current document. Click on a slice to select or deselect for exporting.
- List View - Enable or disable listing mode view of the slices. In listing mode, there is more space to show and edit the slice names.
- Preview - Set the size of the slice previews in the list.
- Columns - Shown only when the List View mode is enabled, set the number of columns in the list view.
- Export All - Select all slices for exporting.
- Current Canvas - Show and export only slices from the current canvas.
- Member Canvas - Also show and export slices from the member canvases of the current canvas.
- Select Markers - Enables or disables the use of export group markers to automatically select export profiles for exporting.
After confirming the slice selection, the folder selector view is opened, to select a folder where to export the files.
