Output Options
The Output options of the print settings are used to select the extent, alignment, orientation and tiling scheme used in the printed output.
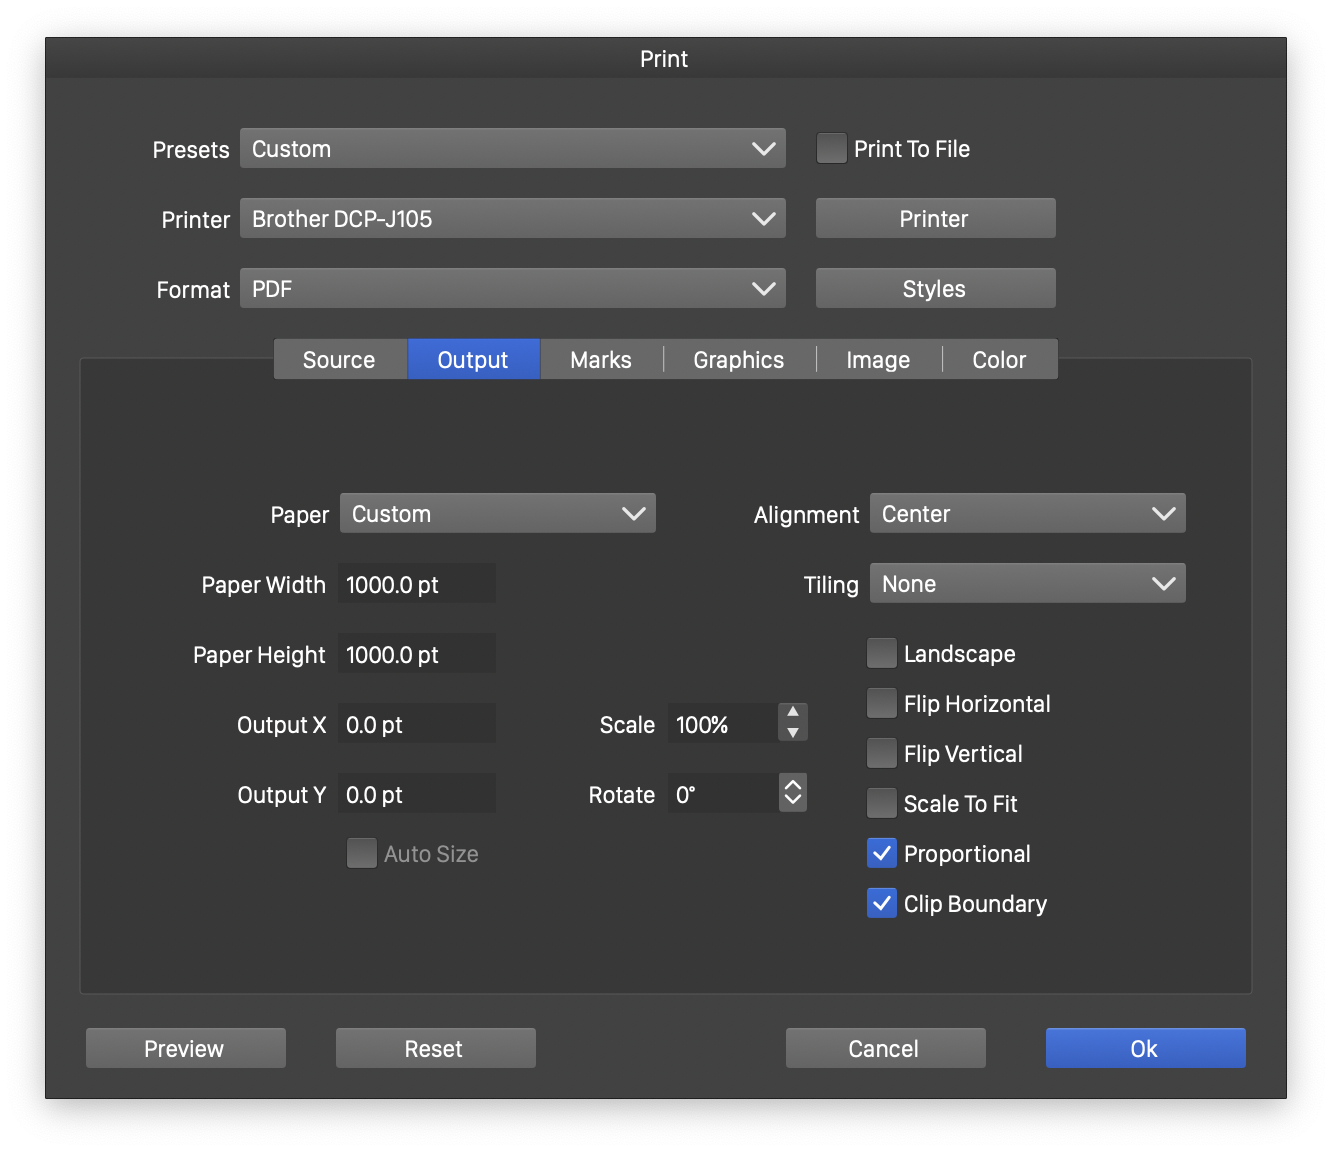
The Output options section.
The following Output options are available:
- Paper - Select the paper size and format from the list of predefined formats. User defined paper sizes can be saved using the Save Preset command, for future selection.
- Paper Width and Paper Height - Edit a custom paper width and height of the printing output.
- Output X and Output Y - Offset the position of the printed content on the paper.
- Scale - Set the scaling amount of the printed content on the paper.
- Rotate - Set the rotation of the printed content on the paper.
- Auto Size - Enable or disable the automatic fetching of the paper size from the printer type.
- Alignment - Select the alignment of the printed content relative to the paper.
- Tiling - Select a tiling scheme to output one or more source regions on one or more printer papers. Custom tiling schemes can be created and saved by selecting the Edit option. Editing tiling options is described below.
- Landscape - Enable or disable landscape mode.
- Flip Horizontally - Enable or disable horizontal mirroring of the printed content.
- Flip Vertically - Enable or disable vertical mirroring of the printed content.
- Scale to Fit - Enable or disable scaling of the printed content to fit the available region on the paper.
- Proportional - Enable or disable the proportional scaling of the printed content.
- Clip Boundary - Clip the boundary of the printed artboard or slice.
Tiling Schemes
Printer tiling schemes are used to arrange one or more printed regions (artboards or slices) on one or more papers.
Tiling schemes can be used to:
- Print multiple artboards on a single paper.
- Print multiple slices on a single paper.
- Print a large artboard or canvas on multiple papers.
- Print a tiling of multiple artboards over multiple papers.
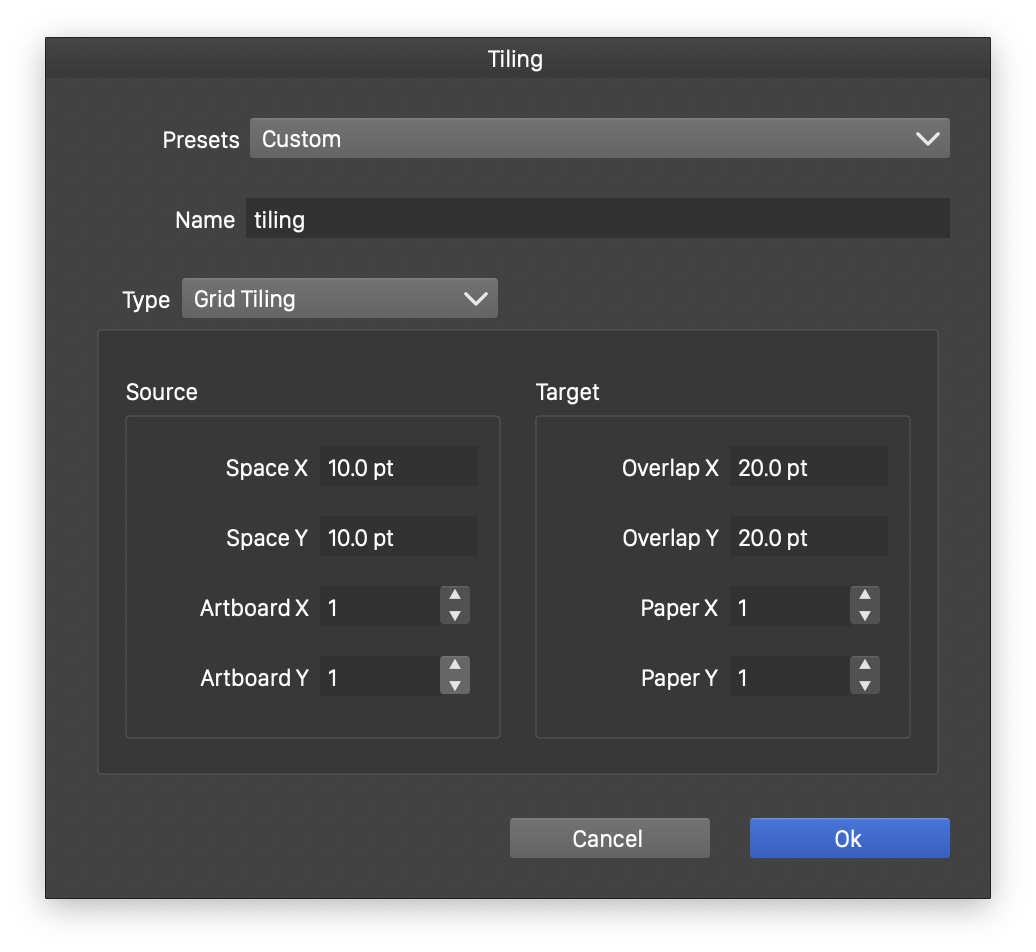
Editing printer tiling schemes.
- Presets - Contains the list of previously defined tiling scheme presets. New presets can be defined by selecting the Save Preset option. Tiling scheme presets can be used to setup a tiling scheme once, and easily select and use it later.
- Name - Edits the name of the tiling preset.
- Type - Select the tiling type. This can be:
- Grid Tiling - Arranges a grid of artboards or slices over a grid of papers.
- Automatic Tiling - Creates a tiling grid automatically, using the size of printed content and printer paper.
- Packed Tiling - Creates a tiling by arranging artboards of varying sizes on a printer paper.
Grid Tiling
The Grid Tiling mode arranges a grid of artboards or slices over a grid of printed papers. The Source section contains the tiling mode of the printed artboards or slices. The Target section contains the tiling arrangements of the papers used to print the content.
- Space X - Edit the amount of horizontal spacing between artboards.
- Space Y - Edit the amount of vertical spacing between artboards.
- Artboard X - Edit the number of artboard columns in the tiling.
- Artboard Y - Edit the number of artboard rows in the tiling.
- Overlap X - Edit the amount of horizontal overlap between printer papers.
- Overlap Y - Edit the amount of vertical overlap between printer papers.
- Paper X - Edit the number of columns of papers in the tiling.
- Paper Y - Edit the number of rows of papers in the tiling.
Automatic Tiling
The Automatic Tiling mode determines the artboard and paper grid automatically, with either the artboards or the papers arranged in the grid, depending on their sizes.
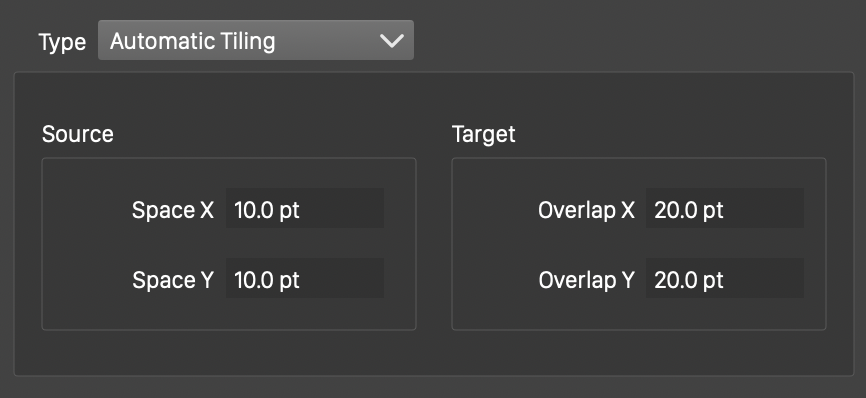
Automatic tiling mode.
- Space X - Edit the amount of horizontal spacing between artboards.
- Space Y - Edit the amount of vertical spacing between artboards.
- Overlap X - Edit the amount of horizontal overlap between printer papers.
- Overlap Y - Edit the amount of vertical overlap between printer papers.
Packed Tiling
The Packed Tiling mode arranges the artboards or slices to fit into a paper using a packing algorithm. The artboards may be printed in the same order as their appearance in the document, or reordered for a better packing into the available printed area.
The following options are used in package tiling:
- Space X - Edit the amount of horizontal spacing between artboards.
- Space Y - Edit the amount of vertical spacing between artboards.
- Overlap X - Edit the amount of horizontal overlap between printer papers.
- Overlap Y - Edit the amount of vertical overlap between printer papers.
- Paper X - Edit the number of columns of papers in the tiling.
- Paper Y - Edit the number of rows of papers in the tiling.
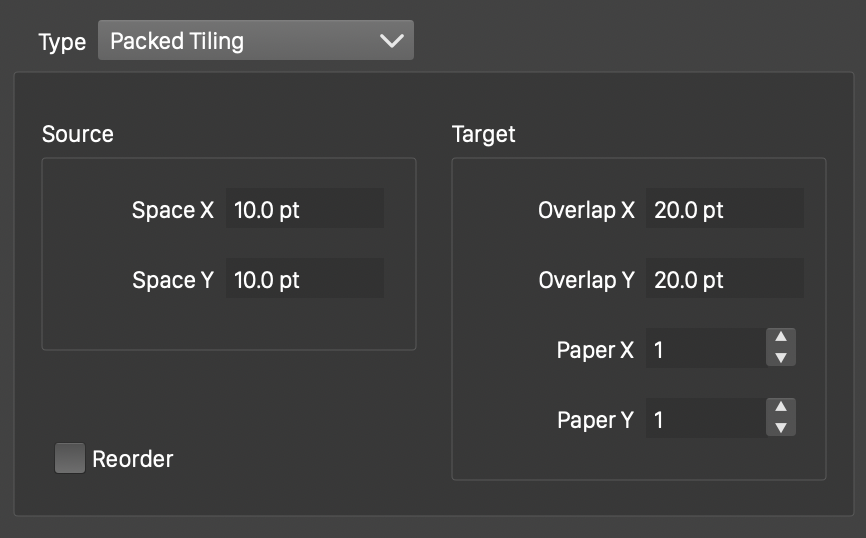
Packaged tiling mode.
The arrangement of the artboards depends on their size and the available space over the grid of papers.


