
Blending
The object blend effect creates a transition of shape and style between two or more objects. The number of intermediary objects in the transition can be set directly, by distance or to approximate a smooth style transitions.
Object blends can be created between objects containing open shapes or between objects of closed shapes. The transition of between different shapes is automatically determined by the application.
Blend effects between objects can be used to create smooth shape and style transitions for an artwork. The blend effect of the selected objects can be customized from the Blend Panel, or using the Blend Options command.
Important features and options to consider when working with the blend effect:
- The original objects of the blend effects remain separate and selectable. These object can be moved, modified and reshaped.
- When creating blends, a new blend object is created between the starting and ending objects. The blend object will contain the intermediary objects. This blend object can only be selected together with the two ends only.
- The color mode used in the blend effect controls the intermediary colors in the style transitions.
- The blend effect will create transitions for the image effects on the two objects. This may result in a large number of intermediary blend objects containing transitions of image effects.
- The blend path controls the position of the objects (both ends and the intermediary objects). The blend path can be selected to be any path on the canvas.
- Shape presets, styles or objects with the Shape role can be used as blend paths.
- The blend path can also be created by editing the blend object with the Node tool. The initial blend path will be a line.
- The easiest way to control the blend options is to use the Blend Panel from the Effects - Blend or Window - Effects menu. The Blend panel provides access to common blend options, and to the Blend Options editor, containing all blend options.
- Blend effects can be created interactively, using the Blend
 tool, by clicking on the starting and ending object.
 - The Blend tool can also be used to create and extract intermediary objects from a blend at any position.
- The transition between two shapes can be customized using the Blend Mapping
 tool. This is done by mapping locations of one shape to the other, and by this restricting how the shapes are transitioned.
Overview
Creating and modifying blend effects is described in the following sections:
- Blend Panel - Describes how to use the Blend panel to create and modify blend effects on selected objects. The Blend panel is the easiest way to control the blending options.
- Blend Options - Describes how to use the Blend Options modal editor view. The Blend Options view provides access to all options available when blending objects.
- Blend Tools - Describes how to use the Blend and Blend Mapping tools. These tools provide interactive access to creating and extracting blends, and to customizing shape transitions.
Creating Blends
A new blend effect can be created between two or more objects, using the following steps:
- Open the Blend Panel from the Effects - Blend or Window - Effects menu.
- Select two or more objects to create blend effect.
- Click on the
 button, to create a blend effect.
 - Adjust the blend options in the panel, after the blend effect has been created.
Alternative modes of creating a blend transition between two objects are:
- Select the Blend tool.
- Click on the first and then on the second object.
- A new blend effect is created between the clicked objects.
- The objects must be inside the same layer and group.
Blends can be created directly on two selected objects, using the Create Blend command from the Effects - Blend menu. In this case neither the Blend panel or tool is required. The blend is created with the default options. The Blend Options command can be used to set the various options used to control the blend effect.
An existing blend effect between two or more objects can be removed using the Remove Blend command from the Effects - Blend menu.
Blend Paths
To select a blend path for an existing blend object:
- Select the blend object and the object containing the path.
- Click on the
 button in the Blend panel.
 - The blend objects are aligned along the selected path.
- The path remains separate and the blend object will contain a copy of the path.
- To edit the path, select the blend object (not the original path) using the Node tool.
- The original path can be linked to the blend object, by enabling the Linked Path option in the blend panel menu, before aligning the blend object to the path.
An existing blend object without an alignment path, is aligned to a line between the center of the original objects. This line can be edited as a regular path using the Node tool.
Blended Objects
Blended objects are objects resulting from a single step of a blend between two objects. Blended objects can be used to create an intermediary between two objects or symbols, using an editable position parameter.
- Select to objects to create an intermediary object from.
- Click on the
 button in the Blend panel.
 - A new blended object is created at 50% position between the two objects.
- The new object is linked to the two original objects and changing the original objects will update the blended objects.
- The new blended object can be independently moved and transformed.
- The blending position of the blended object can be adjusted in the Appearance panel.
Blended objects can be used to create single step intermediary objects between two symbols, where the content and position of the objects inside the symbol are also blended according to the selected blending rules.
Blended Shapes
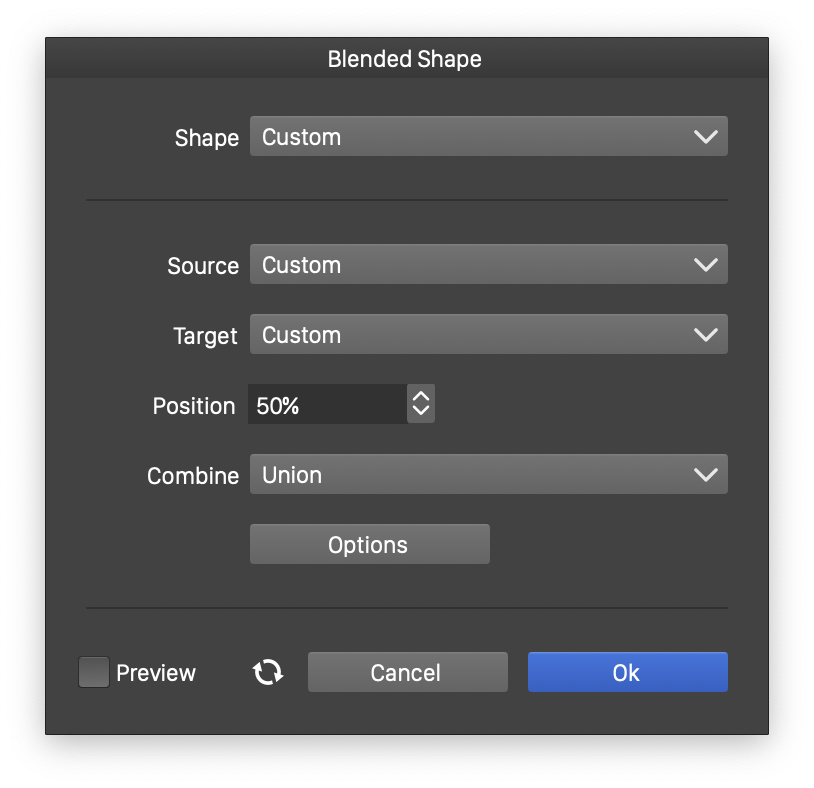
Blended shape options
Blended shapes are shapes created from a single step blend of two other shapes. Blended shapes can link to existing object shapes or shape styles. The blending position of a blended shape can be adjusted in the Shape panel.
- Select to objects to create an intermediary shape from.
- Open the Shape drop down of the context or shape panels.
- Select the Blended Shape Preset or the Blended Shape Style to create a shape preset or style that is the blending of the two shapes.
- A new blended shape is created that can be accessed from the Presets or Styles panel.
- The blended shape options can be used to control how the shape is created from the two source shapes.
The blended shape has the following options:
- Source - The source shape used in creating the blended shape.
- Target - The target shape used in creating the blended shape.
- Position - The blending position to create the intermediary shape.
- Combine - Combine operator used to merge multiple shapes into a single shape.
- Options - The Blend Options.
Expanding Blends
The blend effect can be expanded into individual objects of the transition, as follows:
- Select the blend object, by clicking on an intermediary object.
- Select the Expand Blend command from the Effects - Blend menu.
- The intermediary objects are expanded into a group.
- To access individual objects, ungroup the resulting group of objects.
Blend Examples
The blend effect has several options controlling the transition of the shape and style between multiple objects. Next are some examples created using the blend effects.
Blending open paths
In this example, a blend is created between two, relatively simple, open shapes. The shapes contain gradients as stroke styles. The gradient on the starting and ending outlines are different, and the blend will create intermediary gradients between the two styles.
Blending open paths with gradients.
Blending closed shapes
In this two examples, a blend is created between two, closed shapes. The shapes are filled with solid colors, and the intermediary shapes will be filled with the color transition between then two objects.
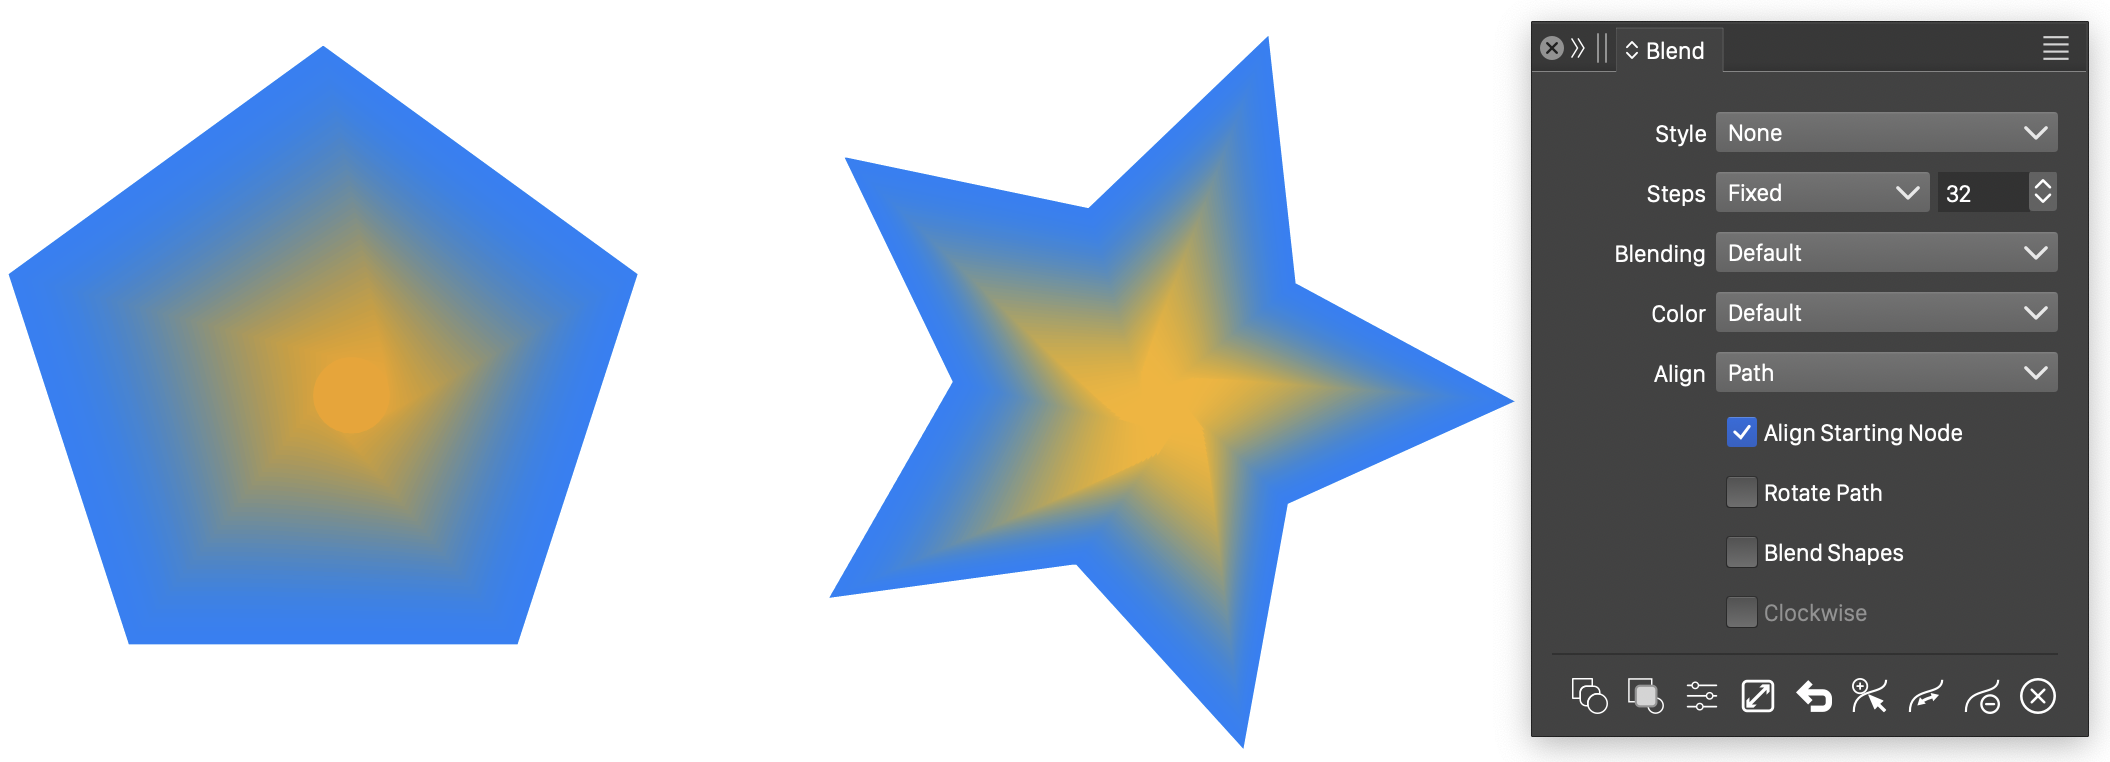
Blending closed shapes of different fill and form.
Blending outlined shape
In this example, a blend is created between two closed shapes, each having a stroke style, but no outline. The Revolve option from the Blend Options view is used to create extra rotations as one shape transitions into another.
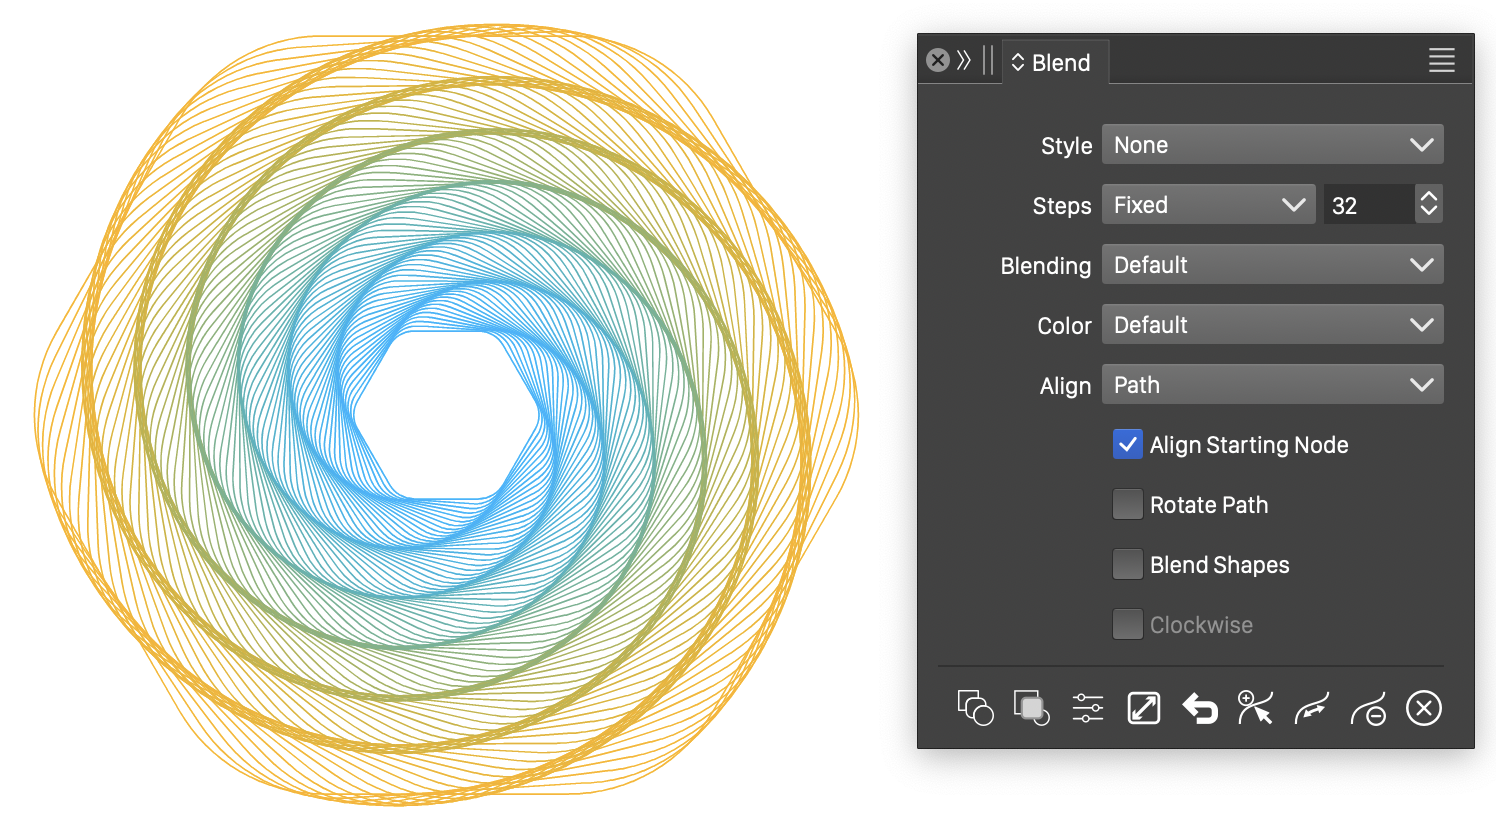
Using the revolve option to blend closed shapes.
Blending along a path
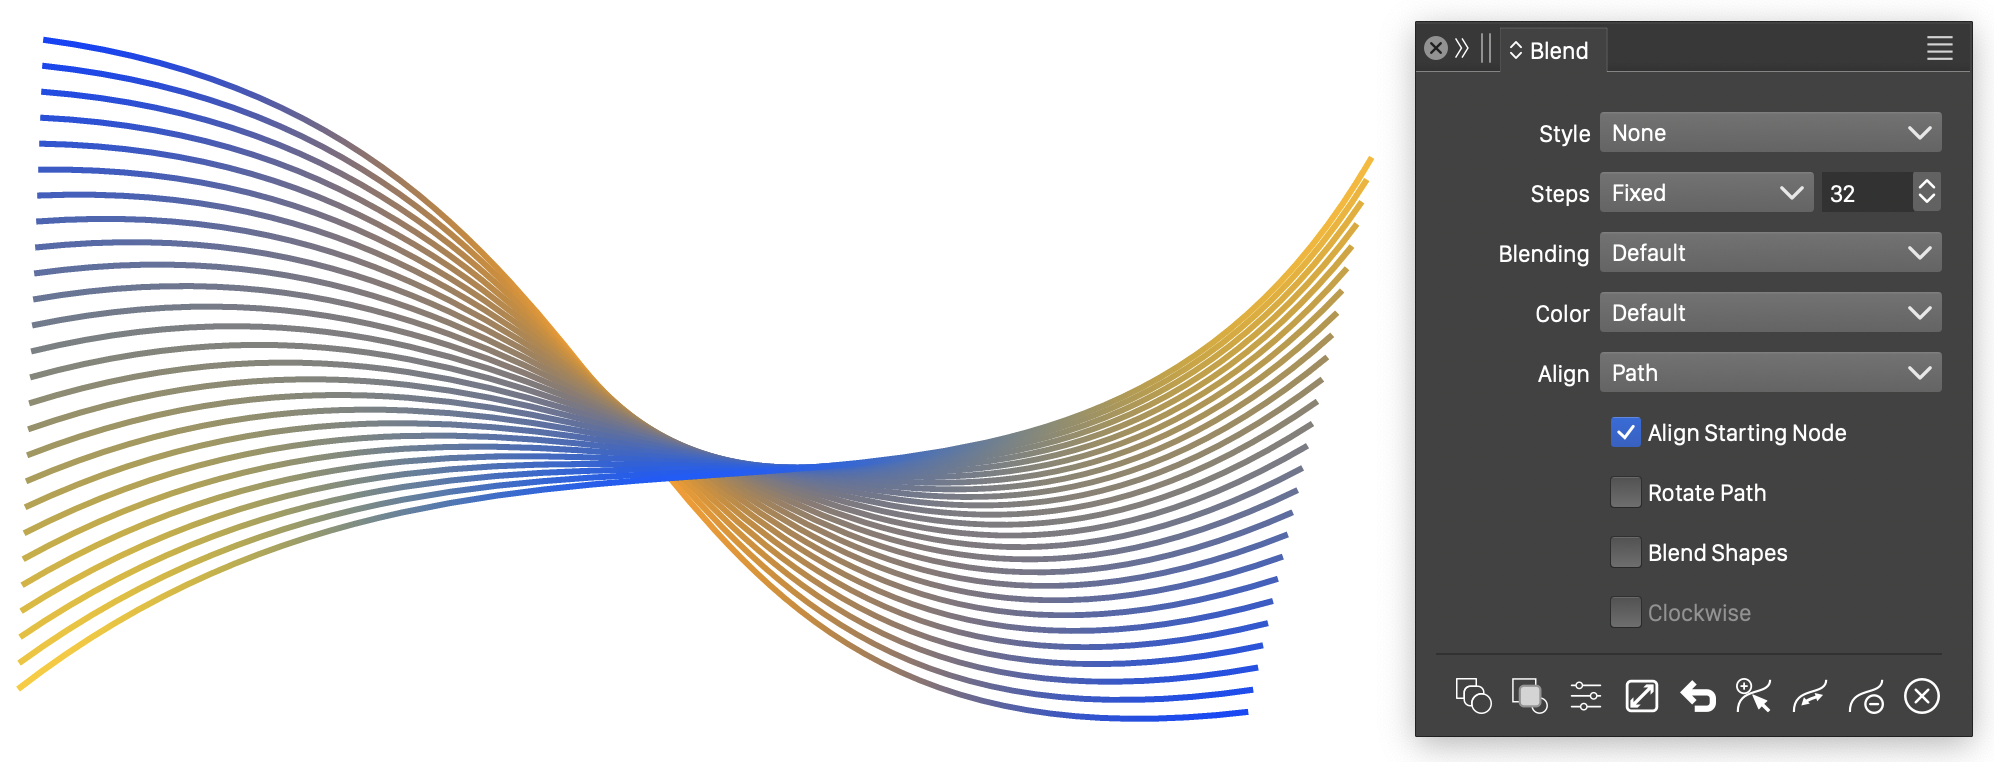
In this example, the blend effect is aligned to an open path. The starting and ending objects are positioned at the end of the open path. Intermediary objects are positioned uniformly along the blend path. This blend effect uses a style transition function, to create several cycles of style transitions between the two end styles.
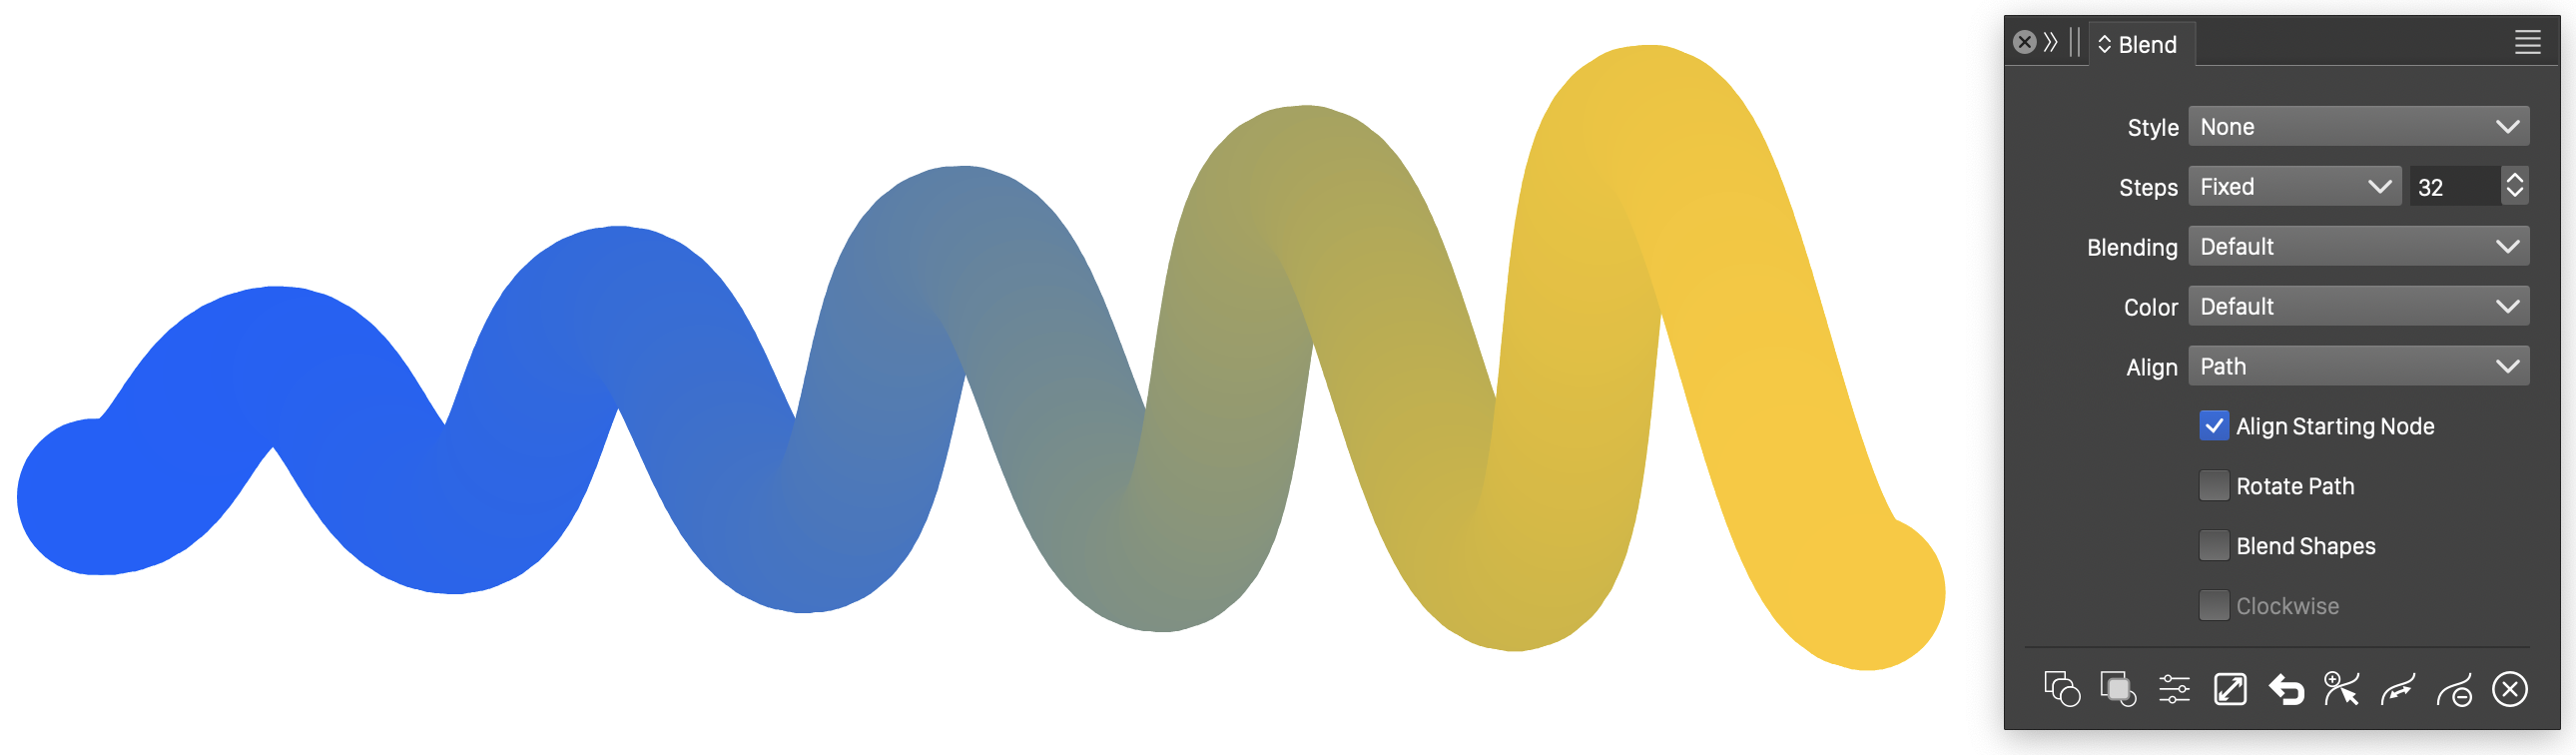
Blending along a path, using a style variation function.
Blending open shapes along a path.
In this example, the blend is created between two freely drawn open shapes. The resulting blend is aligned to an other open shape.
