Exporting Final Art from VS for others including non-VS users
-
@b77 said in Exporting Final Art from VS for others including non-VS users:
But… my idea is to improve the app in such a way that you can keep the entire editability of the original file right up until you need to send it to print, and when it's time for that, simply export it as PDF (the universal graphics interchange format), which should take care of all vector + vector effects conversion without fuss.
@b77 - I'm appreciating your ideas and your feedback on this topic.
Referencing what I quoted from you in this post, I am all in support of keeping editability of the original file up to the point of sending it out for use. We all have different needs for what the final result is, however.
For you, it sounds like just exporting as a pdf gives you a file adequate to either send to your client or to your printer to use. This would not go far enough for me as someone designing for screen printers because I need the image completely flattened. We may have to both define what we mean by "flattened" and maybe I need a better descriptive word to represent what I am talking about. To me there's "expanded" - as in, everything is a fill, all strokes are now fills, but objects can be stacked and moved around independently. Then there's "flattened" for me, meaning, merged down, completely pancaked... nothing is underneath anything else. It would be impossible to pull a complete shape out from behind another after this kind of flattening.
-
Continuing from earlier on -
@b77 - With what I do, I almost never send an editable file to the end-client. I send them a final vector that is as pancaked and compressed and simplified (no extra styling).
It's pretty common amongst designers to do a save-as with their final art and give it a revised name to represent it being the final art file, and then use destructive means to prepare it for the end client.
With what I do, saving final art is not the last step in the process. For some clients, I need to prepare customized separations of color to be burned onto silkscreens for apparel printing; putting each color used on its own dedicated layer/art file. (In VS I will probably set each color art on a different artboard and then use "export dartboards" to expedite that process) Some colors, such as white if it's being used to underbase the other colors overtop, I need to be able to modify the vectors in that color usually with a stroke to essentially cut-back the white so it will not show when another ink color is printed overtop.So I say all that to express that destructive pancaking and exporting is not the end of the process for me. Just relying on the pdf export to do the expanding and compressing would not work for everything I do.
-
@vectoradmin said in Exporting Final Art from VS for others including non-VS users:
So this would be some sort of "flatten to vectors at export" option, that would do all the tricks in the background when exporting, without any impact in the document.
What if it did like Photoshop where you can choose selected layers and do a key command or a menu option from the layer panel to essentially create a new layer at the top of the stack and copy all information from selected layers to that new layer and then compress all selected and merge them. I can look that command up if it helps.
This leaves all the editable layers below untouched and gives a 'final" expanded/merged layer at the very top
-
@Boldline OK, as I understand it, you need complete flattening by merging overlapping same-color shapes or all same-color shapes.
Regardless, I didn't say 'inner fills' would help with any flattening (obviously), much less the complete one you need.
It would just help with the issue in your third post in the thread — it would skirt the need to merge, break apart, separate paths and all that to assign color to negative space, and would let you keep the original drawing easily editable and skip repeating the merging steps if changes are needed, because it's non-destructive.But anyway… in the meantime:
Have you tried generating separations from VS (only if you use spot colors for all objects), then opening each generated PDF and layering the shapes from each into one drawing? This could be a good workaround, IMO.
If you test this workaround and it does the job for your kind of artwork, then the developer could basically use the same separations code to generate a single flattened PDF from the original file directly.
-
@b77 said in Exporting Final Art from VS for others including non-VS users:
@Boldline OK, as I understand it, you need complete flattening by merging overlapping same-color shapes or all same-color shapes.
Yes- where same colors even if they are in different layers or grouped in different groupings would become individual shapes where they touch. But also, all colors would be completely flattened and "cookie cutter " each other based on what was in front. The front shapes cookie cutter and destroy what is behind them. If you look in the video in the earlier post, you can see I show many vector items layered over the top of one another and then after I merge and ungroup it, the remaining pieces that touch and are the same color get united into unified shapes with no styling and everything is broken apart.
@b77 said in Exporting Final Art from VS for others including non-VS users:
Regardless, I didn't say 'inner fills' would help with any flattening (obviously), much less the complete one you need.
It would just help with the issue in your third post in the thread — it would skirt the need to merge, break apart, separate paths and all that to assign color to negative space, and would let you keep the original drawing easily editable and skip repeating the merging steps if changes are needed.I'm open to alternative ways to fill color in empty vector shapes. That's a part of the design process that overlaps the end process with the finalizing steps and separating colors for screenprint. If @vectoradmin adds an option for that specifically, I'm all for it. I have no issue with things remaining "live" and editable so long as there is a destructive option I can use while designing and/or at the end when I am prepping files for output
@b77 said in Exporting Final Art from VS for others including non-VS users:
Have you tried generating separations from VS (only if you use spot colors for all objects), then opening each generated PDF and layering the shapes from each into one drawing? This could be a good workaround, IMO.
I have not tried doing a full separations in VS yet. Usually I have exported or pasted the design into Illustrator and then done the destructive merging and flattening there. Also because I still need to figure out how I can make everything a solid opaque black and also get a real registration black for the registration marks and then test the file with a client to be sure it all works.... that is something I'll be doing soon
-
This video applies to a few of the conversations on the forum - but for now I'll add it here.
This is the "Live Paint" option in Illustrator for filling in negative spaces inside expanded vectors.
You select the vector first - then select the live paint tool and then you can pick a color from the open swatch palette or there's a mini-selector as part of the cursor where an arrow key left or right switches between colors in the color palette.
As you hover over the selected vector, it highlights areas you can click to fill. It's a "live effect" and when finished you have to expand it (same as convert to curves) and then ungroup it.By no means do I think this is the best solution but I do feel like it's a step in a good direction and might tie in with the idea you were suggesting @b77 for an option to fill negative shapes that is still "live"
@vectoradmin this was a topic brought up last week;
@vectoradmin said in How to expand and divide a single stroke overlapping object?:
@Subpath said in How to expand and divide a single stroke overlapping object?:
Illustrator's Live Paint function, would be a very nice and useful addition to VS.
There is "Shape Paint" in VS (Styles -> Shape Paint -> Create Shape Paint) that does similar (planar map) graphics as Live Paint in AI
I will try your suggestion again before I comment further on that existing tool in VS because my first attempts did not seem to get me what I was expecting - but I want to go in and read up on it and try again before comparing it to Live Paint
-
@Boldline said in Exporting Final Art from VS for others including non-VS users:
I'm open to alternative ways to fill color in empty vector shapes. That's a part of the design process that overlaps the end process with the finalizing steps and separating colors for screenprint. If @vectoradmin adds an option for that specifically, I'm all for it.
Great!
-
@b77 This is a screenshot of what a typical separation job looks like for me in Illustrator.
Every color in the job (this job has five colors and a white base) is on it's own layer.
The gray background gets turned off, I use that as a standard background color when prepping everything.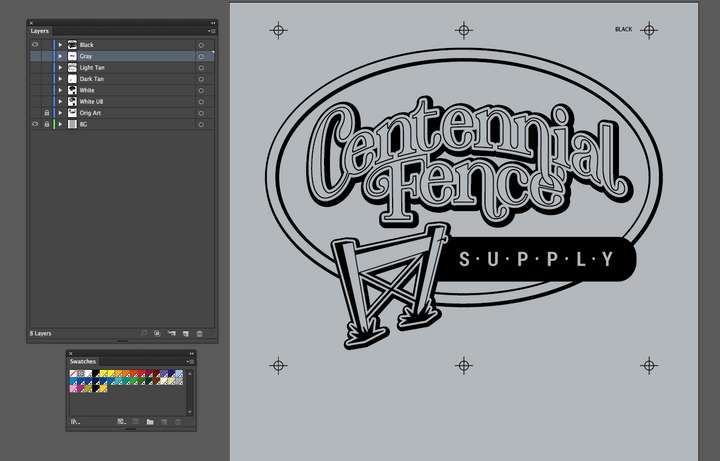
I convert each color layer to a dark opaque black. and then when I send this to the client, they will turn off the original art layer and the background layer and then turn on each color layer one by one and print onto films
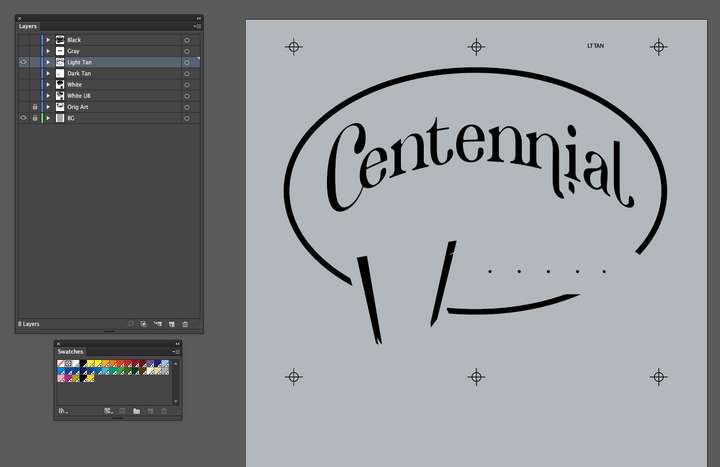
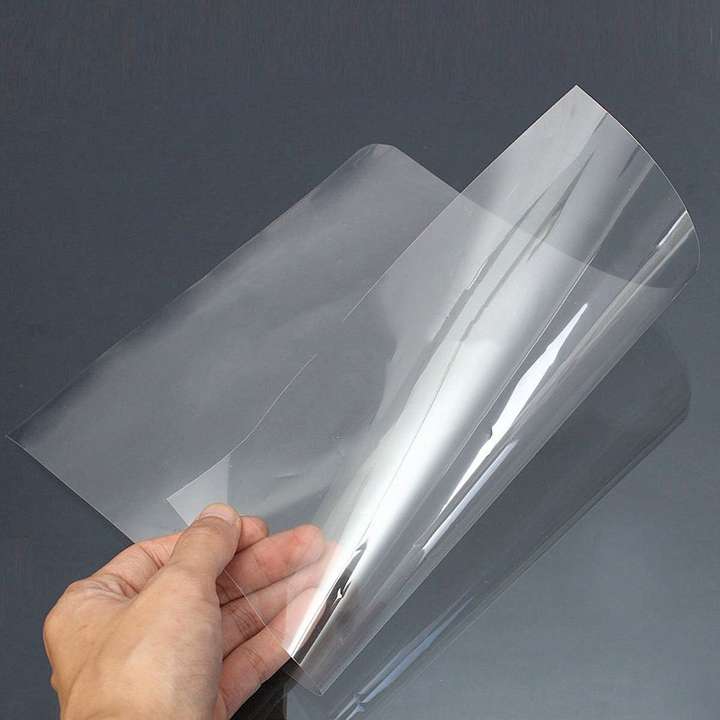
This is what it looks like when you print films:
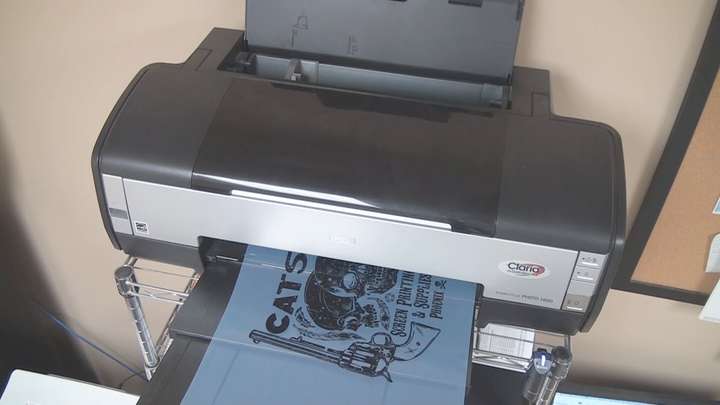
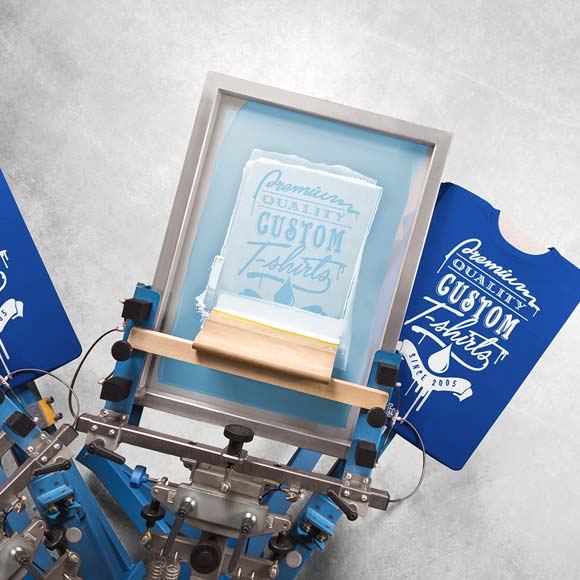
So the black needs to be super opaque so it can block UV light from exposing that portion of a screen coated in emulsion. The UV light hardens the exposed emulsion and the part covered by the black ink on the film can be washed off easily, creating the stencil used for screen printing

-
@Boldline Yes, it's a CTF (Computer-to-Film) workflow, where a RIP (usually software)…
- rasterizes the artwork as spot (full opacity) or halftones, then…
- sends it to the printer (or to an imagesetter), which uses toner or laser to print it on film…
- which film then gets used directly (or after it gets developed) with the help of UV to…
- create the stencil for textiles, lithographic plates for offset printing or maybe a flexible relief plate for flexo printing.
I think separations done in VectorStyler work for what you need — if the object has an uniform, opaque black (C0 M0 Y0 K100), or an opaque spot color, exporting the separations to file will result in correct PDFs with 100% opaque colors for each ink used in the drawing.
You might however want to open each PDF and combine some objects, for complete flattening.
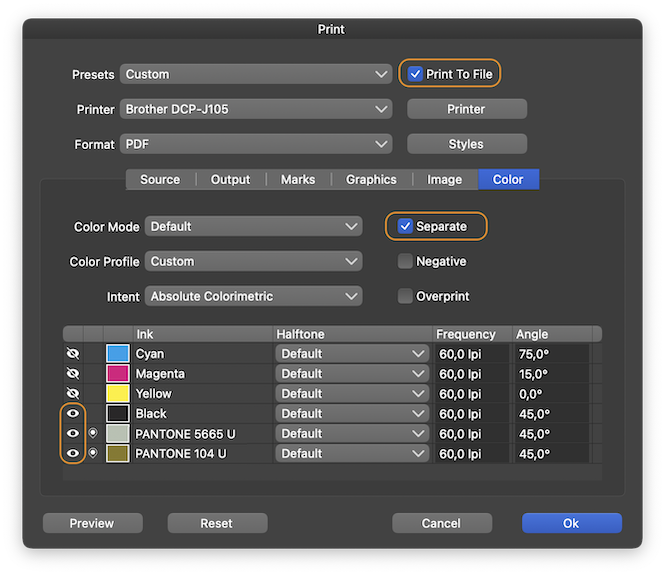
I'm attaching a simple VS file with black and two spot colors. If you use the settings below when printing, you should get three PDFs for all three inks used in the drawing:
-
@b77 This is really awesome! Yes this is a CTF (Computer-to-Film) workflow. I did not know the technical names and I wanted to be sure I explained specifically how I export vector designs and for what purpose and on why they need to be opaque, etc...
I downloaded your file and edited my settings and it produced the three pdfs as you mentioned - this is a lot like what I would do in Illustrator when I printed films while working at a screen print shop (instead of just doing the art in my office working for myself now) so I'm understanding completely what is happening - thank you for showing me. I will be doing this way going forward in VS.
What I need to figure out still is a working registration black I can use when I do this method of printing... because I will want the registration black to be used for the registration marks on my designs and print on every output no matter what colors are chosen. I will add the name of the color for the film in that same Pantone colors so they print with each color
@b77 said in Exporting Final Art from VS for others including non-VS users:
where a RIP (usually software)…
rasterizes the artwork as spot (full opacity) or halftones, then…
Is it wishful thinking to get @vectoradmin to add a RIP to VS?

-
@Boldline Is that a regular printer, or one that is specially made to print on film? I guess it has its own driver. If it does, that should do the job. You can try with a gradient that goes from full opacity to full transparency.
-
@b77 Standard printers are used - I think there are some that print on film easier than others do. From my experience there's no way to get it to convert something with a lowered opacity to halftones.... many people use RIPs for that... if there was a way for @vectoradmin to add even a simple RIP to VS, I think that would be amazing.
A long time ago before I worked for myself, one of the Screenprinting shops was just beginning to experiment with halftone printing and we started with an open source RIP called "GhostRip"
It was a little clunky 10 or so years ago when I used it. It took a number of steps at the time to use and eventually we went to using Accurip.
Accurip however, has become the bane of many a screen printer due to its excessive cost and licensing.
-
@vectoradmin said in Exporting Final Art from VS for others including non-VS users:
One thing to do is to gather (difficult) examples where merge or union is failing, or it is slow. There is no excuse of having VS merge be less usable than AI merge.
Awesome! I appreciate that vision! Merge and Union improved a lot in 2021.
I'll keep testing things and sending in examples when it happens. I know there were a few examples recently I sent in that you found worked better with union than with merge or vice versa. Are you able to go back and look at those?
-
@Boldline said in Exporting Final Art from VS for others including non-VS users:
What I need to figure out still is a working registration black I can use when I do this method of printing...
Did you try using the Registration color in the VS default palette (should be just after the null color)?
That should print on all plates.
-
Regarding your screen printing photos above.
Found it interesting that your designs are screen printed

I was a screen printer for about 12 years mainly printing foils
and signs.And after that job I was a screen printer again for about 8 weeks in
T-shirt printing and we had the same workflow as you describe with
your photos above. Brings back some memories
After that I went into digital printing, and created the vector graphics there.
-
@Subpath That's really awesome! Would love to see some of your work, do you have a link? I kind of fell into screen print designing in 2010 and loved it immediately and have done it since. After working for a couple companies I decided to quit and start my own business in 2014 and have done it full time since. I don't do the actual printing myself, I just create the designs and sell them to printers who use them for their clients.
What kind of digital printing do you do now?
-
@Boldline, unfortunately can not show anything.
Screen printing was a long time ago. And for vector designs,
the company owns the rights.In my last job, I was also only doing vector designs, new products
with marketing, the Designs were mostly safety signs and labels,
custom road signs and so on and Designs on customer request.The digital printers were two "Gerber Edge," if you know them and we
also had two vinyl plotters, I forget the name. Later also a large
UV ink printer.Btw. like your Designs and must say that you do a really good job.
-
@Subpath said in Exporting Final Art from VS for others including non-VS users:
Btw. like your Designs and must say that you do a really good job.
thank you!
Would love to see stuff you do currently, even for yourself
-
Will look, but do not expect anything special
I'm more experimenting at the moment.
To find out solutions for some ideas.
-
@vectoradmin said in Exporting Final Art from VS for others including non-VS users:
@Boldline said in Exporting Final Art from VS for others including non-VS users:
What I need to figure out still is a working registration black I can use when I do this method of printing...
Did you try using the Registration color in the VS default palette (should be just after the null color)?
That should print on all plates.I tried using the built in registration black to no avail.... it would not show up on the final output pdf.
I've attached the file here in hopes @b77 and @vectoradmin in particular could help me find a solution.
0_1641349834100_CC Bulldogs Seps.vstyler
