Guidelines
Guidelines are used to align objects to precise locations on the artboard or a canvas. Guidelines can be created and positioned interactively, or edited using numeric coordinate values in the Guideline panel. Guidelines are displayed above the artwork, using guideline colors.
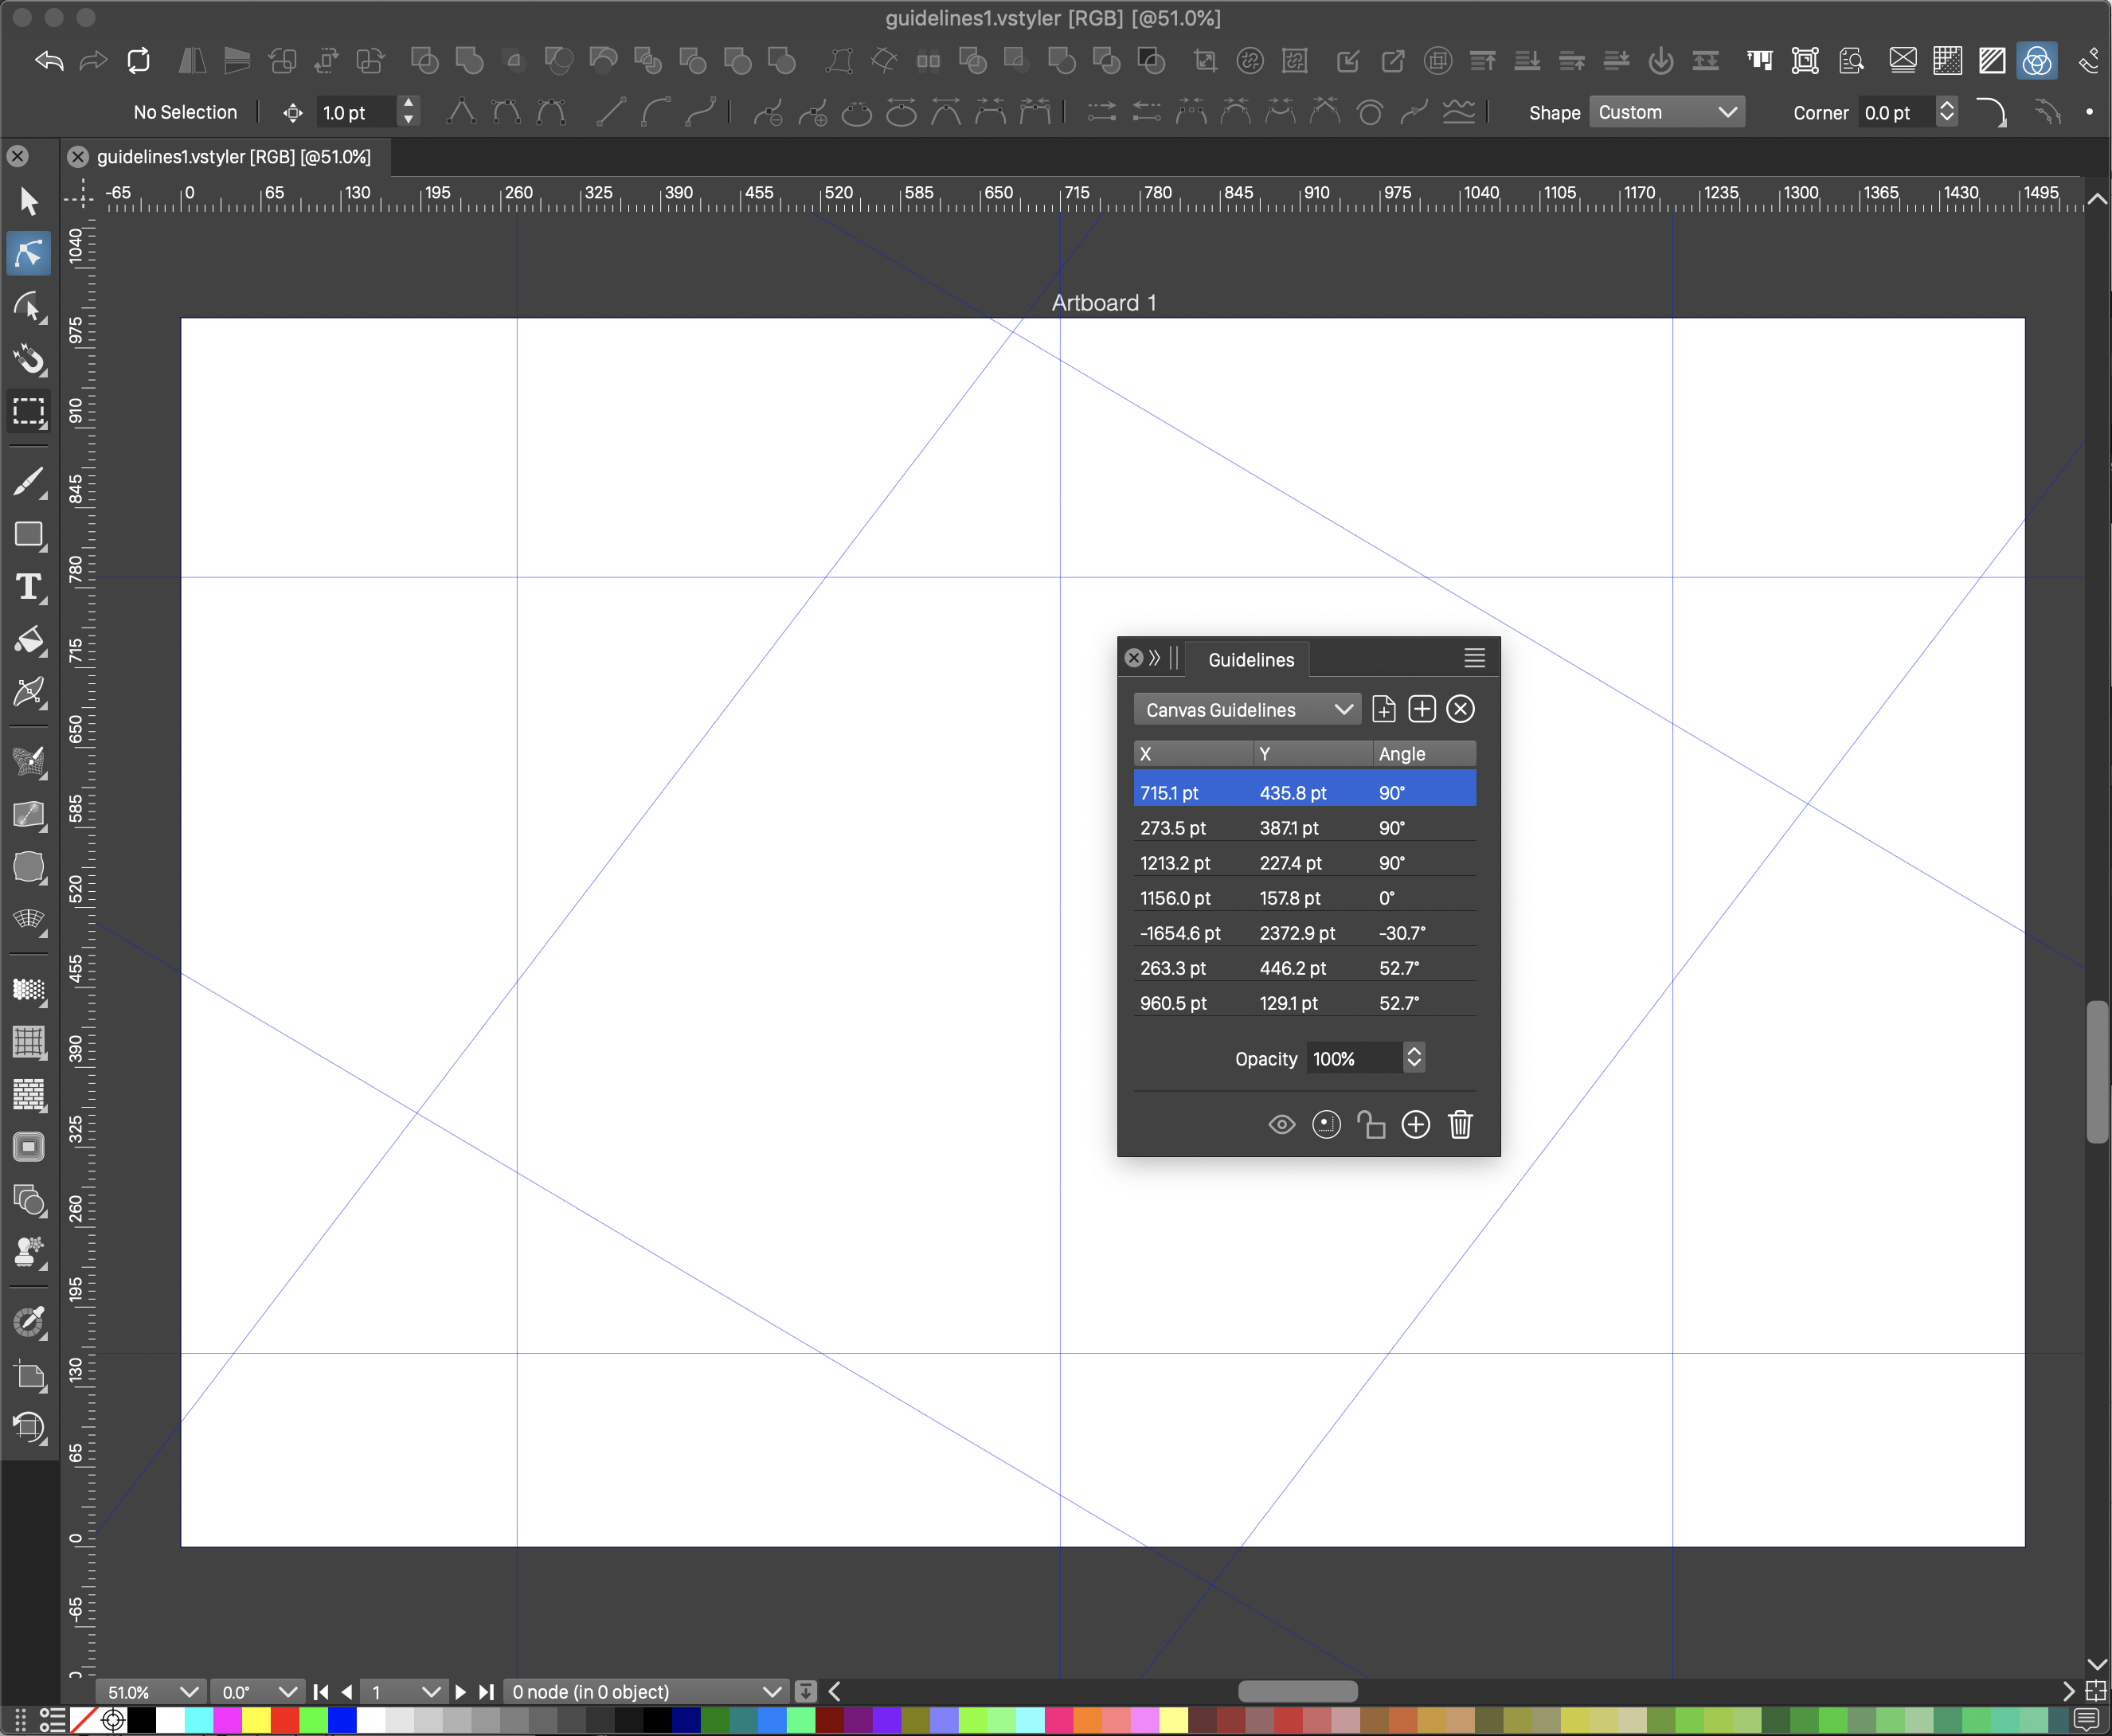
The guidelines and aligned objects.
The following guideline features are present in VectorStyler:
- Rotate guidelines to any angle interactively. Set the guideline angle in the Guideline panel.
- Create and manage named guideline groups. A group of guidelines can have its own color, visibility, locking and activation options.
- Assign guidelines to an artboard. Artboard guidelines are clipped to the artboard, and move with the artboard.
- Assign guidelines to a canvas. Canvas guidelines are active on all artboards of a canvas.
- Save guideline groups as presets and reuse the guideline presets in other documents, canvases or artboards.
- Align objects at any angle, by snapping to rotated guidelines.
- Combine rotated guideline and collision snapping to position objects.
- Snap object rotation and line drawing angles to guideline angles.
- Create guidelines by setting up row and column numbers and spacing.
- Create guidelines by dragging new guidelines from the ruler.
- Guidelines created in a rotated document view, will be rotated relative to the document coordinate system.
- Snap to rotated guidelines in rotated document views.
- Create guidelines for any object shape.
- Snap to guideline shapes using collision snapping.
Creating and Changing
The easiest way to create a new guideline is to drag it from the ruler into the document. Hovering over an existing guideline, will change the cursor to indicate guideline moving or rotating option. Guideline editing is available in most tools, unless the guidelines are locked.
To create and change guidelines interactively, use the following steps:
- Drag and drop a new guideline from the ruler. The ruler and guidelines must be visible. Use the Show Ruler command from the View menu, to make the ruler visible. Use the Show Guidelines command from the View - Guides menu to make guidelines visible.
- When creating a guideline from the ruler, the guideline showing state is automatically enabled.
- If the document view is rotated, the guidelines created from the ruler will be rotated in the document coordinate space, and appear straight in the rotated document view.
- The corner region between the horizontal and vertical ruler can be used to create two guidelines in a single step.
- The new guideline is added to the active guideline group. The active guideline group can be selected in the Guideline panel.
- To move a guideline, hover over the guideline in a region not too close to the view or artboard edge. The cursor should indicate guideline movement. Press the mouse and drag the guideline.
- While moving the guideline, hold the Control key to place the guideline into the artboard under the mouse, or the canvas, if the mouse is outside of the artboards.
- To rotate a guideline, hover over a visible end of the guideline. This can be close to the artboard margin (for artboard guidelines) or the document view margin (for canvas guidelines). The cursor should indicate guideline rotation, when hovering at the end of a guideline. Press the mouse and start dragging. The guideline will rotate around the last position used to move the guideline.
Guideline Panel
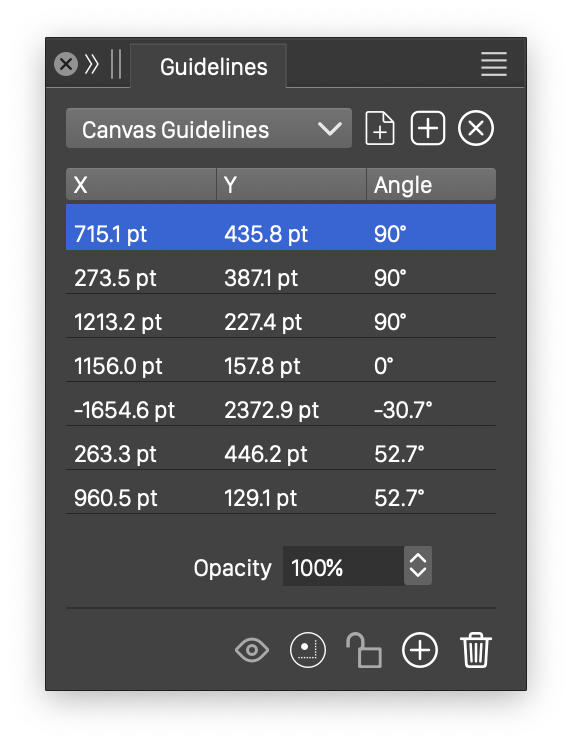
The Guideline panel.
The Guideline panel, accessible from the Window - Editing menu, can be used to create and manage guideline groups, and to set positions and rotation angles of guidelines in the current group. A single canvas or artboard may contain multiple guideline groups.
The main region of the Guideline panel contains the list of guideline coordinates from the current group. Each guideline has an X and Y coordinate and a rotation Angle. The X and Y coordinate are required, regardless of the guideline direction, as it is also used as a rotation center for the guideline. To change the rotation center, move the guideline to a new position.
The guidelines can be organized into groups. Guideline groups have separate color, visibility and activation options, enabling a workflow with multiple different guideline settings on the same canvas or artboard.
The following guideline editing options are accessible from the Guideline panel:
- To select the active guideline group, click on the drop box arrows at the top of the panel. A menu is opened with available guideline groups.
- The name of the active guideline group can be edited, by typing it in the drop box at the top of the panel.
- The guideline coordinates of the current guideline group are listed in the main region of the panel.
- The X, Y and Angle values can be edited by selecting the guideline in the list, and clicked on the field to edit. The changed value can be confirmed by pressing Enter, or clicking away from the numeric editor.
- The Opacity field contains the opacity used when displaying guidelines from the current guideline group. The guidelines are displaying over the top of the artwork, and the opacity can be used to dim the guidelines.
The icon section of the Guideline panel contains the following options and commands:
 - Show or hide the current guideline group. Each guideline group can be independently hidden or made visible. The common Show Guidelines command from the View - Guides menu controls the visibility of all guideline groups. Guidelines in invisible groups may still be active when snapping to guidelines is enabled.
 - Activate or deactivate snapping to guidelines in the current group. Each guideline group can be independently activated and deactivated for snapping.
 - Lock or unlock the current guideline group, Guidelines in a locked group cannot be changed using the interactive guideline moving and rotating tool.
 - Create a new guideline, centered to the current document view. The new guideline is created in the current guideline group. If the current guideline group is in an artboard, the new guideline coordinates may fall outside of the artboard.
 - Delete the selected guidelines.
 - Create a new guideline group on the current canvas. The name of the guideline can be set in the editor field at the top of the panel.
 - Create a new guideline group on the current artboard.
 - Delete the current guideline group, with all of its guidelines.
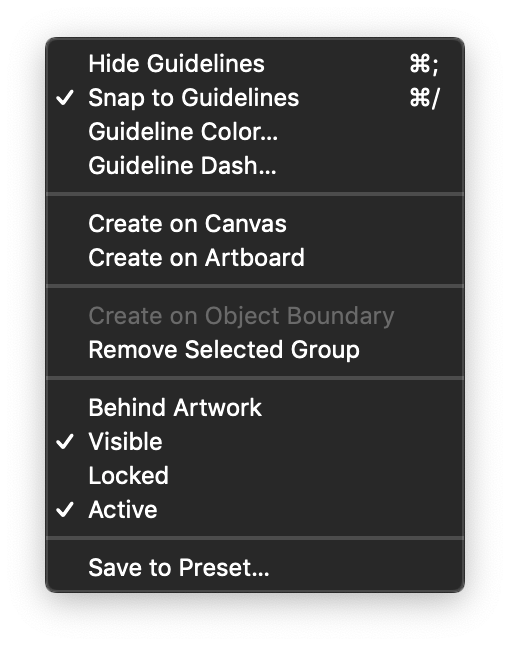
The Guideline panel menu.
The Guideline panel menu contains options and commands to manage the guidelines and guideline groups:
- Guideline Color - Set the guideline color of the current guideline group. Each guideline group may have a different color, enabling the indication of guideline groups on the canvas and artboards.
- Create on Canvas - Create a new guideline group on the current canvas. The name of the guideline can be set in the editor field at the top of the panel.
- Create on Artboard - Create a new guideline group on the current artboard.
- Remove Selected Group - Delete the current guideline group, with all of its guidelines.
- Save to Preset - Save the current guideline group as a preset. Guideline presets can be saved into a document, or shared between documents, for future reuse.
- Previously saved guideline presets can be recalled using the Use from Preset and Add from Preset menus from the panel menu.
Objects as Guidelines
Any object, group of objects, or a whole layer can be marked as a guideline object. The shapes inside guideline objects are used as guidelines when moving objects.
In VectorStyler, snapping to the guideline object shapes is done using collision snapping, even if the Collision snapping mode is disabled.
- To convert an object, group or layer to guidelines, select the object and select the Make Guides command from the Views - Guides menu. The guideline objects and layers are shown using the default guideline color. The default color can be changed in the Document Setup view.
- When the Snap to Guideline option is enabled, the guideline object shapes are treated as collision snapping objects.
- To release a guideline object and return it to a regular object, select the Release Guides command from the Views - Guides menu.
Create with Rows and Columns

The Create Guides panel.
In some workflows, it is required that a set of guidelines are created on an artboard, at regular intervals. The Create Guidelines command from the Canvas menu can be used to create a set of guidelines that split the current artboard into rows and columns, using a gap as spacing.
To create row and column guidelines, use the following steps:
- Select the Create Guidelines command from the Canvas menu.
- In the Columns region set the Number of columns, and the Gutter between the columns.
- In the Rows region set the Number of rows, and the Gutter between the rows.
- Gutter - Edit the spacing between guidelines delineating two neighboring columns.
- Artboard Margin - Enables or disables the use of the artboard margin as the region of the newly created row and column guideline. When disabled, the whole artboard is split into rows and columns.
- Remove Guidelines - Enable or disable the removal of existing guidelines from the artboard. This option can be used to delete other guidelines, including previous row and column guidelines from the current artboard, before creating the new set of guidelines.
- The newly created row and column guidelines can be freely positioned and rotated using the guideline editing tools. To keep a row and column guideline set intact, lock the newly created guideline group in the Guidelines panel.


