Transparency Groups
A transparency group is a group of objects used as a transparency mask in other objects or groups of objects. When using a transparency group, the shape of the transparency mask can be adjusted by drawing objects and using fill and outline styles on those objects. Transparency groups can be used to create any transparency masks.

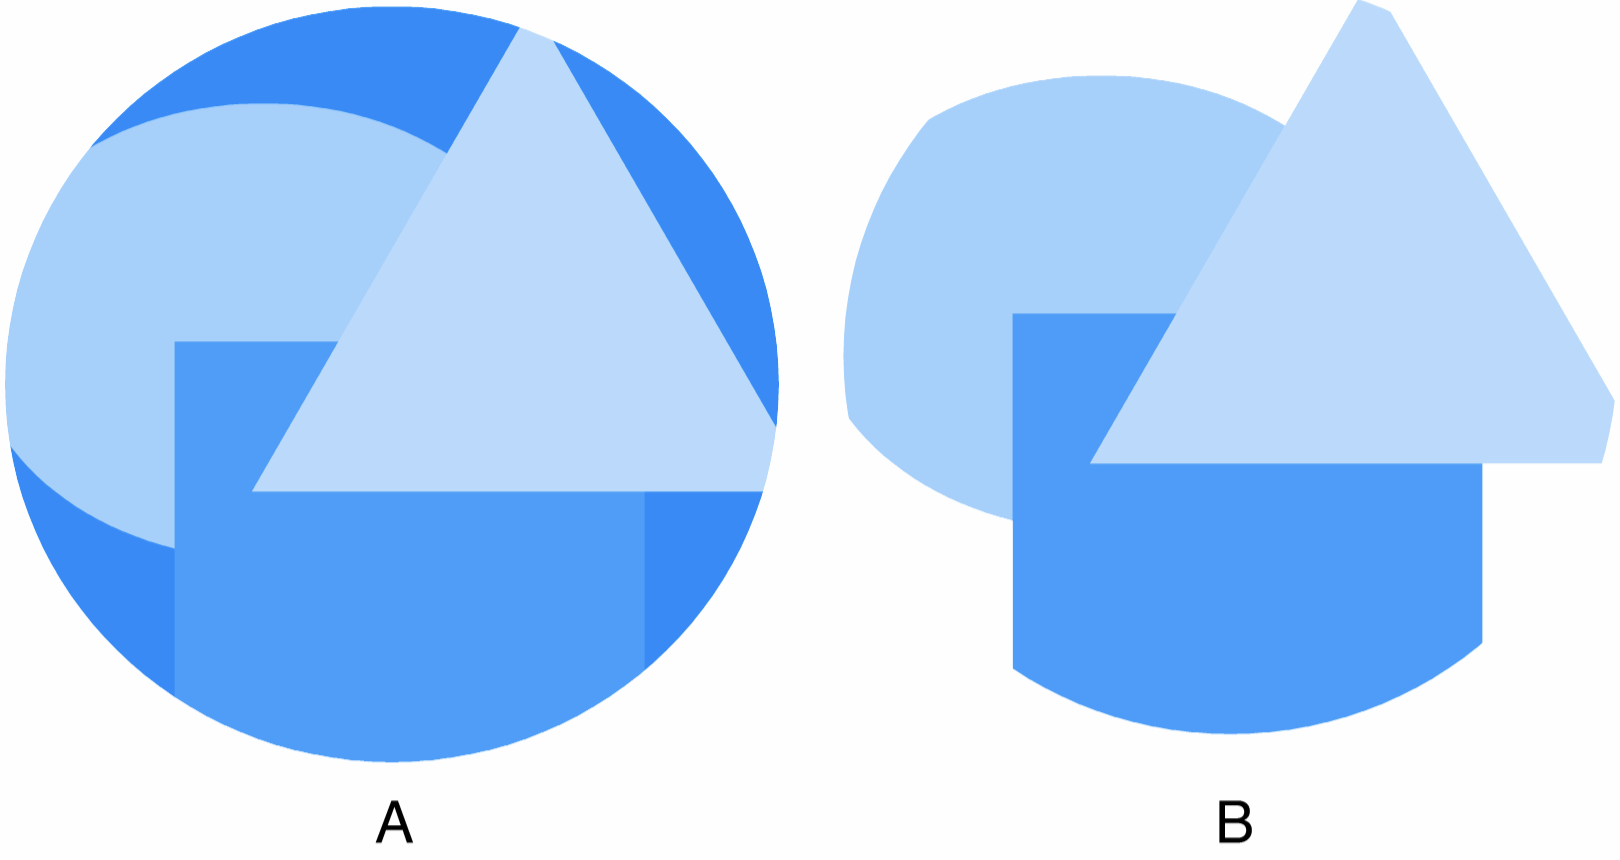
Transparency group masking a circle (A) as a non-clipping mask, (B) as a clipping mask.
The content of a transparency group is a set of objects with similar features as any object that can be created in VectorStyler.
Creating a Transparency Group
To create a new transparency group, use the following steps:
- Select the object or group of objects.
- Select the Drawing mode in the Mask field of the Transparency panel.
- Start drawing and styling the objects inside the transparency group.
To create a transparency object from an existing group of objects:
- Select the one or more objects whose transparency mask should be changed.
- Add to the selection the group of objects that will be the transparency mask.
- Select the Drawing mode in the Mask field of the Transparency panel.
- The last selected object will become the transparency mask of the object.
When using a group of objects as a transparency mask, the positioning of the mask relative to the object will impact on how the mask is used. The  button in the Transparency panel can be used to set this position relative to the object, or to an absolute location.
Using absolute positioning of transparency group objects is useful when sharing the same transparency mask over multiple objects. When the same mask is used over multiple objects, and the mask position is set to an absolute location, the mask of the different objects will be aligned.
Editing a Transparency Group

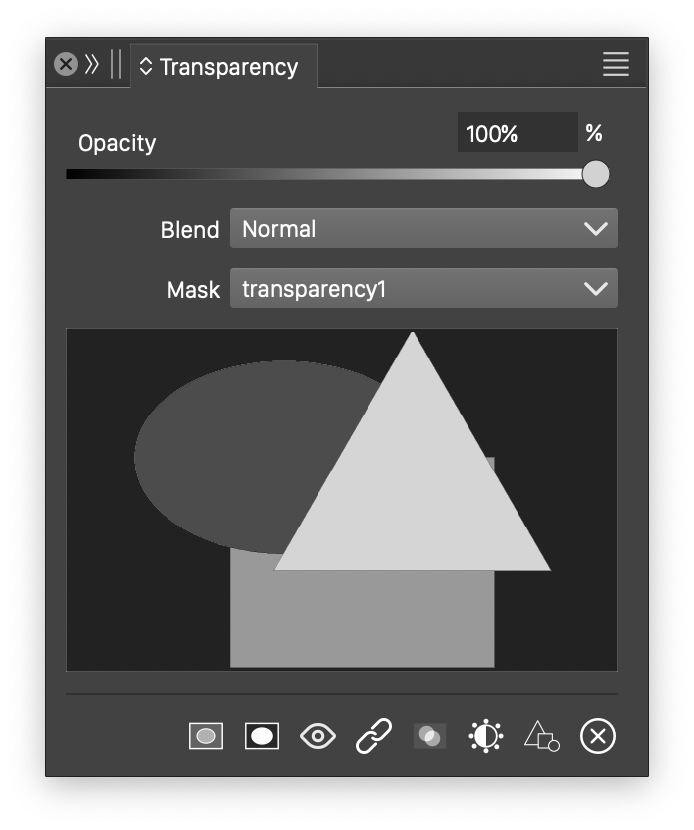
The Transparency panel with a group mask.
The content of a transparency group can be modified just like any regular object group:
- Select the object with a transparency group mask.
- Double click on the mask preview area in the Transparency panel.
- The transparency group is set into an isolated editing mode.
- Select and modify the objects inside the group.
- Create new objects using the drawing tools, or delete existing objects.
- Double click outside the area of the masked object to exit the isolated editing mode.
Reusing Transparency Groups
Transparency groups containing multiple objects can be reused by saving them as styles. When a transparency group is available as a style, it will show up in the Mask field of the Transparency panel.
To make a group of objects as a transparency group, use the following steps:
- Select the group of objects that will be used as a transparency content style.
- Select the Create Mask from Selection from the panel menu.
- In the modal view, set the style name used to identify the mask.
- Press Ok to save the transparency content style.
- The list of masks opened from the Mask field of the Transparency panel will contain the new transparency content style.
The transparency mask of the selected object can be saved as a preset or a style. This does not include the blending mode or the opacity value. Any of the possible transparency mask types (gradient, pattern, noise or objects) can be saved as a style or a preset.
- To create a transparency mask style, select the Create Mask Style command from the panel menu.
- Set the style name and press Ok to create the new style.
- The new transparency mask style can be selected from the Mask field of the Transparency panel.
- When creating and using styles, the mask style can be modified later, and all uses of the style are automatically updated with the mask changes.
- To create a transparency mask preset, select the Create Mask Preset command from the panel menu.
- Select the preset group and set the style name. Press Ok to create the new preset.
- The new transparency mask preset can be selected from the Mask field of the Transparency panel.
- When using mask presets, the preset attributes are copied into the object, and no links are kept to the original preset.
Transparency Group References
The easiest and most direct way of using a group of objects as a transparency group is to setup a Transparency Content reference to the object. This can be done using the following steps:
- Select the group of objects that will be used as a transparency mask.
- Select the Object Options command from the Object menu.
- Set a name for the object.
- Using the Role button, enable the Transparency Content object role for the object.
- Apply the object options by pressing Ok.
- The newly named object group will show up as a mask style in the list opened with the Mask field of the Transparency panel.
When using references to define transparency groups, the objects are not copied. Editing the original group of objects will immediately update all transparency masks using the object reference.
Multiple Transparency Content references can also be quickly created and maintained by drawing them on a Reference canvas. The Reference canvas must enable the Transparency Content role in the Canvas Options. The groups created on the Reference canvas should be named for easy identification.
