Pattern Panel
The Pattern panel can be opened from the Window menu. The pattern panel is used to create tiling pattern styles and presets and to pick from existing pattern styles or presets as fill, stroke or transparency style of the selected objects.
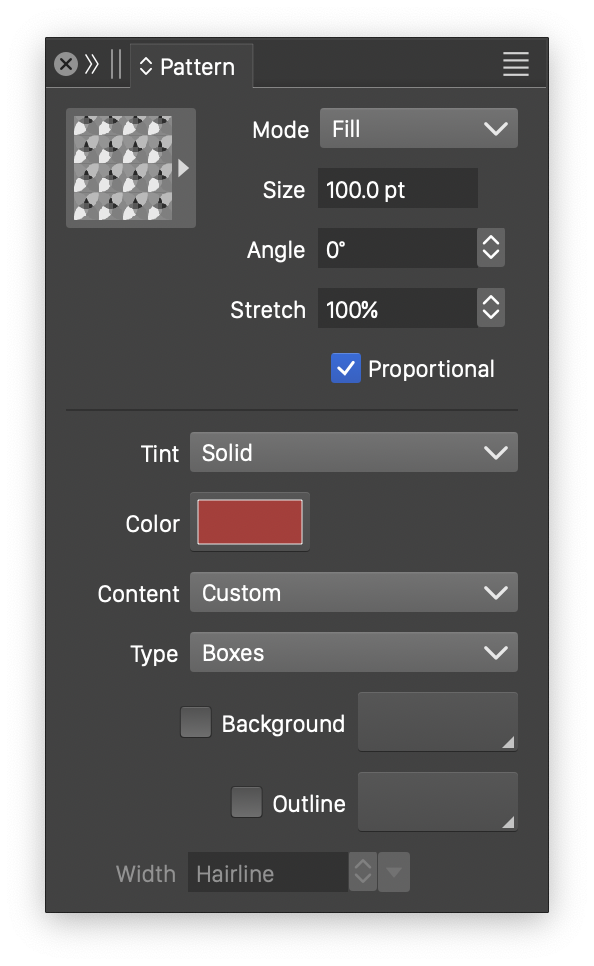
The pattern panel.
The pattern panel contains basic options of the tiling pattern fill style. The pattern panel menu contains additional commands and options used to setup tiling patterns. For more options of the tiling pattern style, use the Pattern Selector view.
The size, scale and rotation of the pattern fill can be interactively adjusted using the Pattern
tool. If an object uses a tiling pattern transparency, the Pattern Mask
tool is used to adjust its size, scale and angle.
Selecting a Pattern
The upper section of the pattern panel contains fields used to select a tiling pattern as a fill, stroke or transparency style. The pattern can be selected from an existing set of pattern styles and presets, using the button previewing the pattern. The list of patterns also contains object references with the Pattern Style role from the current document.
To setup a tiling pattern on the selected objects, use the following steps:
- Select the target of the pattern style from the Mode field. This can be Fill, Stroke or Transparency. The pattern setting target is also determined by the fill or stroke target set in the color panel.
- Click on the pattern list button (upper-left corner) to open the list of pattern styles and presets.
- Select a pattern from the list. The pattern is applied to the selected objects.
- Set the size of the pattern in the Size field. This field sets the size of a single pattern tile.
- Set the rotation angle of the tiling pattern in the Angle field.
- Set the horizontal stretching of the pattern tiles in the Scale field.
- Proportional - Enable or disable the proportional scaling of the pattern content objects, when fitting the pattern content object into a single tile.
Pattern Content
The middle section of the pattern panel contains the pattern content and tiling mode options. These options determine how the pattern tiles are arranged and what is inside each pattern tile.
- Select the pattern content from the Content field. The Content field contains a list of pattern content styles and presets and symbol styles and presets, including object references with the Tiling Pattern Content or Symbol roles. To create new pattern content, use the Create Pattern Style or Create Pattern Preset commands from the panel menu, or from the Styles - Create Style menu.
- Type - Opens a list of pattern tiling modes. The tiling mode determines the location of pattern tiles relative to each other. The available tiling modes are Boxes (for rectangular tiles), Hexagons (for hexagonal tiles), Triangular (for triangular tiles), Rhomboid (for rhomboid tiles). The tiling mode determines the tiling options available in the bottom section of the panel.
- Tint - Opens a list of pattern content tint modes. The colors in the pattern content can be the original colors (None tint), or adjusted using a tinting scheme selected in the Tint field.
- Color - Visible when the tinting scheme is selected to be other than None. Sets the pattern content color.
Tiling Outline
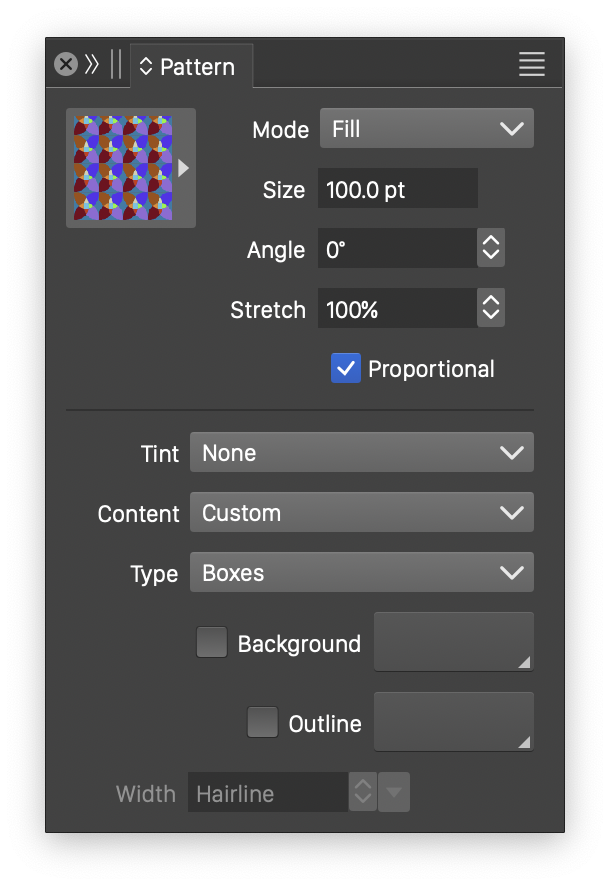
The pattern panel.
The tiles of a pattern can be outlined using a color and outline style. This can be done by changing the pattern panel state to make the outlining options visible.
- Background - Set the background fill of the tiling pattern. When arranging tiles in a layout with some spacing, the content behind the object may become visible. If there is no background color, the empty regions of the objects will be fully transparent. Select a background color to fill the object with a solid color, before laying out the tiles.
- Outline check - Set an outline for the tiling grid. The tiling grid geometry is determined by the tiling mode.
- Width - Edit the width of the outline used to render the tiling grid. Available when the Outline check box is checked.
Tiling Options
The lower section of the pattern panel contains the tiling mode specific options. The content of this section depends on the current tiling mode selected in the Type field of the pattern panel. The options for the available tiling modes are as follows:
Boxes Tiling Options
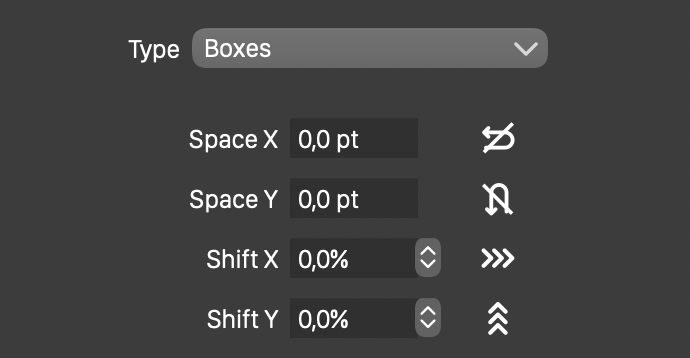
Boxes tiling options.
When the Boxes tiling mode is selected, the pattern content is arranged into a rectangular grid using the size, scale and angle options of the pattern. The rectangular grid can also set a spacing amount between the grid cells, and a shift in horizontal or vertical direction.
The following options are available when using the boxes tiling mode:
- Space X - Edit the amount of horizontal spacing between the tiles of the pattern. Negative values result in overlapping tiles.
- Space Y - Edit the amount of vertical spacing between the tiles of the pattern.
- Shift X - Edit the amount of horizontal shift between consecutive rows of the pattern. The shift is set in percentages, relative to the pattern size.
- Shift Y - Edit the amount of vertical shift between consecutive columns of the pattern. When both the vertical and the horizontal shift amounts are nonzero, the result is a tiling containing holes that are either transparent or filled with the background color.
 - Flip the tile rendering order in the horizontal direction. The tile rendering order determines the overlapping of tiles, in case of negative spacing.
 - Flip the tile rendering order in the vertical direction.
 - Enable or disable the mirroring of every other tile in the horizontal direction.
 - Enable or disable the mirroring of every other tile in the vertical direction.
Hexagons Tiling Options
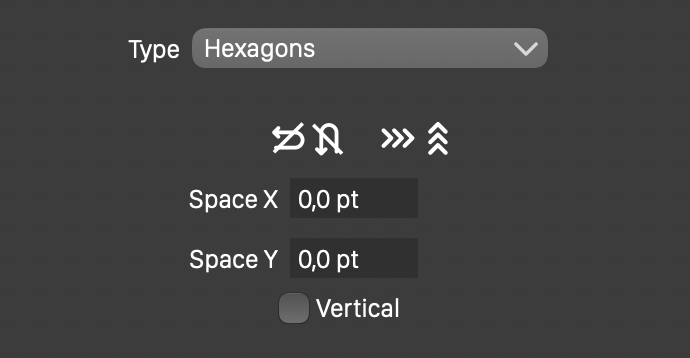
Hexagons tiling options.
The Hexagons tiling mode arranges the tiles of the pattern in a hexagonal grid, using the size, scale and angle options of the pattern. The hexagonal grid tiling allows spacing between the tiles and the control of the tiling direction.
The following options are available when using the hexagonal tiling mode:
- Space X - Edit the amount of horizontal spacing between the tiles of the pattern. Negative values result in overlapping tiles.
- Space Y - Edit the amount of vertical spacing between the tiles of the pattern.
- Vertical - Set the orientation of the hexagon.
 - Flip the tile rendering order in the horizontal direction. The tile rendering order determines the overlapping of tiles, in case of negative spacing.
 - Flip the tile rendering order in the vertical direction.
 - Enable or disable the mirroring of every other tile in the horizontal direction.
 - Enable or disable the mirroring of every other tile in the vertical direction.
Triangular Tiling Options
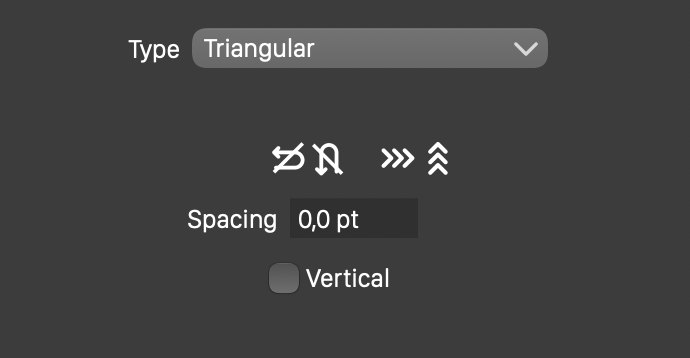
Triangular tiling options.
The Triangular tiling mode arranges the tiles of the pattern in a triangular grid, using the size, scale and angle options of the pattern. The triangular grid tiling allows a spacing amount between the triangles and the control of the tiling direction.
The following options are available when using the triangular tiling mode:
- Spacing - Edit the amount of spacing between the triangular tiles of the pattern. Negative values result in overlapping tiles.
- Vertical - Set the orientation of the triangle at zero angle.
 - Flip the tile rendering order in the horizontal direction. The tile rendering order determines the overlapping of tiles, in case of negative spacing.
 - Flip the tile rendering order in the vertical direction.
 - Enable or disable the mirroring of every other tile in the horizontal direction.
 - Enable or disable the mirroring of every other tile in the vertical direction.
Rhomboid Tiling Options
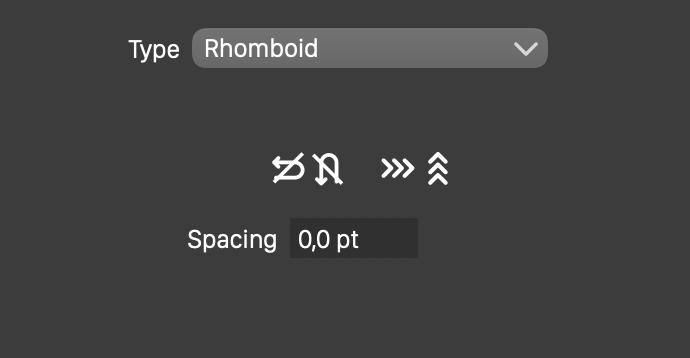
Rhomboid tiling options.
The Rhomboid tiling mode arranges the tiles of the pattern in a rhomboid grid, using the size, scale and angle options of the pattern. The rhomboid grid tiling allows a spacing amount between the rhomboids and the control of the tiling direction.
The following options are available when using the rhomboid tiling mode:
- Spacing - Edit the amount of spacing between the rhomboid tiles of the pattern. Negative values result in overlapping tiles.
 - Flip the tile rendering order in the horizontal direction. The tile rendering order determines the overlapping of tiles, in case of negative spacing.
 - Flip the tile rendering order in the vertical direction.
 - Enable or disable the mirroring of every other tile in the horizontal direction.
 - Enable or disable the mirroring of every other tile in the vertical direction.
Pattern Menu
The pattern panel menu contains additional commands and options used to adjust the tiling pattern style. It also provides access to commands to create new pattern content styles and presets, and to create and select pattern styles and presets.

The pattern panel menu.
Pattern Editing
The following pattern editing commands are available from the pattern panel menu:
- Edit Pattern - Open the Pattern Selector view to edit the detailed options of the current tiling pattern.
- Style Overrides - Select style overrides for styles used in the pattern content.
- Clear Style Overrides - Remove all style overrides defined on the pattern.
- Edit Tile Stroke - Open the Stroke Selector view to edit the detailed options of the stroke used to render the tiling grid. The tiling grid is rendered with a stroke style if the Outline option is enabled in the pattern panel.
- Clear Offset - Set the pattern tiling offset to the origin. Patterns using the Absolute Origin mode, should have the same offset to achieve a matching pattern tiling.
- Isolate Content - Enter into an isolated mode to edit the pattern content object. To exit the isolated mode, double click on the canvas, on a dimmed area outside of the pattern content.
- Change Member Objects - Check to apply patterns to group members.
Pattern Options
The following pattern options can be enabled or disabled from the pattern panel menu:
- Isolated - Enable or disable the rendering of the pattern content as an isolated layer. This option determines how opacities and blending modes of a pattern content object are rendered.
- Knockout - Enable or disable the rendering of the pattern content as a knockout group. This option determines how opacities and blending modes of a pattern content object are rendered.
- Gradient Tint - Enable or disable the use of a gradient color when tinting the pattern content.
- Absolute Origin - Enable or disable the use of an absolute origin of the tiling pattern.
When the absolute origin mode is used in multiple tiling pattern fills with the same content and attributes, the patterns will be aligned so that overlapping objects will have matching tiling positions.
- Clip Tiles - Enable or disable the clipping of pattern content into the region defined by each tile. This option is enabled by default. When disabled, parts of the tile content may overlap.
- Proportional - Enable or disable the proportional scaling of the pattern content into the frame defined by a tile.
- Fit Content - Enable or disable the scaling of the pattern content into the frame defined by a tile. This option is enabled by default. When disabled, the pattern content retains its original size and aspect ratio.
- Transformed Pattern - Enable or disable the transformation (scaling, skewing and rotation) of the pattern content and tiles when the object is transformed. This option is enabled by default, allowing the pattern fill to be transformed with the object. When disabled, the object transformations are not applied to the pattern tiles and content, allowing for the same pattern fill for objects with different transforms. This option should be disabled to achieve true absolute origin between multiple objects with different transformations.
- Apply Shape Effects - Enable or disable the use of shape effects on the pattern tiles and content. This option is disabled by default, keeping the pattern tiles undistorted when the object shape has one or more shape distortion effects. When enabled, the pattern tiles and content are distorted by the shape effects stacked on the object.
- Restrict Tiles on Expand - Enable or disable the limiting of expanded tiles to visible tiles only, when the Expand Pattern Content is used.
- Clip Tiles on Expand - Enable or disable the clipping of individual tiles into the tile geometry (box, hexagon, or other), when expanding the pattern fill.
- Clip Outlines on Expand - Enable or disable intersection of the tiling grid outlines into the object shape, when expanding the pattern fill.
Styles and Presets
The following commands are used to setup pattern, content and tiling mode styles and presets:
- Save Tiling Style - Create a new named tiling geometry style, using the current tiling attributes. Existing tiling mode styles can be selected from the tiling Type field of the pattern panel.
- Save Tiling Preset - Create a new named tiling geometry preset, using the current tiling attributes. The tiling mode presets are shown in the tiling Type field of the pattern panel.
- Save Content Style - Create a new pattern content style from the current pattern content. Saved pattern content styles can be selected on multiple patterns from the Content field. Changes on a content style are automatically reflected on all patterns using the content.
- Save Content Preset - Create a new pattern content preset from the current pattern content. Saved pattern content presets can be selected on multiple patterns from the Content field. When selecting a pattern content preset, the content is copied into the pattern style, and changes on the original object are not reflected on the existing pattern fills.
- Save Pattern Style - Create a new pattern style from the current pattern. The saved pattern style contains all the attributes required for a pattern fill. Saved pattern styles can be selected on multiple objects from the list opened using the pattern button (upper-left corner of the panel). Changes on a pattern style are automatically reflected on all instances of the style.
- Save Pattern Preset - Create a new pattern preset from the current pattern. The saved pattern preset contains all the attributes required for a pattern fill. Saved pattern presets can be selected on multiple objects from the list opened using the pattern button (upper-left corner of the panel). When using presets, the pattern style is copied to the objects, and changes on the preset will not be reflected in the objects using the pattern.
- Create Pattern Style - Create a new pattern style using the selected object as the pattern content. Existing pattern styles can be selected from the pattern button of the panel.
- Create Pattern Preset - Create a new pattern preset using the selected object as the pattern content. Existing pattern presets can be selected from the pattern button of the panel.
Pattern Expansion
The following commands are used to expand a pattern fill into separate objects for each tile:
- Expand Content - Copy the referenced content object into the pattern. This command is available for patterns using referenced content. This command will not expand the pattern, it will only localize its content so that changes to the referenced object will not affect this pattern.
- Expand Pattern Tiles - Expand the tiling pattern, by copying the content object at each tile position and applying the tile clipping. The content object will be soft copied, meaning that storage is not increased by the amount of memory needed for individual tiles, only when the objects associated with these tiles are modified.
- Expand Copied Tiles - Expand the pattern by creating hard copies of the content object.
- Expand Referenced Tiles - Expand the pattern by creating references to the content object.
- Expand Cloned Tiles - Expand the pattern by creating clones of the content object.
- Extract Pattern Content - Extract a single content object from the tiling pattern, without expanding the pattern. This command can be used to extract content of pattern presets, if that content object is not available elsewhere in the document.
