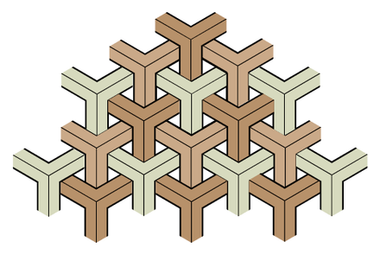
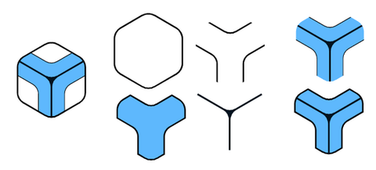
Cube it - A pattern made of Cubes - easy level
-
Hi all
A few days a go i found a Tutorial how to make such a pattern
in the iPad App "Concepts" and i thought that this pattern would
be a nice Tutorial for VS.I use smart shapes and clipping objects in VS to create this pattern.
There are, of course, other possible ways to do it.If you like a little challenge. Then try to recreate the pattern by yourself,
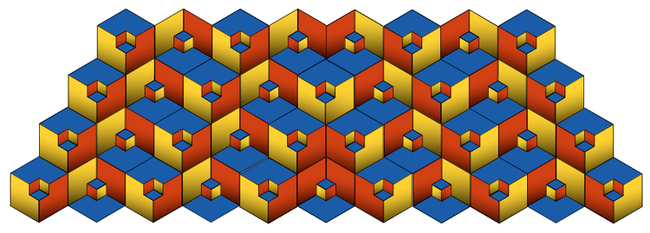
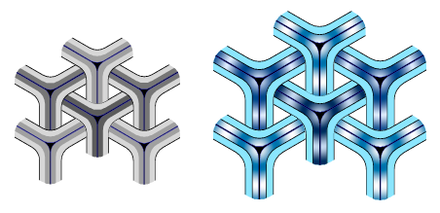
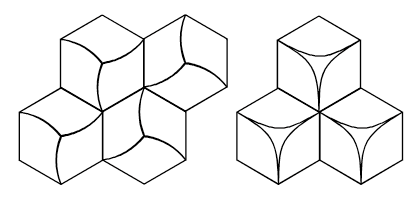
and watch the video later.The pattern looks like this.

Here the Video, re-upload
The video is ca 4 Min longHere another Version of the Pattern also made in VS.
-
Here some descriptions that i promised
As i mentioned above i used clipping objects
and smart shapes to create this pattern in VS.
.
.
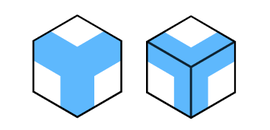
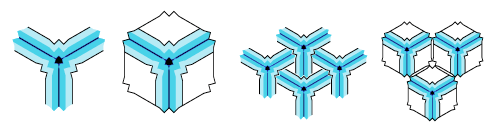
Clipping Group/Objects
Clipping group is a really useful feature, not only
for pattern making. It has so many uses that we'll
probably never be able to explore them all.To create a clipping group you normaly choose one or
more shape/s which be the clipping shape/s and the
clipping contend (Shapes, Strokes, Bitmaps) which you
would put inside the clipping shape.One way to do create a clipping group in VS is:
Position your clipping contend over your clipping shape.
Select your clipping contend and "Cut" it "CTRL-x" on windows
"Command-x" on "mac" into the clipboard.Then select your clipping shape and choose "Paste Inside"
(Menu Edit > Paste Inside.)
.
.
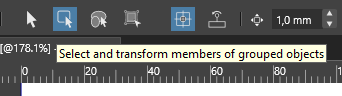
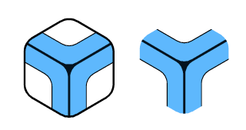
To edit the contend in a clipping group, you can use
the "Select members Group" Tool or double click onto
a clipping Object."Select members Group" Tool
.
.
By double clicking an clipping group you will enter
the "isolation mode". To leave this mode, after your editing,
click once somewhere on the Artboard/Canvas.
.
.
.
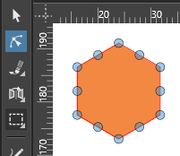
Smart Shapes
All these shapes here are smart shapes.

.
.
Smart Shapes in VS offers some addional editing possibilities.
The opposite are shapes that are converted to curves or shapes
you have create from curves.There are two ways to edit them. One is to use the "Shape Editor" Tool.
If you use this Tool and select a Smart Shape you notice blue dots/handels.
By moving that blue dots with the "Shape Editor" Tool you will see that
the shape change its Form.
.
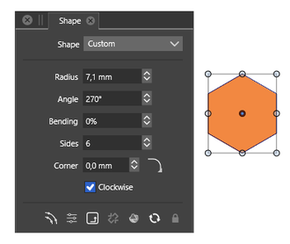
.But to see the whole editing options of a smart shape, you better take
a look at the "Shape Panel" and play with the values there.
.
. -
Very clever

-
@Pat ,
Thank you, usually I tinker around for a while
what options there are to create something like thisBut it's the tools and options in VectorStyler that
make such a workflow possible")
-
Here is a another Pattern.
Made it with more or less the same Workflow as above.
Apart from that i use the "Square Star" Shape as a clipping contend.
.
.
-
And here is how i made it
.
.
Used the Polygon and Square Star Shape
and the Shape Panel.
.
.

1
Recommend to use symmetrical shapes
if you like to align them in the center"Cut" the "Square Star" Shape into the
Clipboard select the "Polygon" Shape
and do a "Paste Inside"
.
.

2
Selecte the "Square Star" Shape with the "Select members
group" Tool and use the "Shape Panel" to set Inner to 30 %.
Set Sides to 3 and rotate the "Square Star" Shape until it looks
like the result on to the right. Inner is still 30 %.
.
.
3
Copy the Square Star Shape to get the outline inside
the clipping Shape.
Switch to the "Select members Group" Tool and select
the Square Star then copy it into the Clipboard.Then select the "Polygon" Shape and do a "Paste Inside"
While the Square Star is still selected change its color to
black and set Inner to 2 %.
.
.
3
Its also possible to use the Corner Tool or to add
a Shape Effect. All of it stay editable, so there is a wide
field for experimentation.
.
.
4
"Expand clipped Groups" (Object > Expand clipped Groups)
Will expand all in individual shapes (they are no longer Smart Shapes then)
could be helpful for special editing needs. -
some variations
Btw. take a look at the "Corner Shape" Video from Vectorstyler
to get some additional inspirations.
Here the Video Link:
Corner Shape Magic
.This variation are made with the Corner Shape only.
.
.

.
.
.
.
some other variations
.
used a "Offset Path" Effect here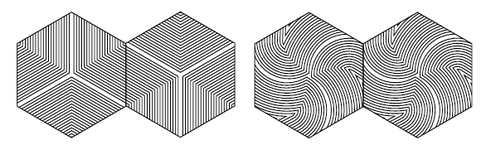
.
.
-
@Subpath Great. I wish I had time to use VS
-
@Pat said in Cube it - A pattern made of Cubes - easy level:
@Subpath Great. I wish I had time to use VS
thank you and no need to worry
during the time you may write down
or scribble your ideas