Contours

-
Sorry for the many questions
")
So contour... it's way more interesting that the one we get with Illustrator but... how can I get a simple offset from a shape?
Best I could get is a contour offset but double the amount I set.
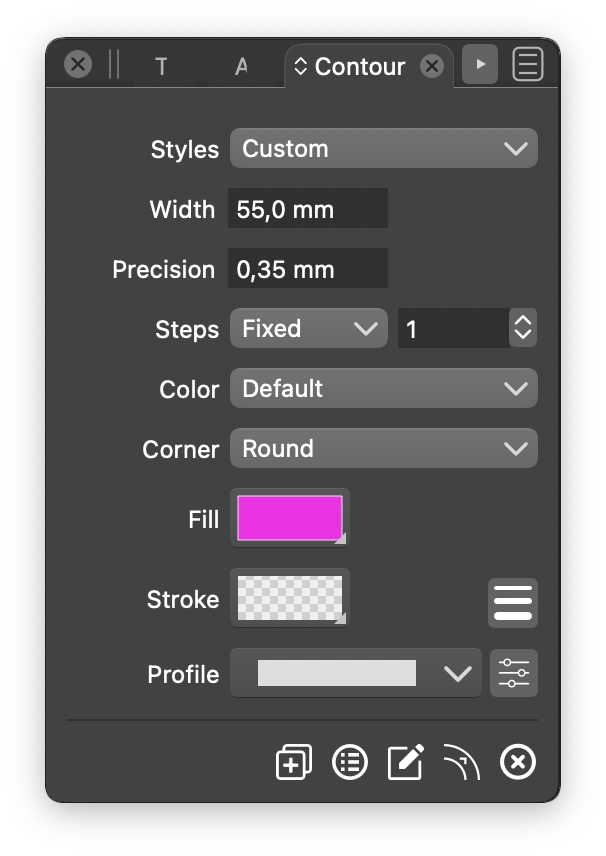

Half of the contour is also going underneath the contoured object, I was not expecting that.
Any way to only have outside, inside or both sides contours?Moreover the arrows to increase or decrease the number of steps don't work for some reasons, I need to manually type the number.
Thanks!
-
Well I think I've found it but it's well very well hid


Any chance to get a button on the bottom of the main panel?

-
@Torakikiii Yes, a double offset for open shapes.
Contour is mostly to create a repeated, expanding blend to some fill/stroke.
There are other variations, if only the shape (path) is offset:The non-destructive Offset Path effect:
- open the Shape Effects panel (Panels -> Effects -> Shape Effects).
- select the object / shape to be offset
- click on the "plus" icon.
- select "Outline -> Offset Path"
- a Offset Path "live" effect is added to the shape.
- click on the arrow at the start of the "Offset Path" row in the panel.
- the Offset Path options are opened for editing.
- also: select the "Offset Path" in the panel list.
- click on the second icon at the bottom.
- the offset path can be dragged interactively, on the canvas
The destructive Offset Path:
- select an object
- select "Object -> Shape -> Offset Path"
- adjust options, use "Preview" if needed, and the confirm changes.
- this one is not "live".
-
@vectoradmin Really impressive! The more I explore, the more I don't want to use any other vector editing programs. The hardest part is getting to an understanding of it all that feels natural and intuitive. I know that's just a matter of time and practice.
@Torakikiii nice to see you on the forum! I think I can speak for most everyone in saying that lots of questions, ideas, suggestions and any bug alerts are welcomed and appreciated. When people ask questions, it prompts me to go explore what they are trying out and then I follow along with any answers others give in response. Questions one person asks can easily help all the users!