VectorStyler
    • Categories
    • Unread
    • Recent
    • Tags
    • Popular
    • Register
    • Login

    Mesh - how to...

    Scheduled Pinned Locked Moved Questions and Support
    30 Posts 3 Posters 37.1k Views 3 Watching
    Loading More Posts
    • Oldest to Newest
    • Newest to Oldest
    • Most Votes
    Reply
    • Reply as topic
    Log in to reply
    This topic has been deleted. Only users with topic management privileges can see it.
    • B Offline
      B-Vs-V @VectorStyler
      last edited by

      @VectorStyler Yes, it is the issue.
      But when I select a single point or several, the opacity can display 100% and when I deselect the whole object and select it again and the point, the opacity is then of 0%.

      W11 Pro 25H2 - 12th Gen Intel(R) i7-12700K 3.61 GHz - RAM 64 Go - NVIDIA GF GTX 4070 Ti - Intuos - Dell UP3216Q / Eizo ColorEdge
      W11 Pro 25H2 - 12th Gen Intel(R) i7-12700KF 3.60 GHz -RAM 64 Go - NVIDIA GF GTX 3080 - IntuosPro- ProArt PA329C

      1 Reply Last reply Reply Quote 0
      • VectorStylerV Offline
        VectorStyler @B-Vs-V
        last edited by

        @PatrickM The 0 opacity could be caused by a bug, we just need to narrow down when this happens.
        Could you send me the file by email, I might find some cause of this.

        How was the mesh created initially? Menu command, or mesh tool?

        B 2 Replies Last reply Reply Quote 0
        • B Offline
          B-Vs-V @VectorStyler
          last edited by

          @VectorStyler I'll send you the file asap. I did create the mesh with the mesh tool.

          W11 Pro 25H2 - 12th Gen Intel(R) i7-12700K 3.61 GHz - RAM 64 Go - NVIDIA GF GTX 4070 Ti - Intuos - Dell UP3216Q / Eizo ColorEdge
          W11 Pro 25H2 - 12th Gen Intel(R) i7-12700KF 3.60 GHz -RAM 64 Go - NVIDIA GF GTX 3080 - IntuosPro- ProArt PA329C

          1 Reply Last reply Reply Quote 1
          • B Offline
            B-Vs-V @VectorStyler
            last edited by

            @VectorStyler said in Mesh - how to...:

            @PatrickM The 0 opacity could be caused by a bug, we just need to narrow down when this happens.
            Could you send me the file by email, I might find some cause of this.

            The file has been sent ☺

            W11 Pro 25H2 - 12th Gen Intel(R) i7-12700K 3.61 GHz - RAM 64 Go - NVIDIA GF GTX 4070 Ti - Intuos - Dell UP3216Q / Eizo ColorEdge
            W11 Pro 25H2 - 12th Gen Intel(R) i7-12700KF 3.60 GHz -RAM 64 Go - NVIDIA GF GTX 3080 - IntuosPro- ProArt PA329C

            1 Reply Last reply Reply Quote 1
            • VectorStylerV Offline
              VectorStyler @B-Vs-V
              last edited by

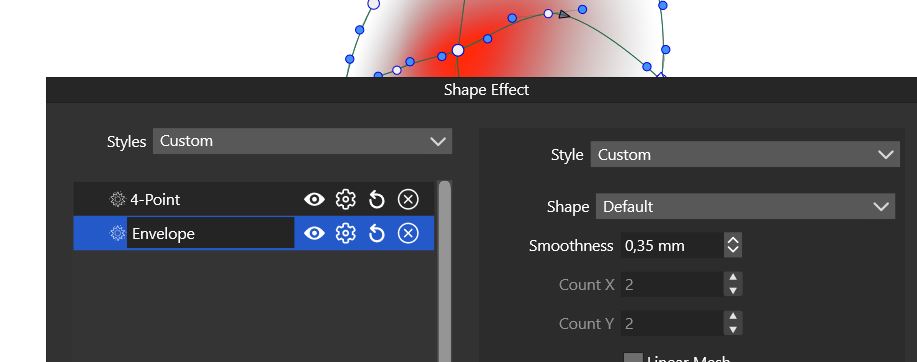
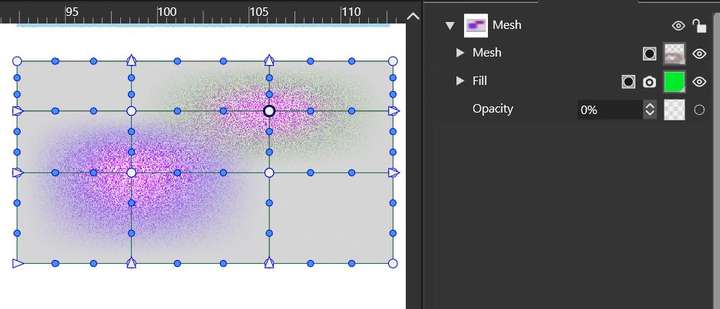
              @PatrickM The rectangle box in the second image is the Envelope effect added on the mesh. The node tool will edit the envelope, not the mesh.

              B 2 Replies Last reply Reply Quote 0
              • B Offline
                B-Vs-V @VectorStyler
                last edited by

                @VectorStyler Yes, nice that I know now that new points have no opacity.
                I'm wondering whether a general stroke to the object can be generated ? I can't in my simple drawing (and the opacity is 100%).

                W11 Pro 25H2 - 12th Gen Intel(R) i7-12700K 3.61 GHz - RAM 64 Go - NVIDIA GF GTX 4070 Ti - Intuos - Dell UP3216Q / Eizo ColorEdge
                W11 Pro 25H2 - 12th Gen Intel(R) i7-12700KF 3.60 GHz -RAM 64 Go - NVIDIA GF GTX 3080 - IntuosPro- ProArt PA329C

                1 Reply Last reply Reply Quote 0
                • B Offline
                  B-Vs-V @VectorStyler
                  last edited by B-Vs-V

                  @VectorStyler Is there a way to add noise only at selected points of the mesh and not to the whole object? Thanks for the feedback.

                  0_1665761169356_d512d6ce-0ed6-48b8-b6bf-e1fbbab84319-image.png

                  Edit : What is/are the difference(s) between (i) the panel Noise and (ii) Panels -> Effects -> Image Effects panel --> Pixelate -> White Noise effect

                  W11 Pro 25H2 - 12th Gen Intel(R) i7-12700K 3.61 GHz - RAM 64 Go - NVIDIA GF GTX 4070 Ti - Intuos - Dell UP3216Q / Eizo ColorEdge
                  W11 Pro 25H2 - 12th Gen Intel(R) i7-12700KF 3.60 GHz -RAM 64 Go - NVIDIA GF GTX 3080 - IntuosPro- ProArt PA329C

                  VectorStylerV b77B 2 Replies Last reply Reply Quote 0
                  • VectorStylerV Offline
                    VectorStyler @B-Vs-V
                    last edited by

                    @PatrickM said in Mesh - how to...:

                    Is there a way to add noise only at selected points of the mesh and not to the whole object?

                    Not possible now with the gradient mesh.
                    But the white noise effect can have a mask and that mask can be a gradient mesh.

                    What is/are the difference(s) between (i) the panel Noise and (ii) Panels -> Effects -> Image Effects panel --> Pixelate -> White Noise effect

                    The Noise Fill panel uses noise to setup fill (or stroke) styles. The Image Effects -> Generate -> Noise does almost the same, but here an image is generated that may be composited with another (existing) fill.

                    The White Noise effect is a plain random noise, while the other noise types (perlin, musgrave, etc) are gradient noise. They are fundamentally different it terms of what they create.
                    For the gradient noise, use the "Browse Noise" from the Noise panel Noise field to see what they are.

                    B 1 Reply Last reply Reply Quote 1
                    • B Offline
                      B-Vs-V @VectorStyler
                      last edited by

                      @VectorStyler Thanks ☺ , another level of complexity. Well, I have to spend more time on this.

                      Using VS is a real challenge 😓 💪 but the effort is worth it.😄

                      W11 Pro 25H2 - 12th Gen Intel(R) i7-12700K 3.61 GHz - RAM 64 Go - NVIDIA GF GTX 4070 Ti - Intuos - Dell UP3216Q / Eizo ColorEdge
                      W11 Pro 25H2 - 12th Gen Intel(R) i7-12700KF 3.60 GHz -RAM 64 Go - NVIDIA GF GTX 3080 - IntuosPro- ProArt PA329C

                      1 Reply Last reply Reply Quote 1
                      • b77B Offline
                        b77 @B-Vs-V
                        last edited by b77

                        @PatrickM Try this:

                        • add a fill to the object;
                        • drag the fill under the mesh (in the Appearance panel);
                        • with the fill content still selected, add a noise effect to it;
                        • select any of the color control points of the mesh;
                        • change its opacity.

                        See the attached file:
                        0_1665765656207_Mesh + noise.vstyler

                        MacBook Pro (Intel) running Monterey 12.6.4

                        B 2 Replies Last reply Reply Quote 1
                        • B Offline
                          B-Vs-V @b77
                          last edited by B-Vs-V

                          @b77 Thanks for your feedback 👍

                          W11 Pro 25H2 - 12th Gen Intel(R) i7-12700K 3.61 GHz - RAM 64 Go - NVIDIA GF GTX 4070 Ti - Intuos - Dell UP3216Q / Eizo ColorEdge
                          W11 Pro 25H2 - 12th Gen Intel(R) i7-12700KF 3.60 GHz -RAM 64 Go - NVIDIA GF GTX 3080 - IntuosPro- ProArt PA329C

                          1 Reply Last reply Reply Quote 0
                          • B Offline
                            B-Vs-V @b77
                            last edited by

                            @b77 I don't get what is expected.

                            First, I create an object with a fill (green). I then add a mesh (mesh tool) & I change the opacity of a point.
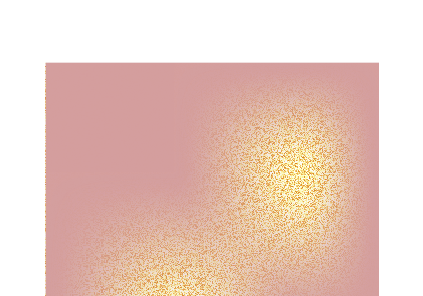
                            Without adding any noise, I notice that I can't see the fill, please see below:

                            0_1665767439135_Mesh1.JPG

                            0_1665767454396_Mesh2.JPG

                            W11 Pro 25H2 - 12th Gen Intel(R) i7-12700K 3.61 GHz - RAM 64 Go - NVIDIA GF GTX 4070 Ti - Intuos - Dell UP3216Q / Eizo ColorEdge
                            W11 Pro 25H2 - 12th Gen Intel(R) i7-12700KF 3.60 GHz -RAM 64 Go - NVIDIA GF GTX 3080 - IntuosPro- ProArt PA329C

                            b77B 1 Reply Last reply Reply Quote 0
                            • b77B Offline
                              b77 @B-Vs-V
                              last edited by

                              @PatrickM Quick video to the rescue: https://recordit.co/6uw81ghcdw

                              MacBook Pro (Intel) running Monterey 12.6.4

                              B 1 Reply Last reply Reply Quote 1
                              • B Offline
                                B-Vs-V @b77
                                last edited by

                                @b77 Thank you for your time

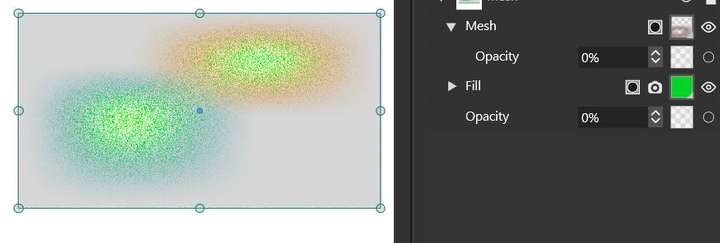
                                I did precisely follow your excellent video. I get what is expected :

                                0_1665815435838_8f7b8130-b9dd-43d5-ba93-00fd53d2906a-image.png

                                but when I want to modify the colour of the added "Fill", I don't get an uniform colour change.

                                0_1665815544997_f160604a-fa32-4479-9ea0-322252541523-image.png

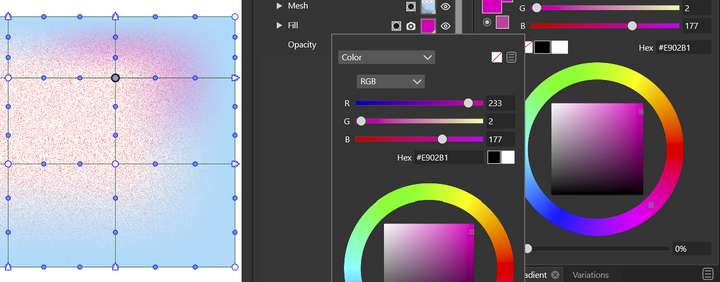
                                @VectorStyler By design? Shouldn't I expect a general colour change for the fill background by changing the fill colour at the Appearance panel?
                                Thanks.

                                W11 Pro 25H2 - 12th Gen Intel(R) i7-12700K 3.61 GHz - RAM 64 Go - NVIDIA GF GTX 4070 Ti - Intuos - Dell UP3216Q / Eizo ColorEdge
                                W11 Pro 25H2 - 12th Gen Intel(R) i7-12700KF 3.60 GHz -RAM 64 Go - NVIDIA GF GTX 3080 - IntuosPro- ProArt PA329C

                                b77B 1 Reply Last reply Reply Quote 0
                                • b77B Offline
                                  b77 @B-Vs-V
                                  last edited by

                                  @PatrickM It's working here as expected.
                                  Maybe one of the control points of the mash has a magenta color?
                                  You can post the file here.

                                  MacBook Pro (Intel) running Monterey 12.6.4

                                  B 1 Reply Last reply Reply Quote 1
                                  • B Offline
                                    B-Vs-V @b77
                                    last edited by

                                    @b77 Thanks. This is probably the problem but it seems to me that by changing the colour of the fill via the Appearance panel the whole background colour should change and not just one point of the mesh.

                                    W11 Pro 25H2 - 12th Gen Intel(R) i7-12700K 3.61 GHz - RAM 64 Go - NVIDIA GF GTX 4070 Ti - Intuos - Dell UP3216Q / Eizo ColorEdge
                                    W11 Pro 25H2 - 12th Gen Intel(R) i7-12700KF 3.60 GHz -RAM 64 Go - NVIDIA GF GTX 3080 - IntuosPro- ProArt PA329C

                                    b77B 1 Reply Last reply Reply Quote 0
                                    • b77B Offline
                                      b77 @B-Vs-V
                                      last edited by b77

                                      @PatrickM The whole fill that is in the background changes when you change it's color, but:

                                      If you changed the opacity of one control point of the mesh (mesh which sits above that fill),
                                      the fill under it is visible only around the location of that control point.

                                      Additionally, if that control point has a different color than the rest of the control points and of the fill beneath, AND reduced opacity,
                                      you will see a combination of the point's color (say, magenta) with the color of the fill under
                                      it (blue), around the control point.

                                      You can try changing the color of that control point to be the same as the others,
                                      so you won't get unwanted color mixing between it and the fill under.

                                      If this doesn't help, you can post the file with the object for any of us to have a look and be able to explain things better.

                                      MacBook Pro (Intel) running Monterey 12.6.4

                                      B 1 Reply Last reply Reply Quote 1
                                      • B Offline
                                        B-Vs-V @b77
                                        last edited by

                                        @b77 I think I found the problem : when I want to change the colour of the fill, I have to select the "Transform tool" and not the Mesh tool. Thus, changing the colour of the fill through the Appearance panel seems to depend of the selected tool. Now, it is fine. I'll test later on more complex shape. Thanks for your time ☺

                                        W11 Pro 25H2 - 12th Gen Intel(R) i7-12700K 3.61 GHz - RAM 64 Go - NVIDIA GF GTX 4070 Ti - Intuos - Dell UP3216Q / Eizo ColorEdge
                                        W11 Pro 25H2 - 12th Gen Intel(R) i7-12700KF 3.60 GHz -RAM 64 Go - NVIDIA GF GTX 3080 - IntuosPro- ProArt PA329C

                                        b77B 1 Reply Last reply Reply Quote 0
                                        • b77B Offline
                                          b77 @B-Vs-V
                                          last edited by

                                          @PatrickM 👍

                                          MacBook Pro (Intel) running Monterey 12.6.4

                                          B 1 Reply Last reply Reply Quote 1
                                          • B Offline
                                            B-Vs-V @b77
                                            last edited by

                                            @b77 I can confirm this behaviour.

                                            The usual steps bring this :

                                            0_1666077109438_M1.JPG

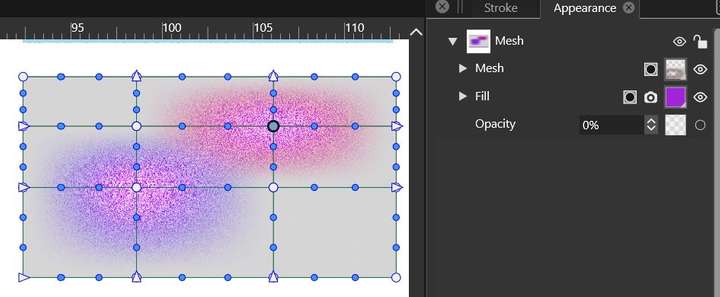
                                            If I modify the "Fill" colour (to green) via the Appearance panel with the "Mesh tool" selected, I get this:

                                            0_1666077155896_M2.JPG

                                            If I modify the "Fill" colour (to green) with the "Transform tool" selected, I get this:

                                            0_1666077614553_M3.JPG

                                            @VectorStyler Is this workflow/feature by design ? I expect that changing the colour of a part of an object (stroke, fill) through the Appearance panel is independent of the selected tool.

                                            Thanks for your time.

                                            W11 Pro 25H2 - 12th Gen Intel(R) i7-12700K 3.61 GHz - RAM 64 Go - NVIDIA GF GTX 4070 Ti - Intuos - Dell UP3216Q / Eizo ColorEdge
                                            W11 Pro 25H2 - 12th Gen Intel(R) i7-12700KF 3.60 GHz -RAM 64 Go - NVIDIA GF GTX 3080 - IntuosPro- ProArt PA329C

                                            VectorStylerV 1 Reply Last reply Reply Quote 0
                                            • First post
                                              Last post